
When I learned how to knit, the long tail cast on was the one that I had been shown. And for almost 30 years I had been blissfully unaware that there was another zillion of cast on methods.
Despite my then following ignorance of the qualities of some of the other methods (cable cast on or provisional come to my mind), I still use the long tail cast on for 99.9% of my projects as I find it strong and versatile. It is supposed to be done over two needles which makes it very stretchy, great for those lacy or stretchy projects, but if I want it a bit less loose (or if I am working with ridiculously big needles) then I will just use one needle.
For this tutorial, I have only used just one needle as I find it easier to get started. Once you understood the movement, you can do it over two needles.
I made this tutorial for my knitting class which is a mess healthy combination of English and continental knitting so it might look slightly weird to those of you who have learned knitting the continental way (considering my observations lately, it might actually be a German way rather than a continental but that is how it is called).
One last thing before we get started. Please remember that these pictures have been taken 3min before the all important football match. We will see if I will ever get the chance to replace them with better ones.
But for now, lets use what we have:
1. Make a slip knot with a long tail end (the length of the tail will depend on the amount of stitches you will need) and put it on the needle. Hold the needle in the right hand, open the two tails up so they form a V- shape, the tail end comes towards you, the ball end goes away from you.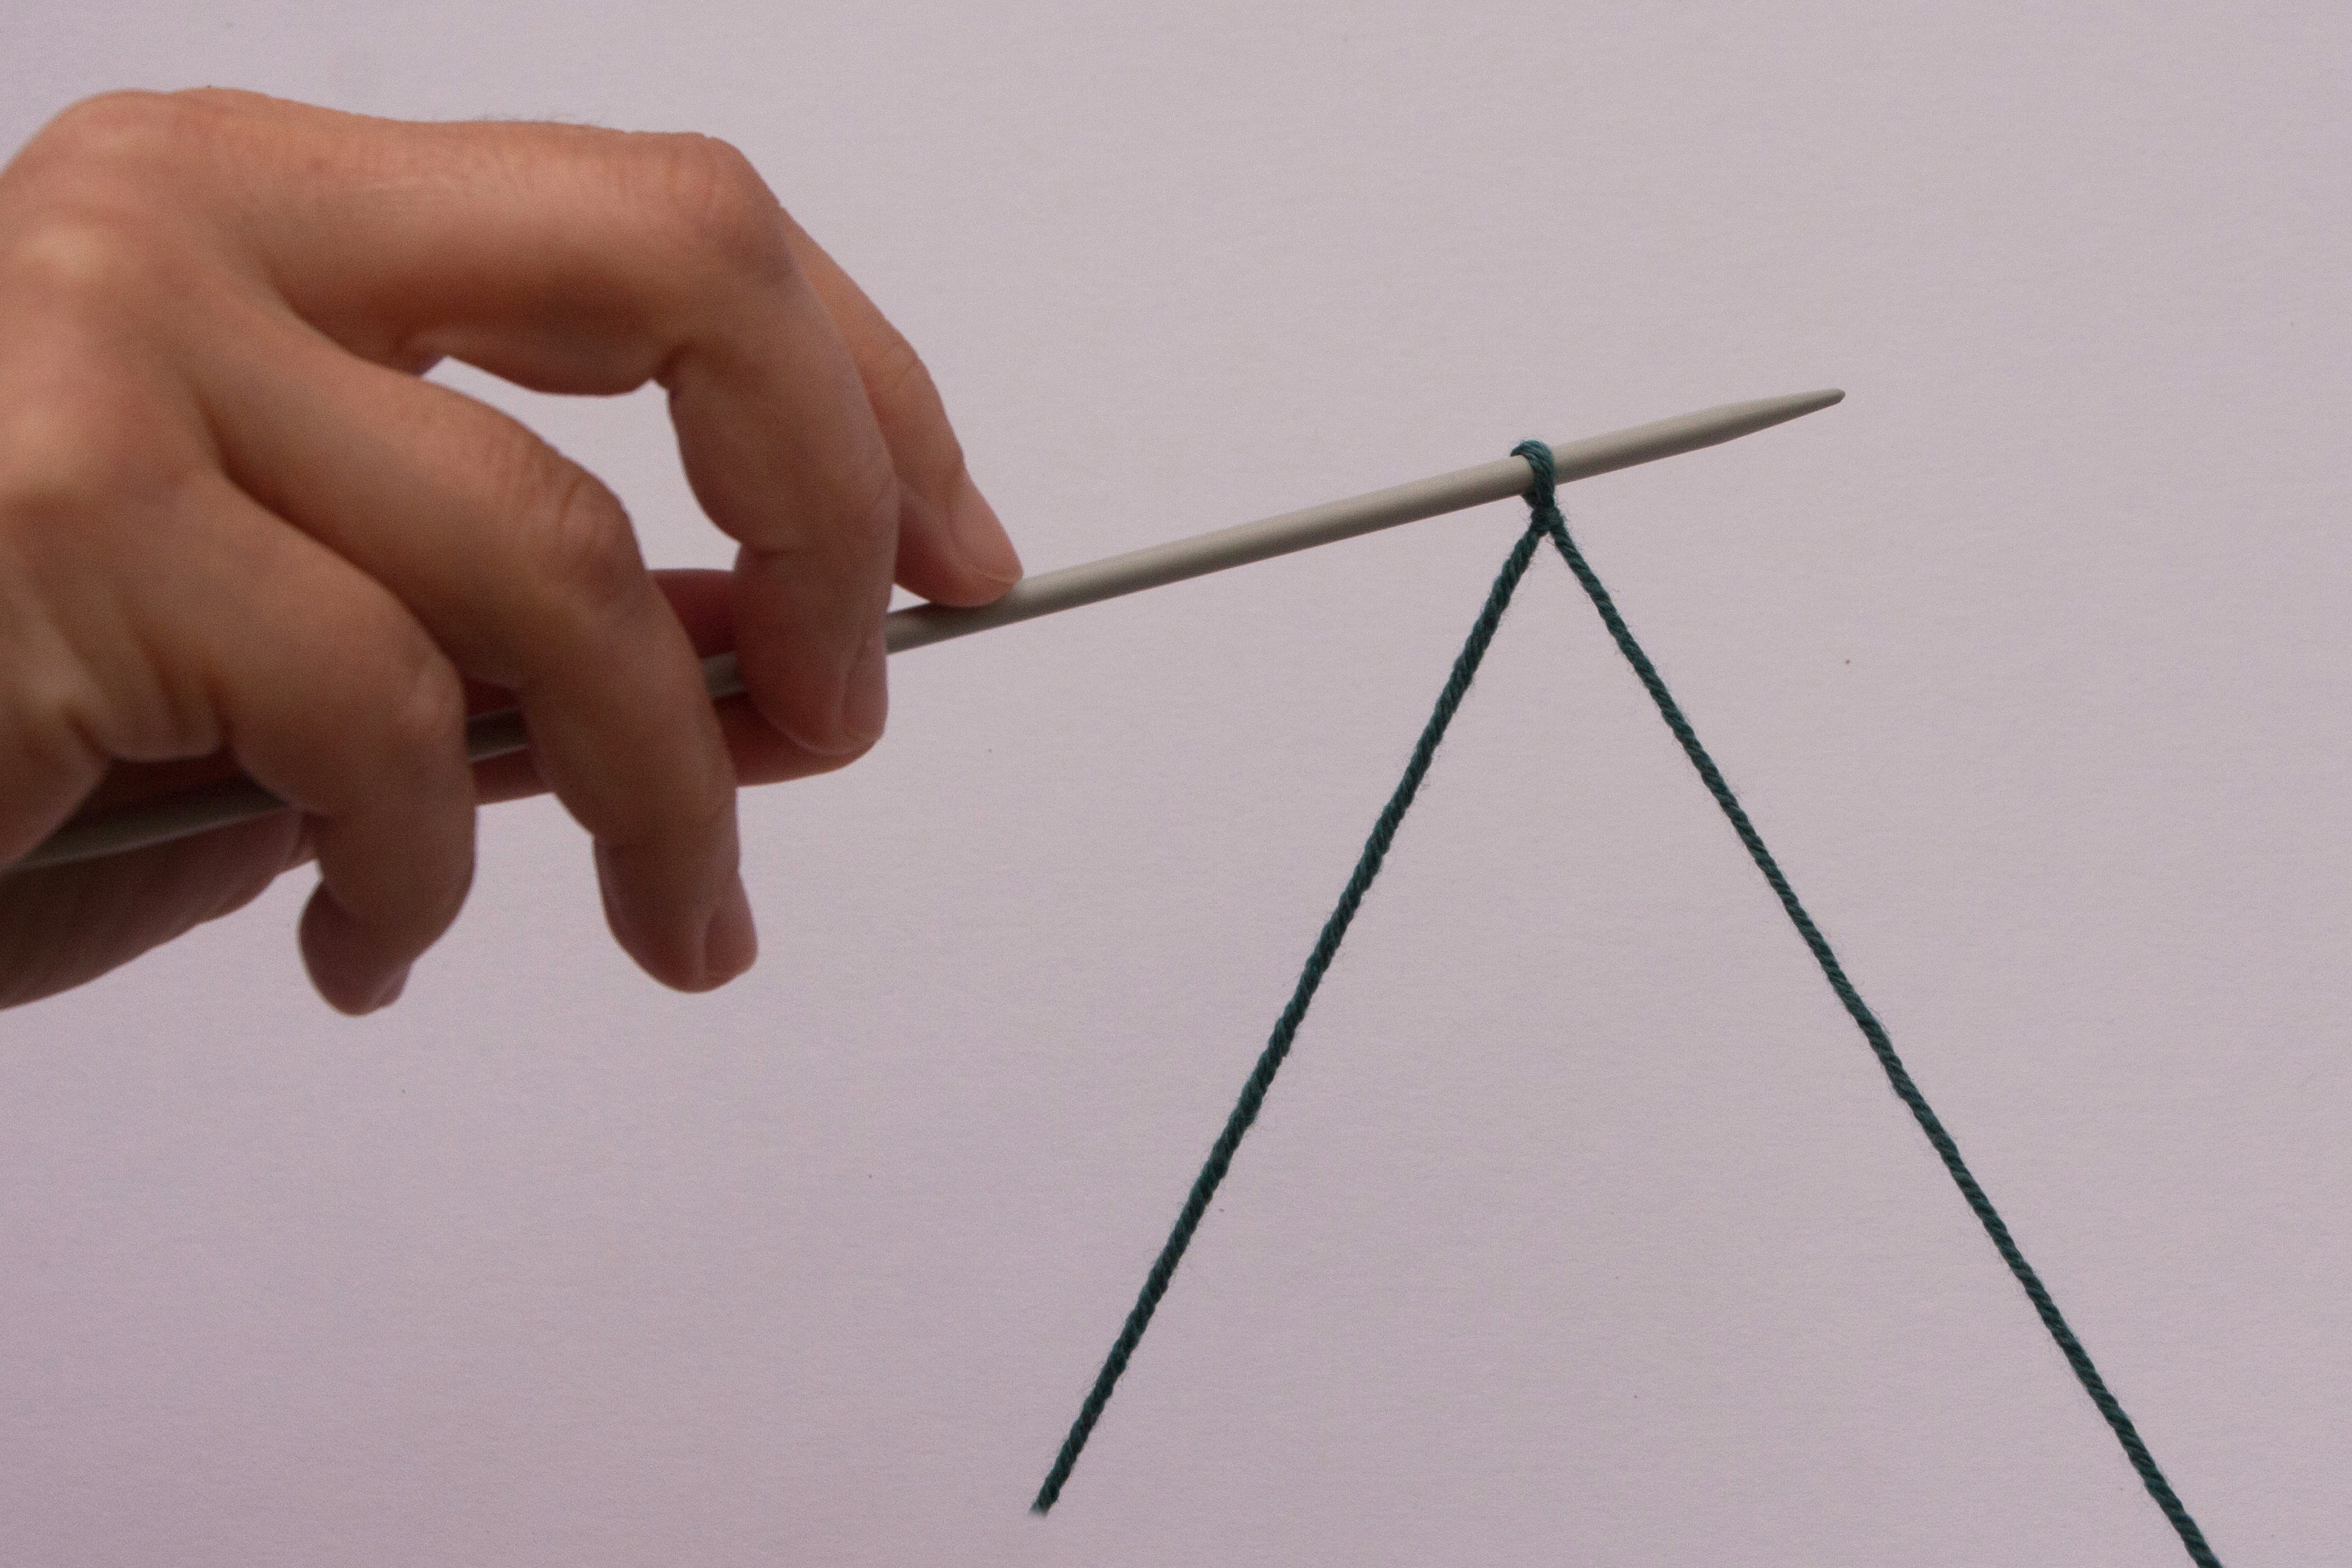
2. Slide the thumb and index finger of your left hand into the gap between the two strands and open the gap up a little bit.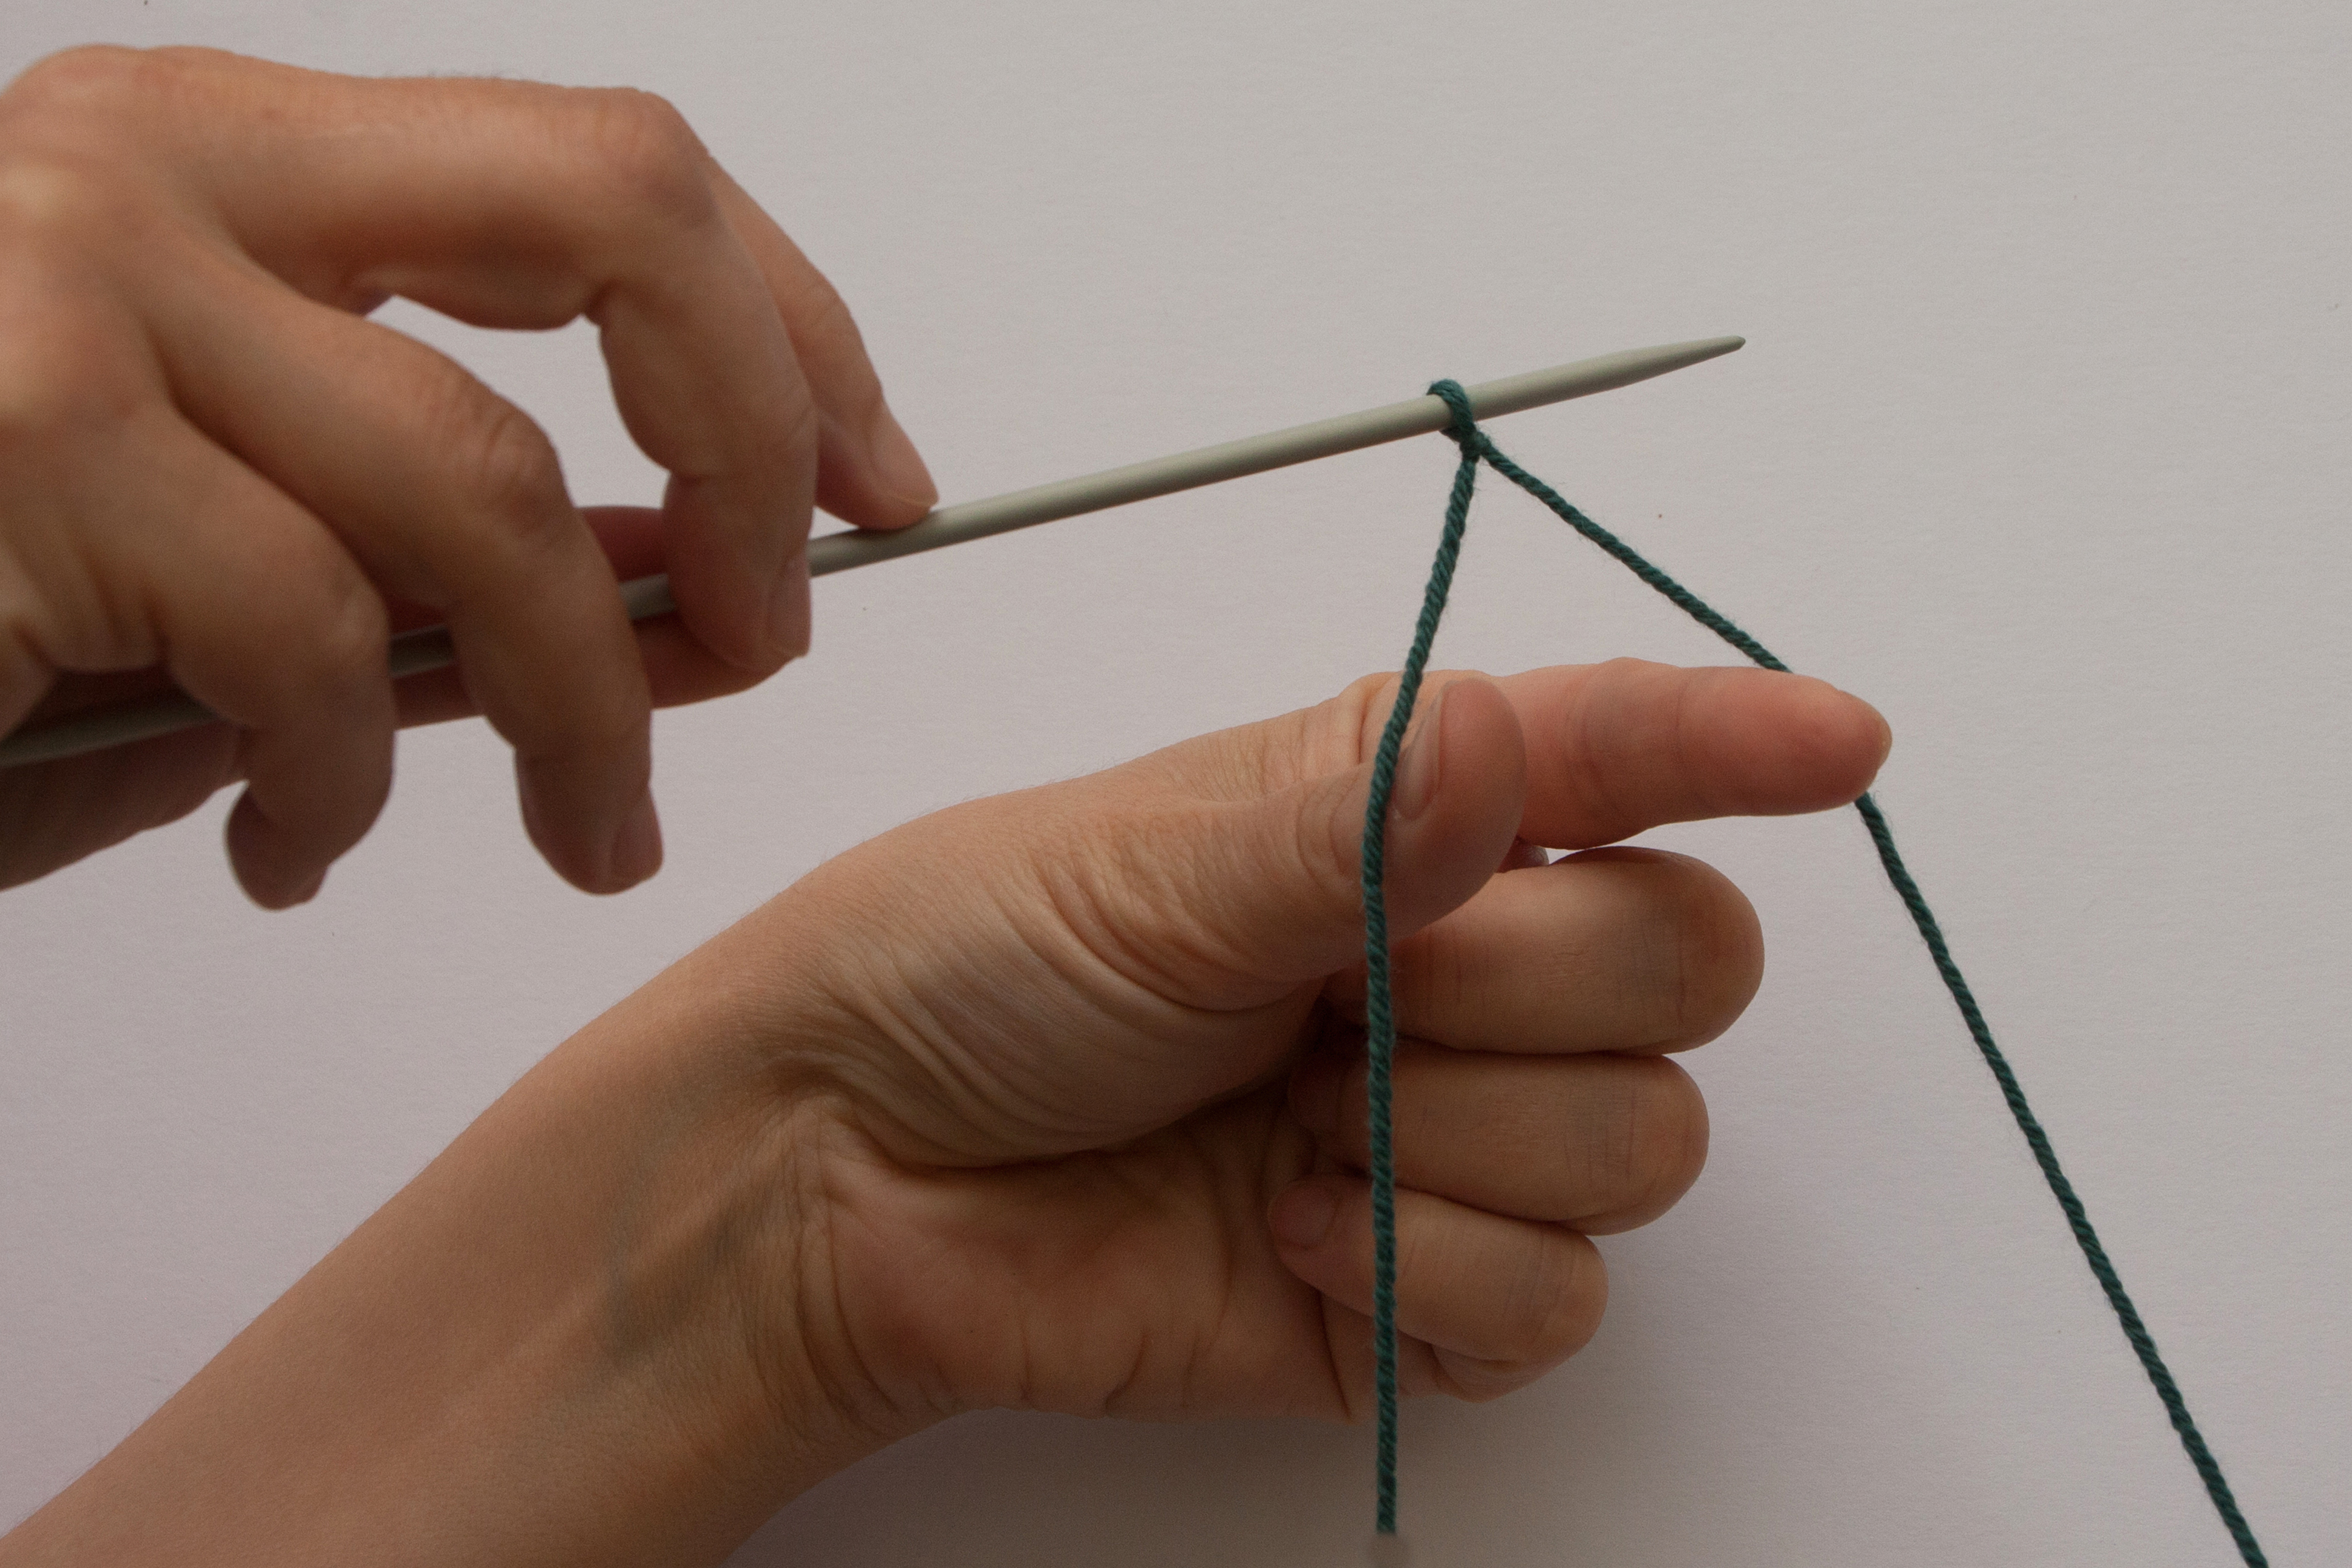
3. Grab the two strands with the remaining three fingers and hold them tightly.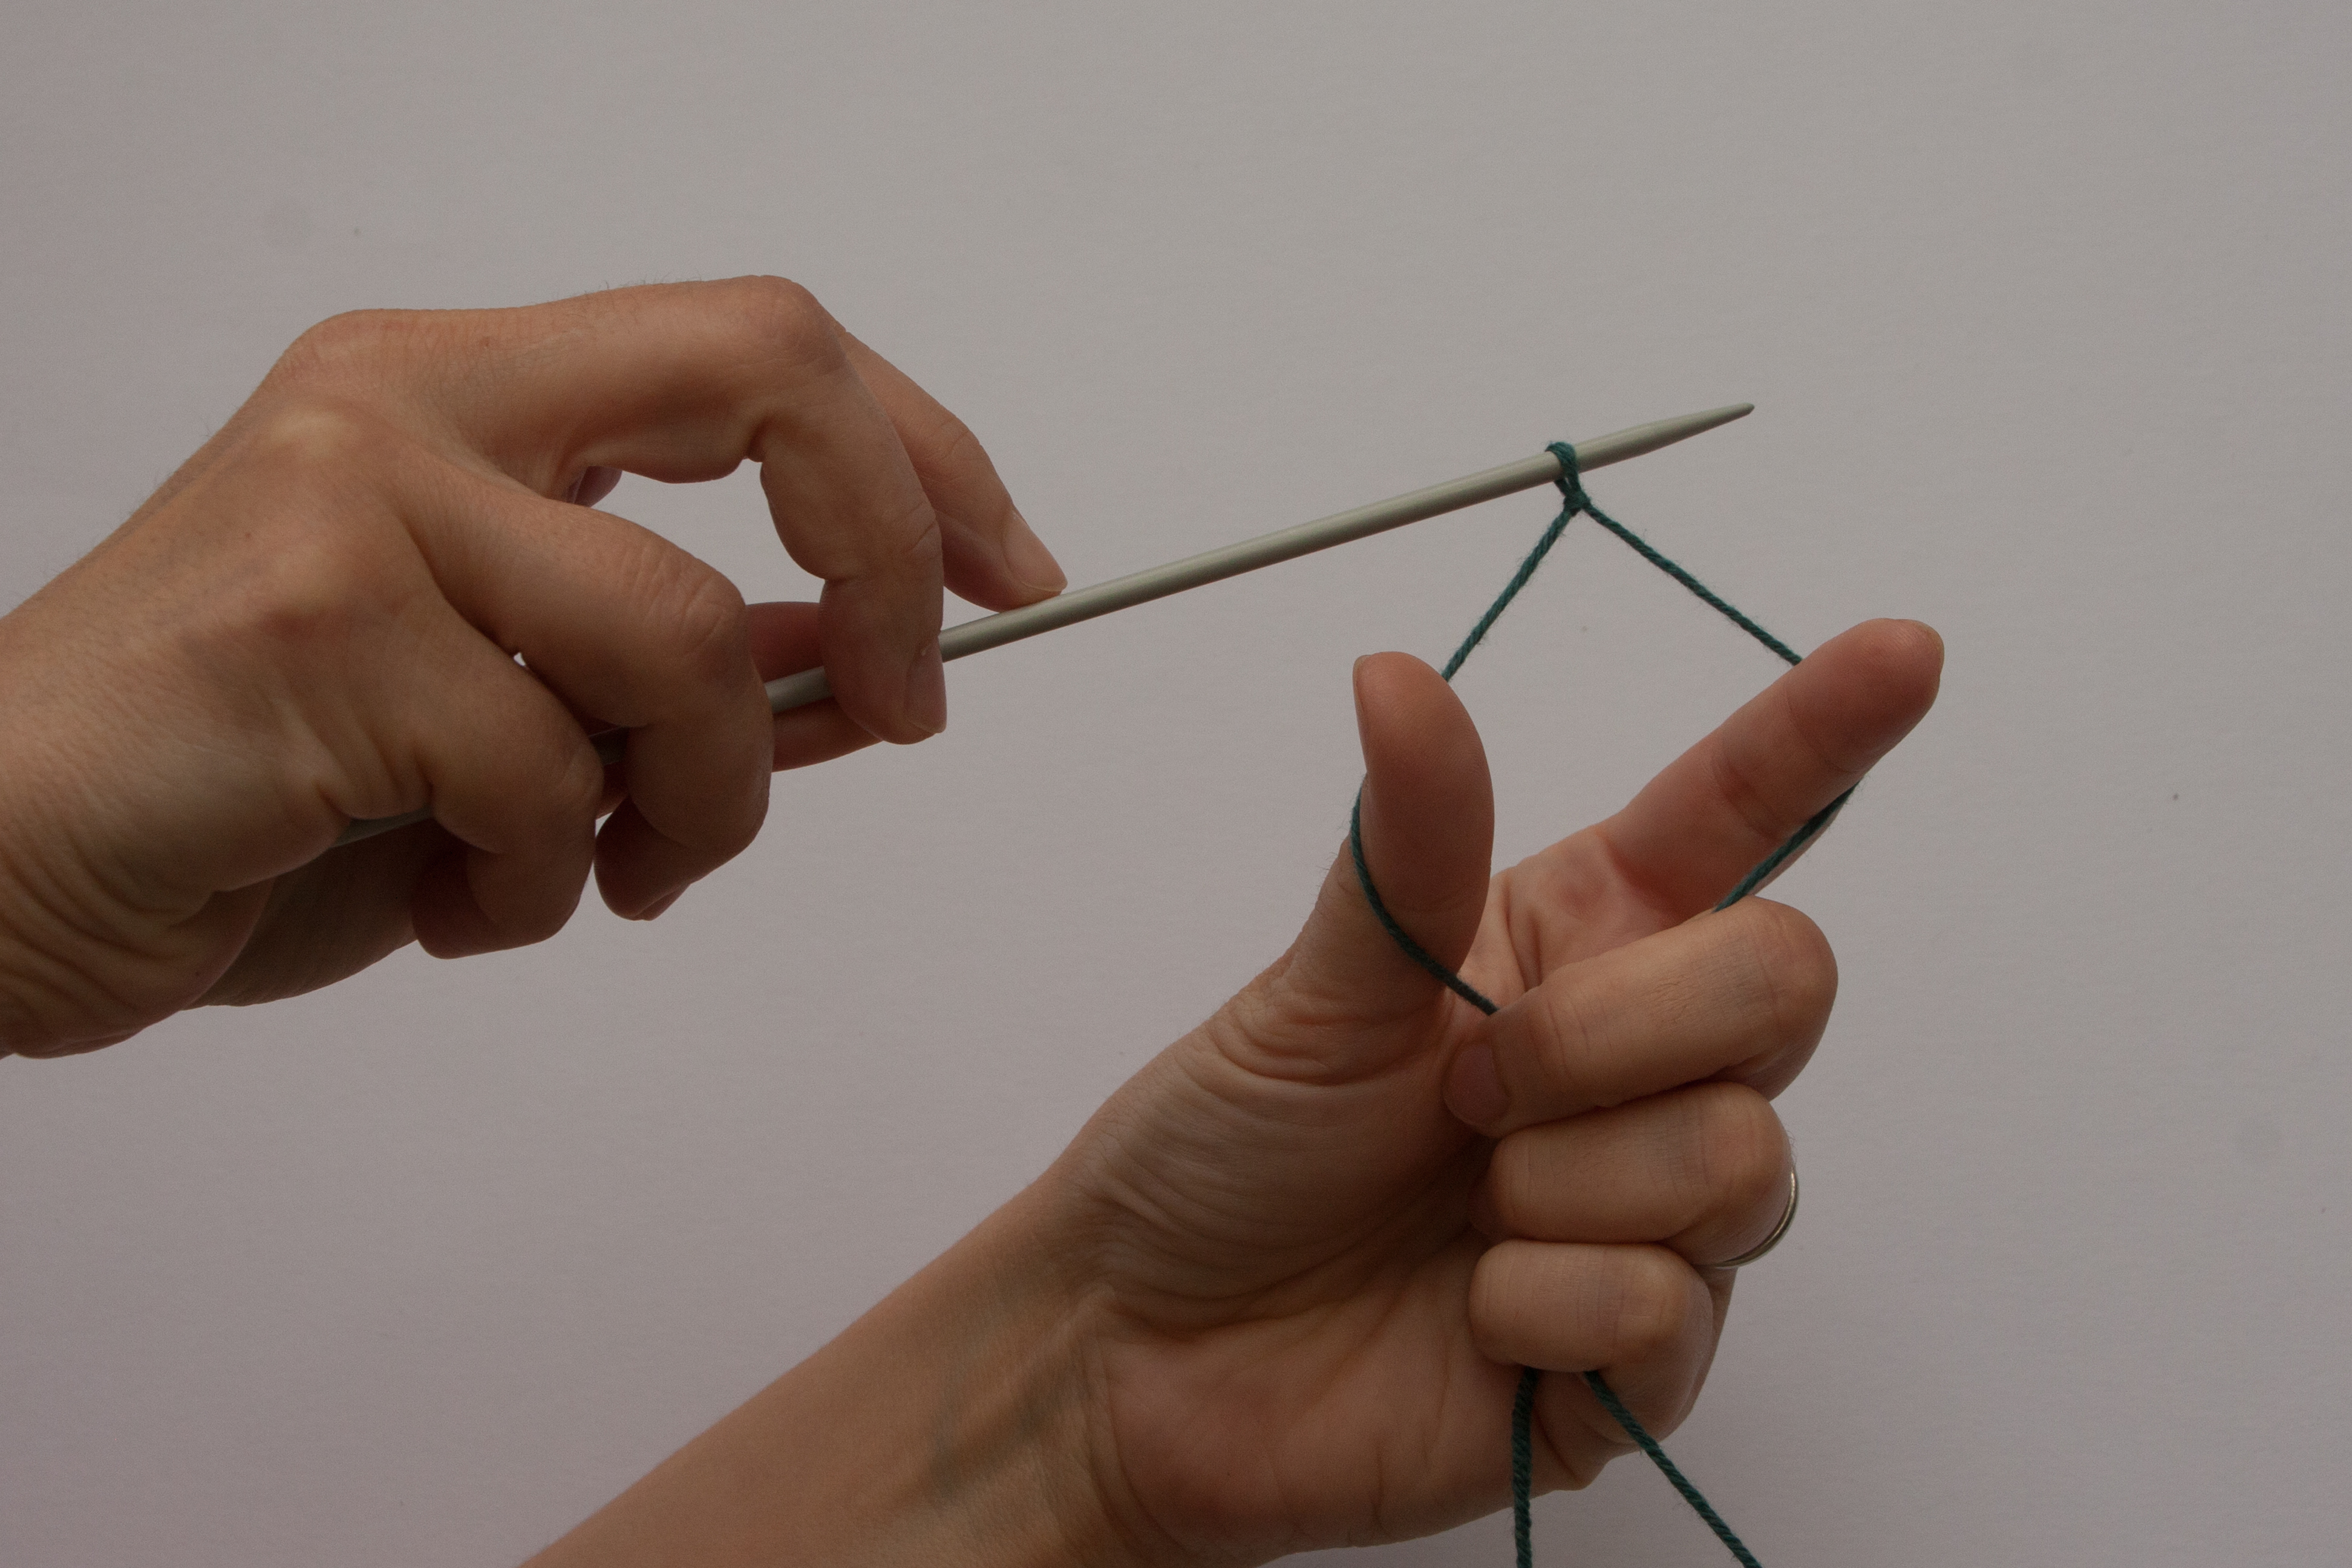
4. The needle with the slip knot should now be positioned between your thumb and your index finger. The tail end goes over your thumb (thumb strand), the ball end goes over your index finger (index strand).
5. Pull the needle down so the thumb strand forms a full loop around your thumb.
6. Slide the needle from bottom to top through the thumb loop…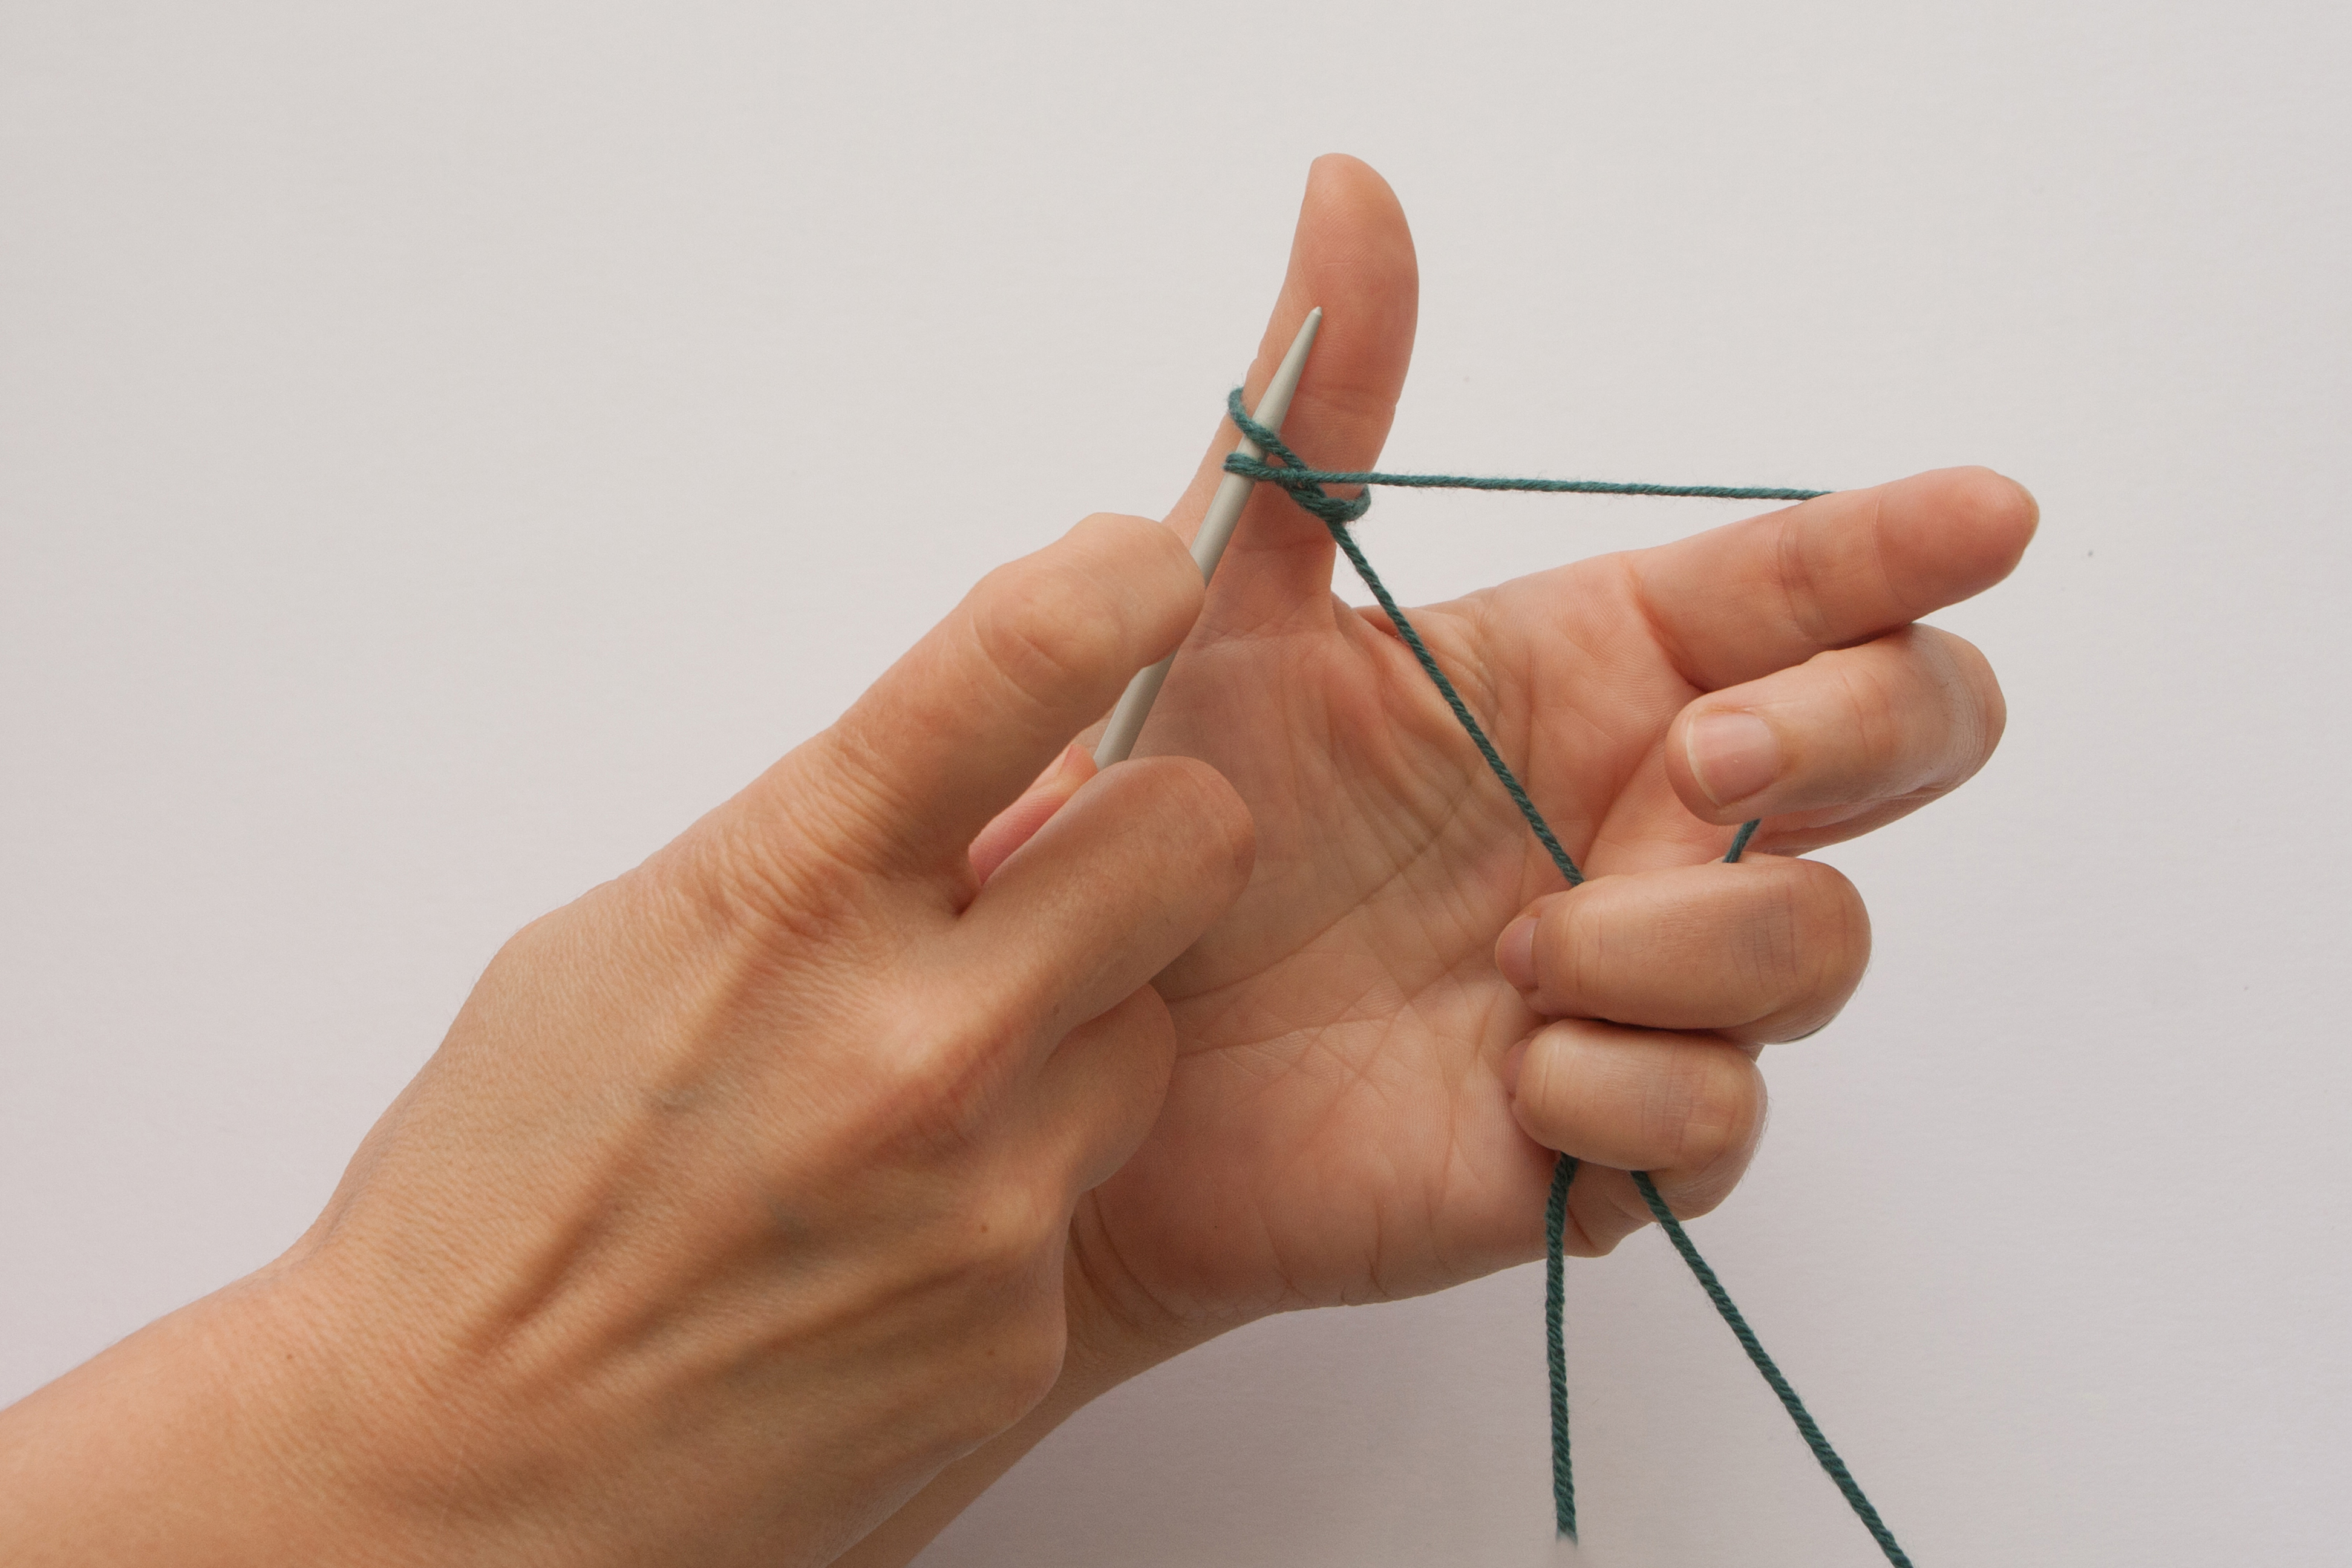
7. …grab the index strand and pull it through the thumb loop.
8. You have now a new stitch on your needle. Release the thumb loop.
9. Push the thumb strand down with your thumb to tighten the stitch but do NOT let go of the two strands.

Start again from Step 5 by bringing the thumb up again and pulling down the needle. If you are working on a small scale with small movements, this will result in a smooth circular movement of your thumb and you will not have to set up everything from scratch.
As I have mentioned before, you should do this over two needles held together. You will pull one out once you have finished the cast on. This will result in a very stretchy cast on, ideal for something that needs to be stretched out.
