Scrap Sunday: A few Me Made May thoughts and a perfect match

May is long gone and I still haven’t summed up my Me Made May experience. So lets have a look.

I pledged

To declutter my wardrobe. Which I did.

To wear me made items three times a week. Which I think I mainly did. Sometimes not for the whole day. But you try and live with a little vomitter and don’t get changed 7 times a day.

To create some new me mades. Which I definitely did.

And to make some progress on the perfect breastfeeding top. Which I haven’t really. Except if you are accepting a head full of vague ideas as progress. Oh well, I will just have to continue breastfeeding for a while.

I guess, I did the challenge only half heartedly as I have so many things on my plate these days but it was still a very good and inspiring experience. And I am already looking forward to taking part next year.

I have realised that my wardrobe consists of lots of ill fitting and mismatching items. I still kept those that might fit again one day. Even though it is hard to tell where kilos things will be going.

The mismatching is another problem, probably unsolvable. I have the colour palette of a parrot so it is difficult to match things. I guess i should add some neutral colours to the mix to be able to combine things better. But if you know me, that will be a difficult task. I might just accidentally turn something that started as a navy blue top into a parrot coat again.

I have also realised that I tend to think that me mades are precious and not to be worn at messy times. For the children I might be making casual items but I still have a tiny bit the feeling that they shouldn’t ruin them because mummy made them. So they shouldn’t be wearing them when they play. Or eat. Which is basically what children do. So whilst in my knitting classes I am always preaching of “making and letting go”, I do struggle a tiny bit of following this for my own makes.

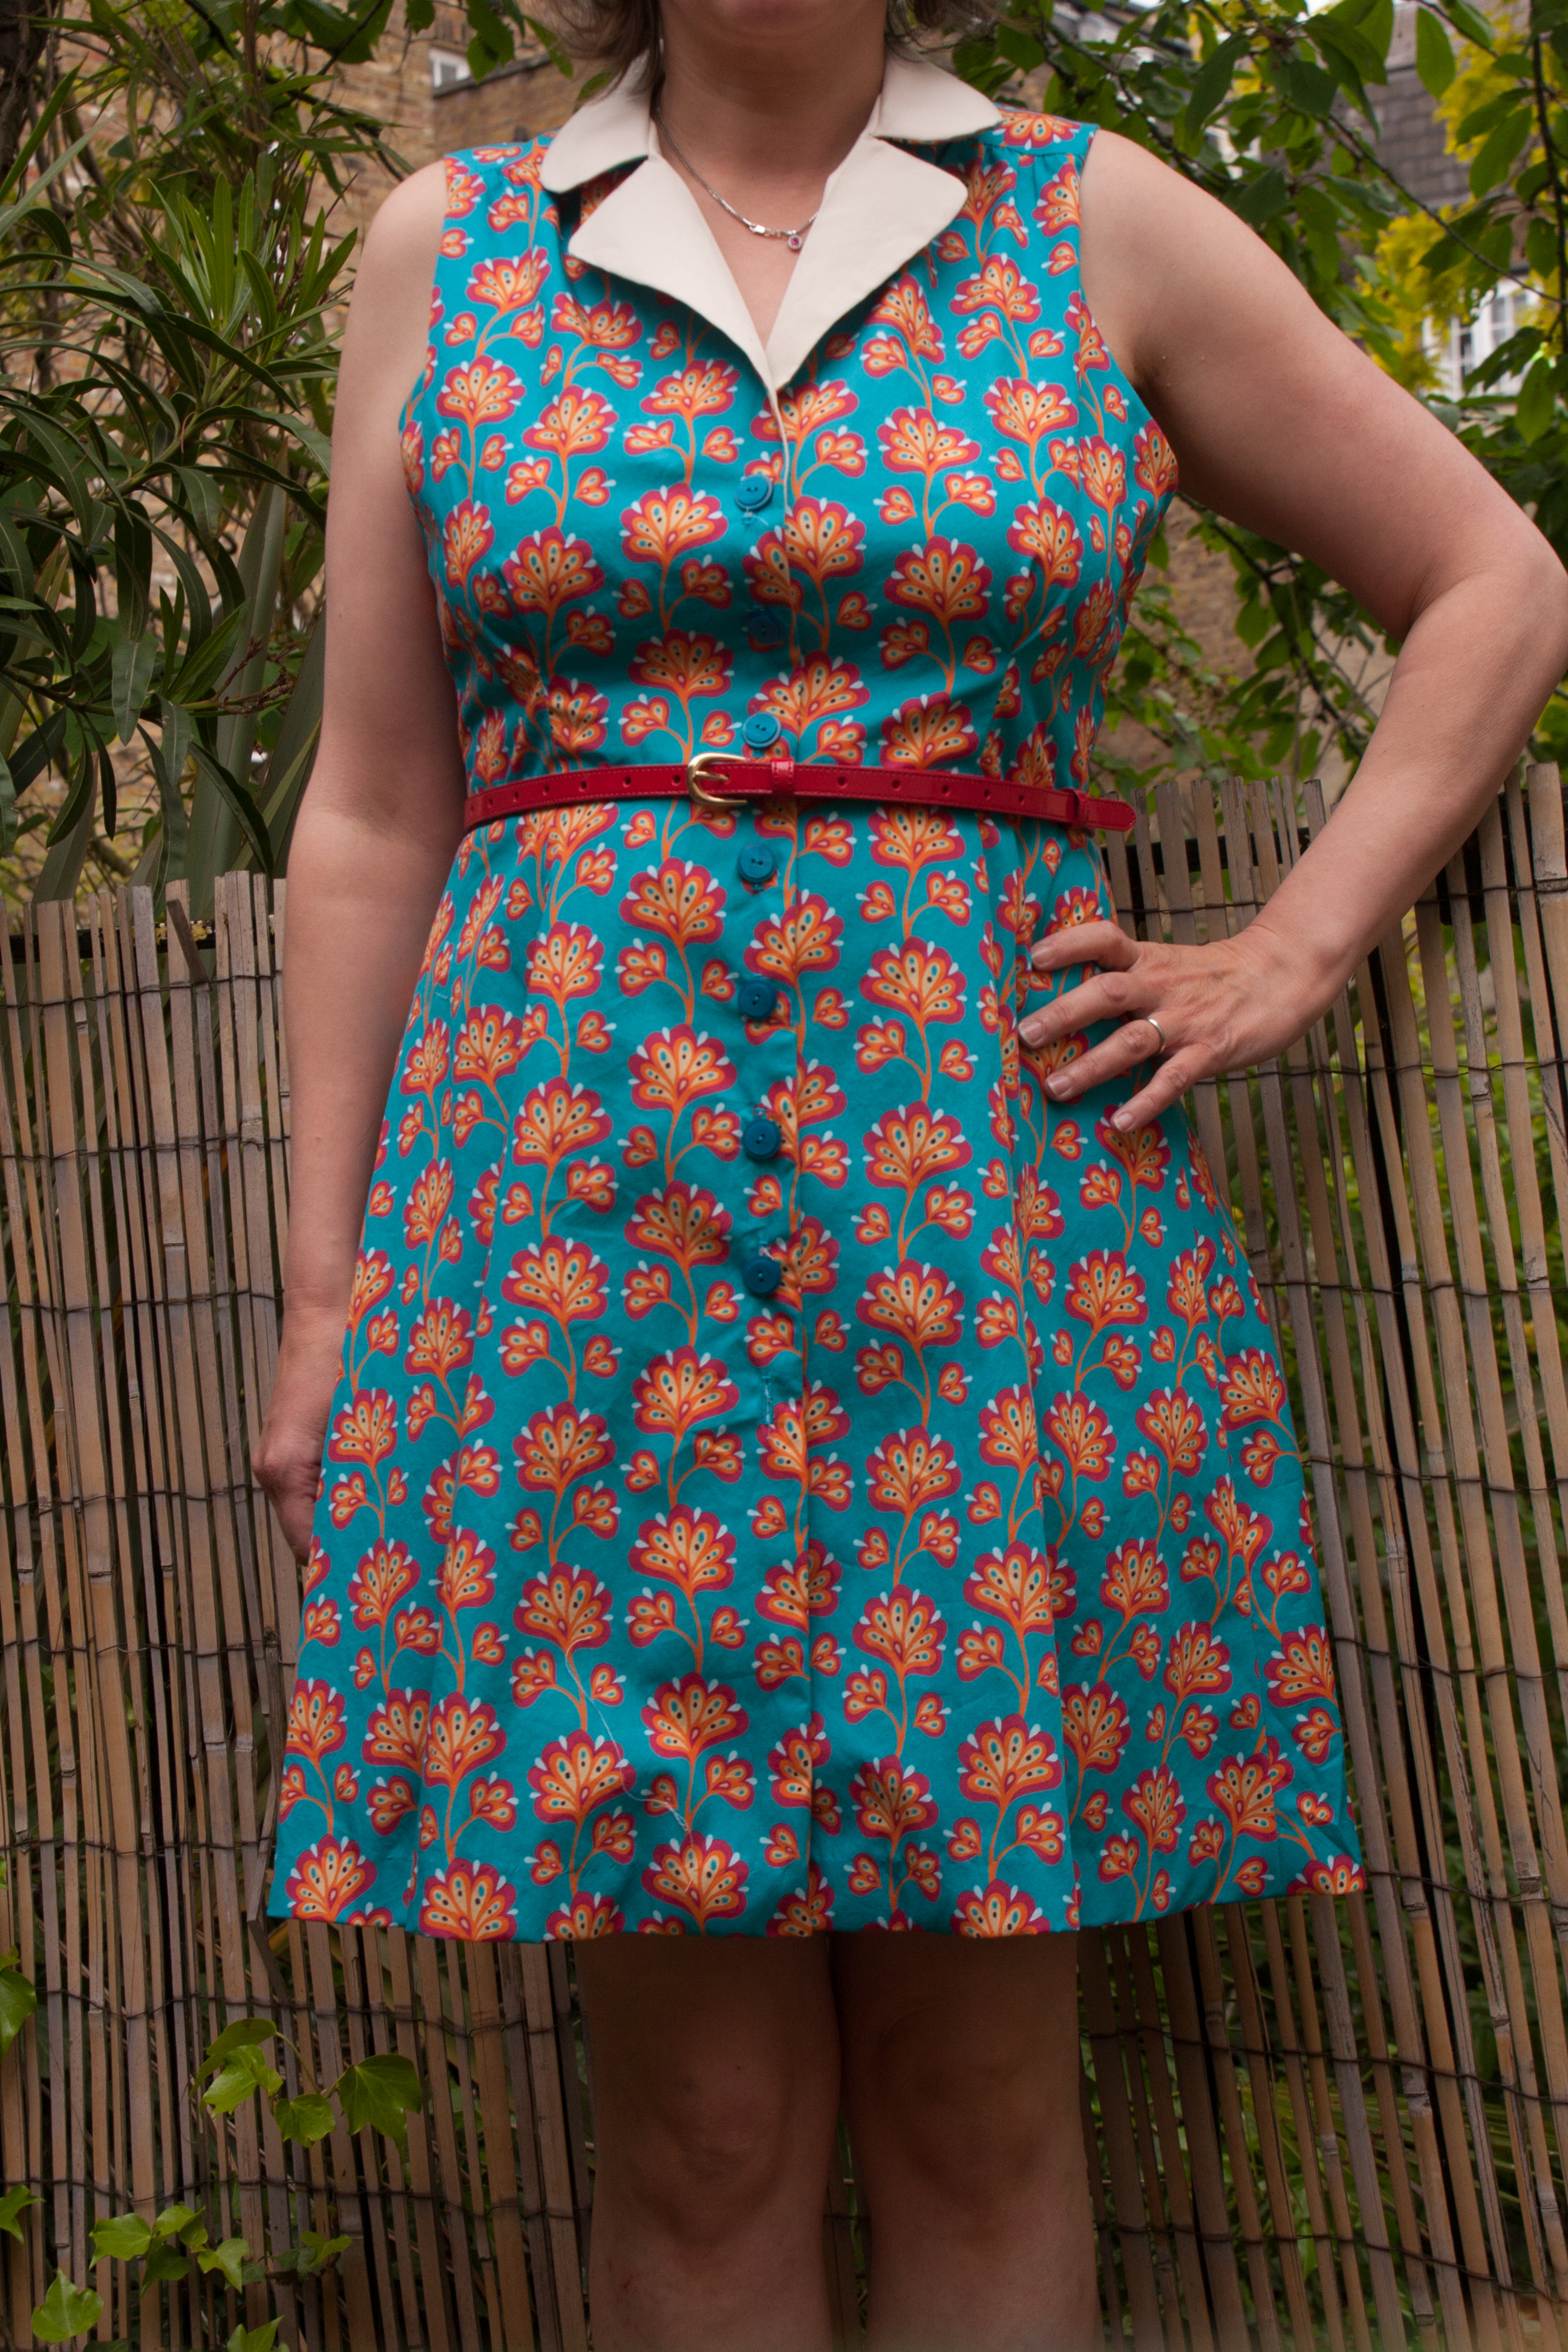
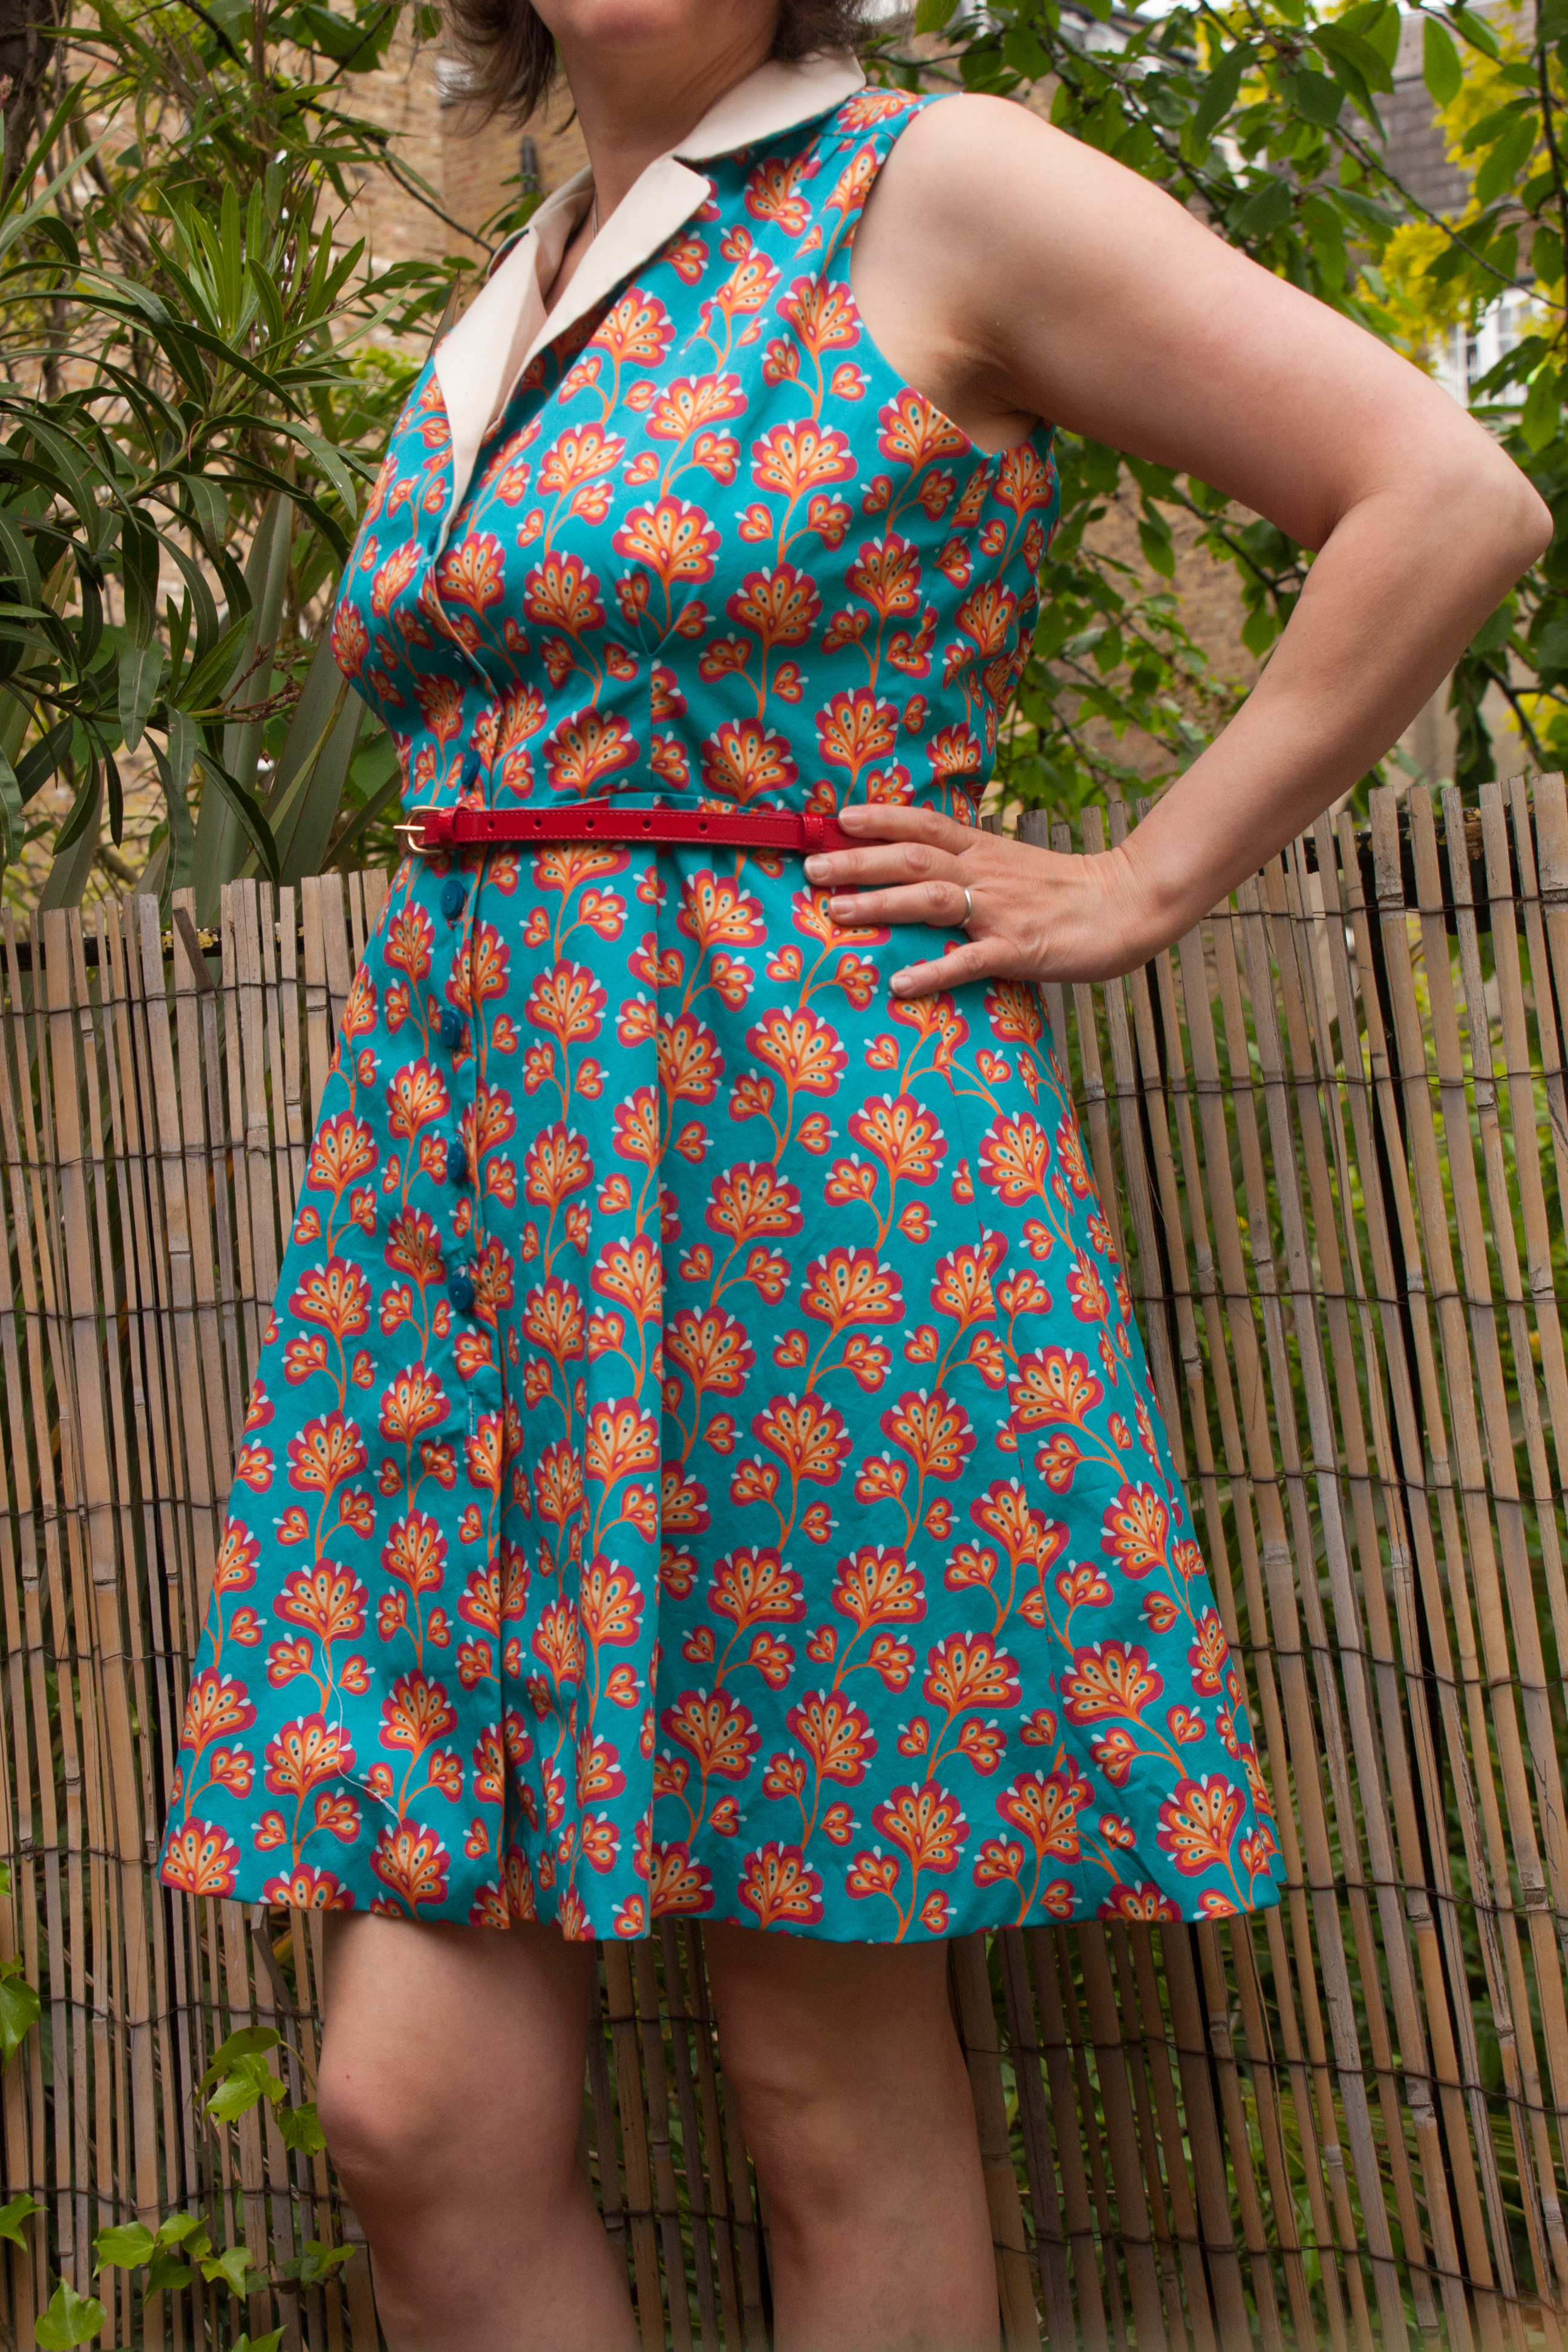
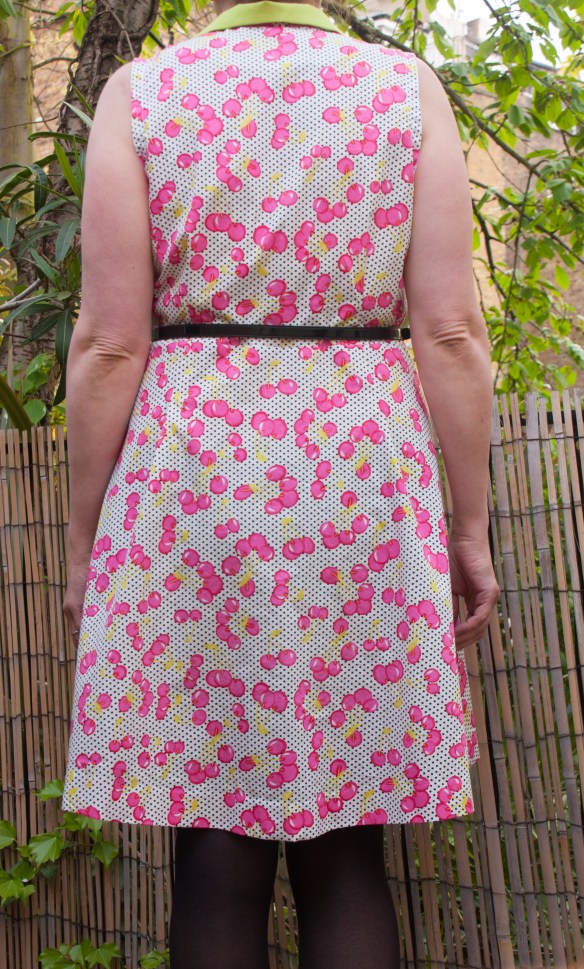
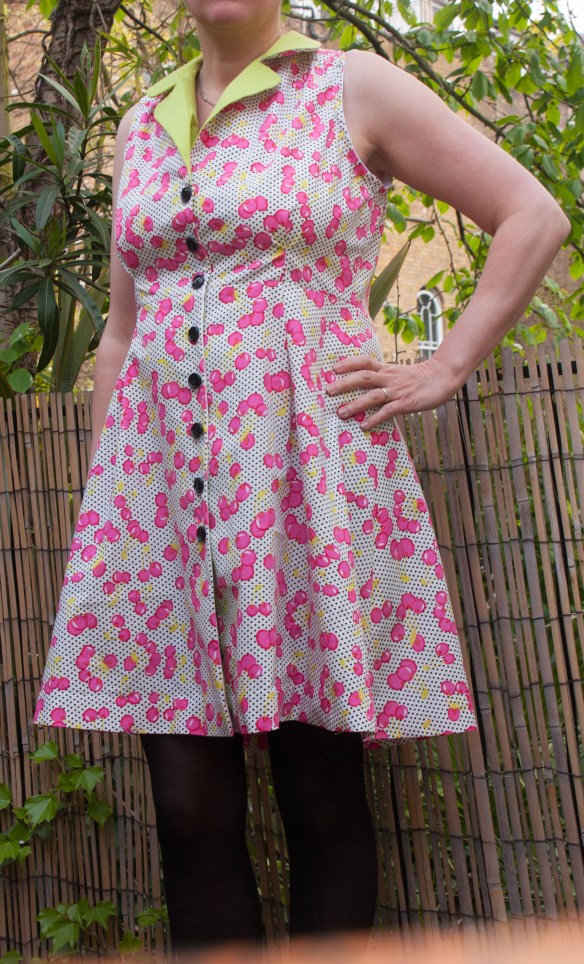
For myself it is even worse. I love making dresses. Especially nice dresses. But I am not an everyday dress type of person. I am a jeans and whatever shirt I pulled out of the wardrobe type of person. So I don’t really have occasions to wear nice dresses and if I wear them for the school run I feel uncomfortable and overdressed.

I guess the main lesson learned from Me Made May 16 was to make not only more clothes for myself and the children but to focus on staples and more wearable items. And to take it more seriously in general. The ideal would be to be able to make all the clothes for the family myself, wouldn’t it. Which would also mean to not only look out for those cute and special printed fabrics but some plain colours too. Even I wouldn’t mix a patterned top with a multicoloured even more patterned skirt. I said “wouldn’t” because I have done it in the past. Due to lack of a plain item in the right colour.

Oh, and when I say “all” the clothes, I don’t include things like rain clothes or winter coats,… Not for now at least. But I am actually planning to make trousers. As I am clearly wearing trousers more often than dresses.

One good side effect of that new plan would also be to reduce my stash considerably. It had gone down lately. Until dotsnstripes had a super sale, selling some lovely fabrics for £3 a metre. So I am back to huge piles of fabric. I wish a day had 48 hours.

So this week started pretty well, I cut out a T-Shirt and a dress last weekend and managed to sew both on Monday. Then I thought, I could continue with one piece a day but this was it 🙂 Well, apart from a Pippi Longstocking apron which I will show you in a seperate post.

Both patterns  are from my klimperklein book Naehen mit Jersey Kinderleicht!

For the dress I used some of the fabric that had been in my Advent calendar last december. And what a perfect match for the size I had to use 🙂 (the pattern doesn’t even include seam allowance yet!):

IMG_5155

IMG_5168

I love it, it is obviously girly but not the usual boring pinkish stuff.

For the pirate shirt I had plenty of fabric because I had bought that fabric for  a onesie which never happened. So for once I actually looked at the position of the pattern when cutting out rather than just squeezing it into a corner of the fabric to have as little waste as possible and so the motives are spread out evenly.

IMG_5156

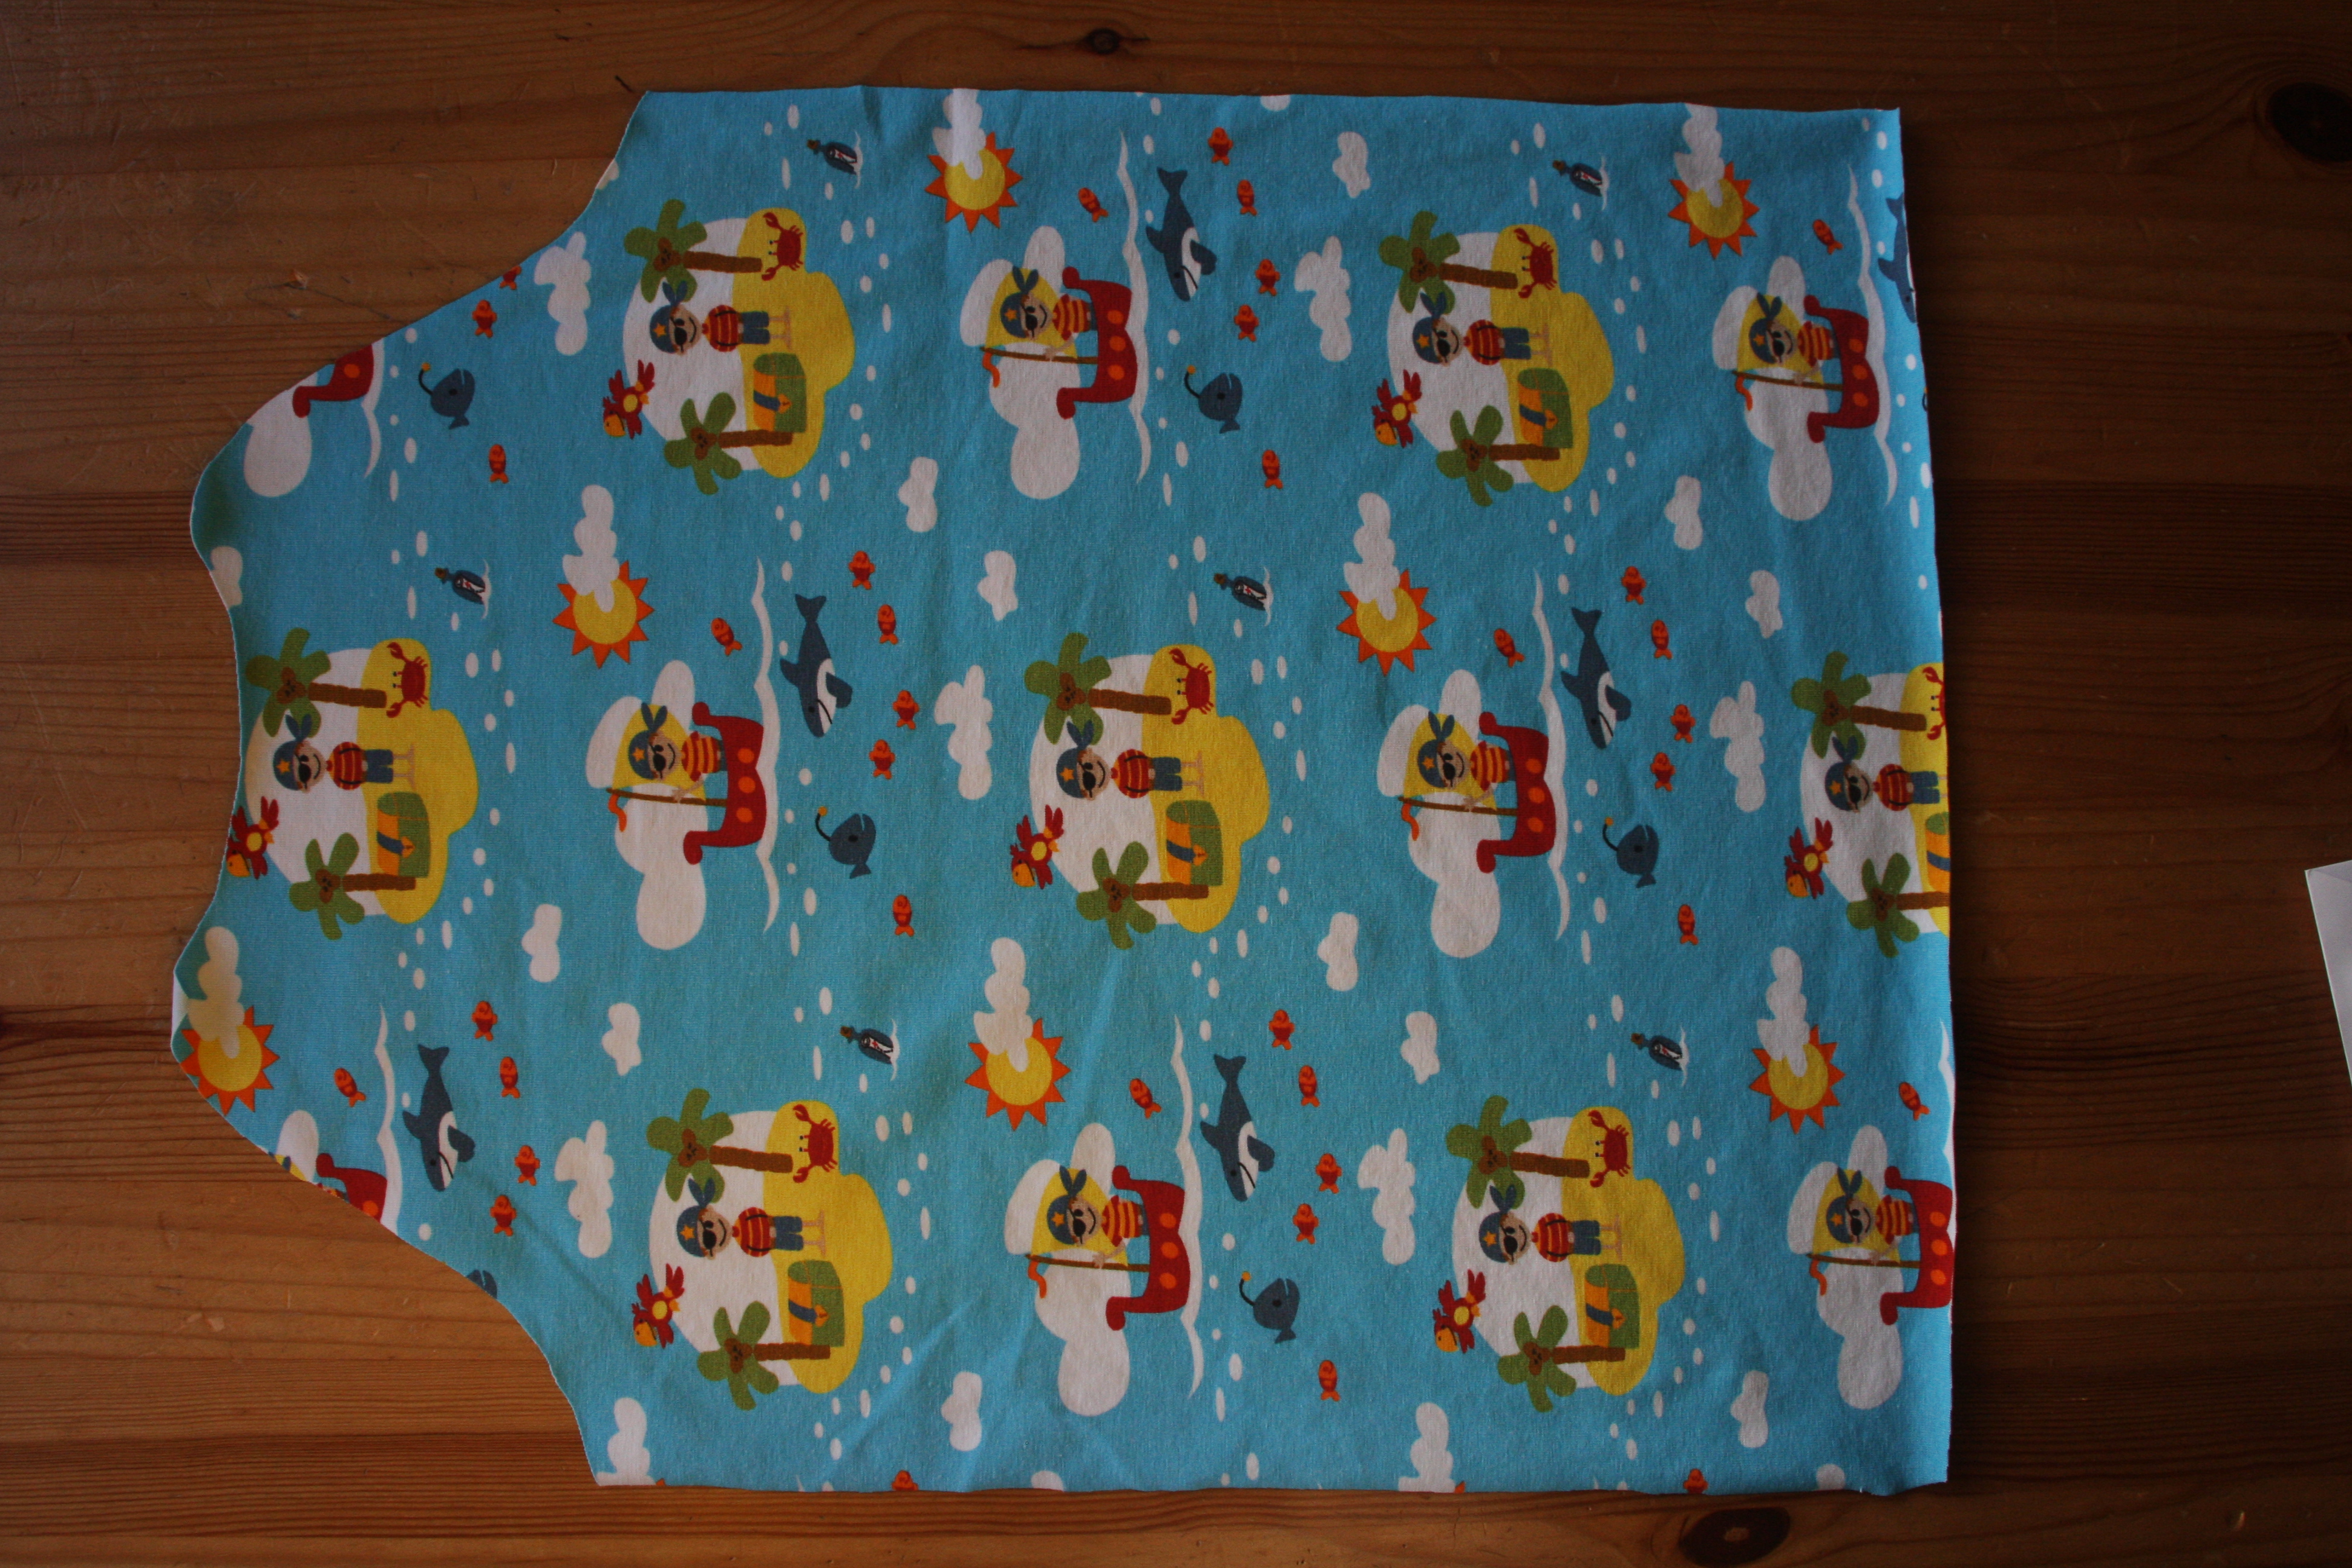
I combined it with palm tree green stripes for the sleeves and orange for the neck and sleeves.

IMG_5164

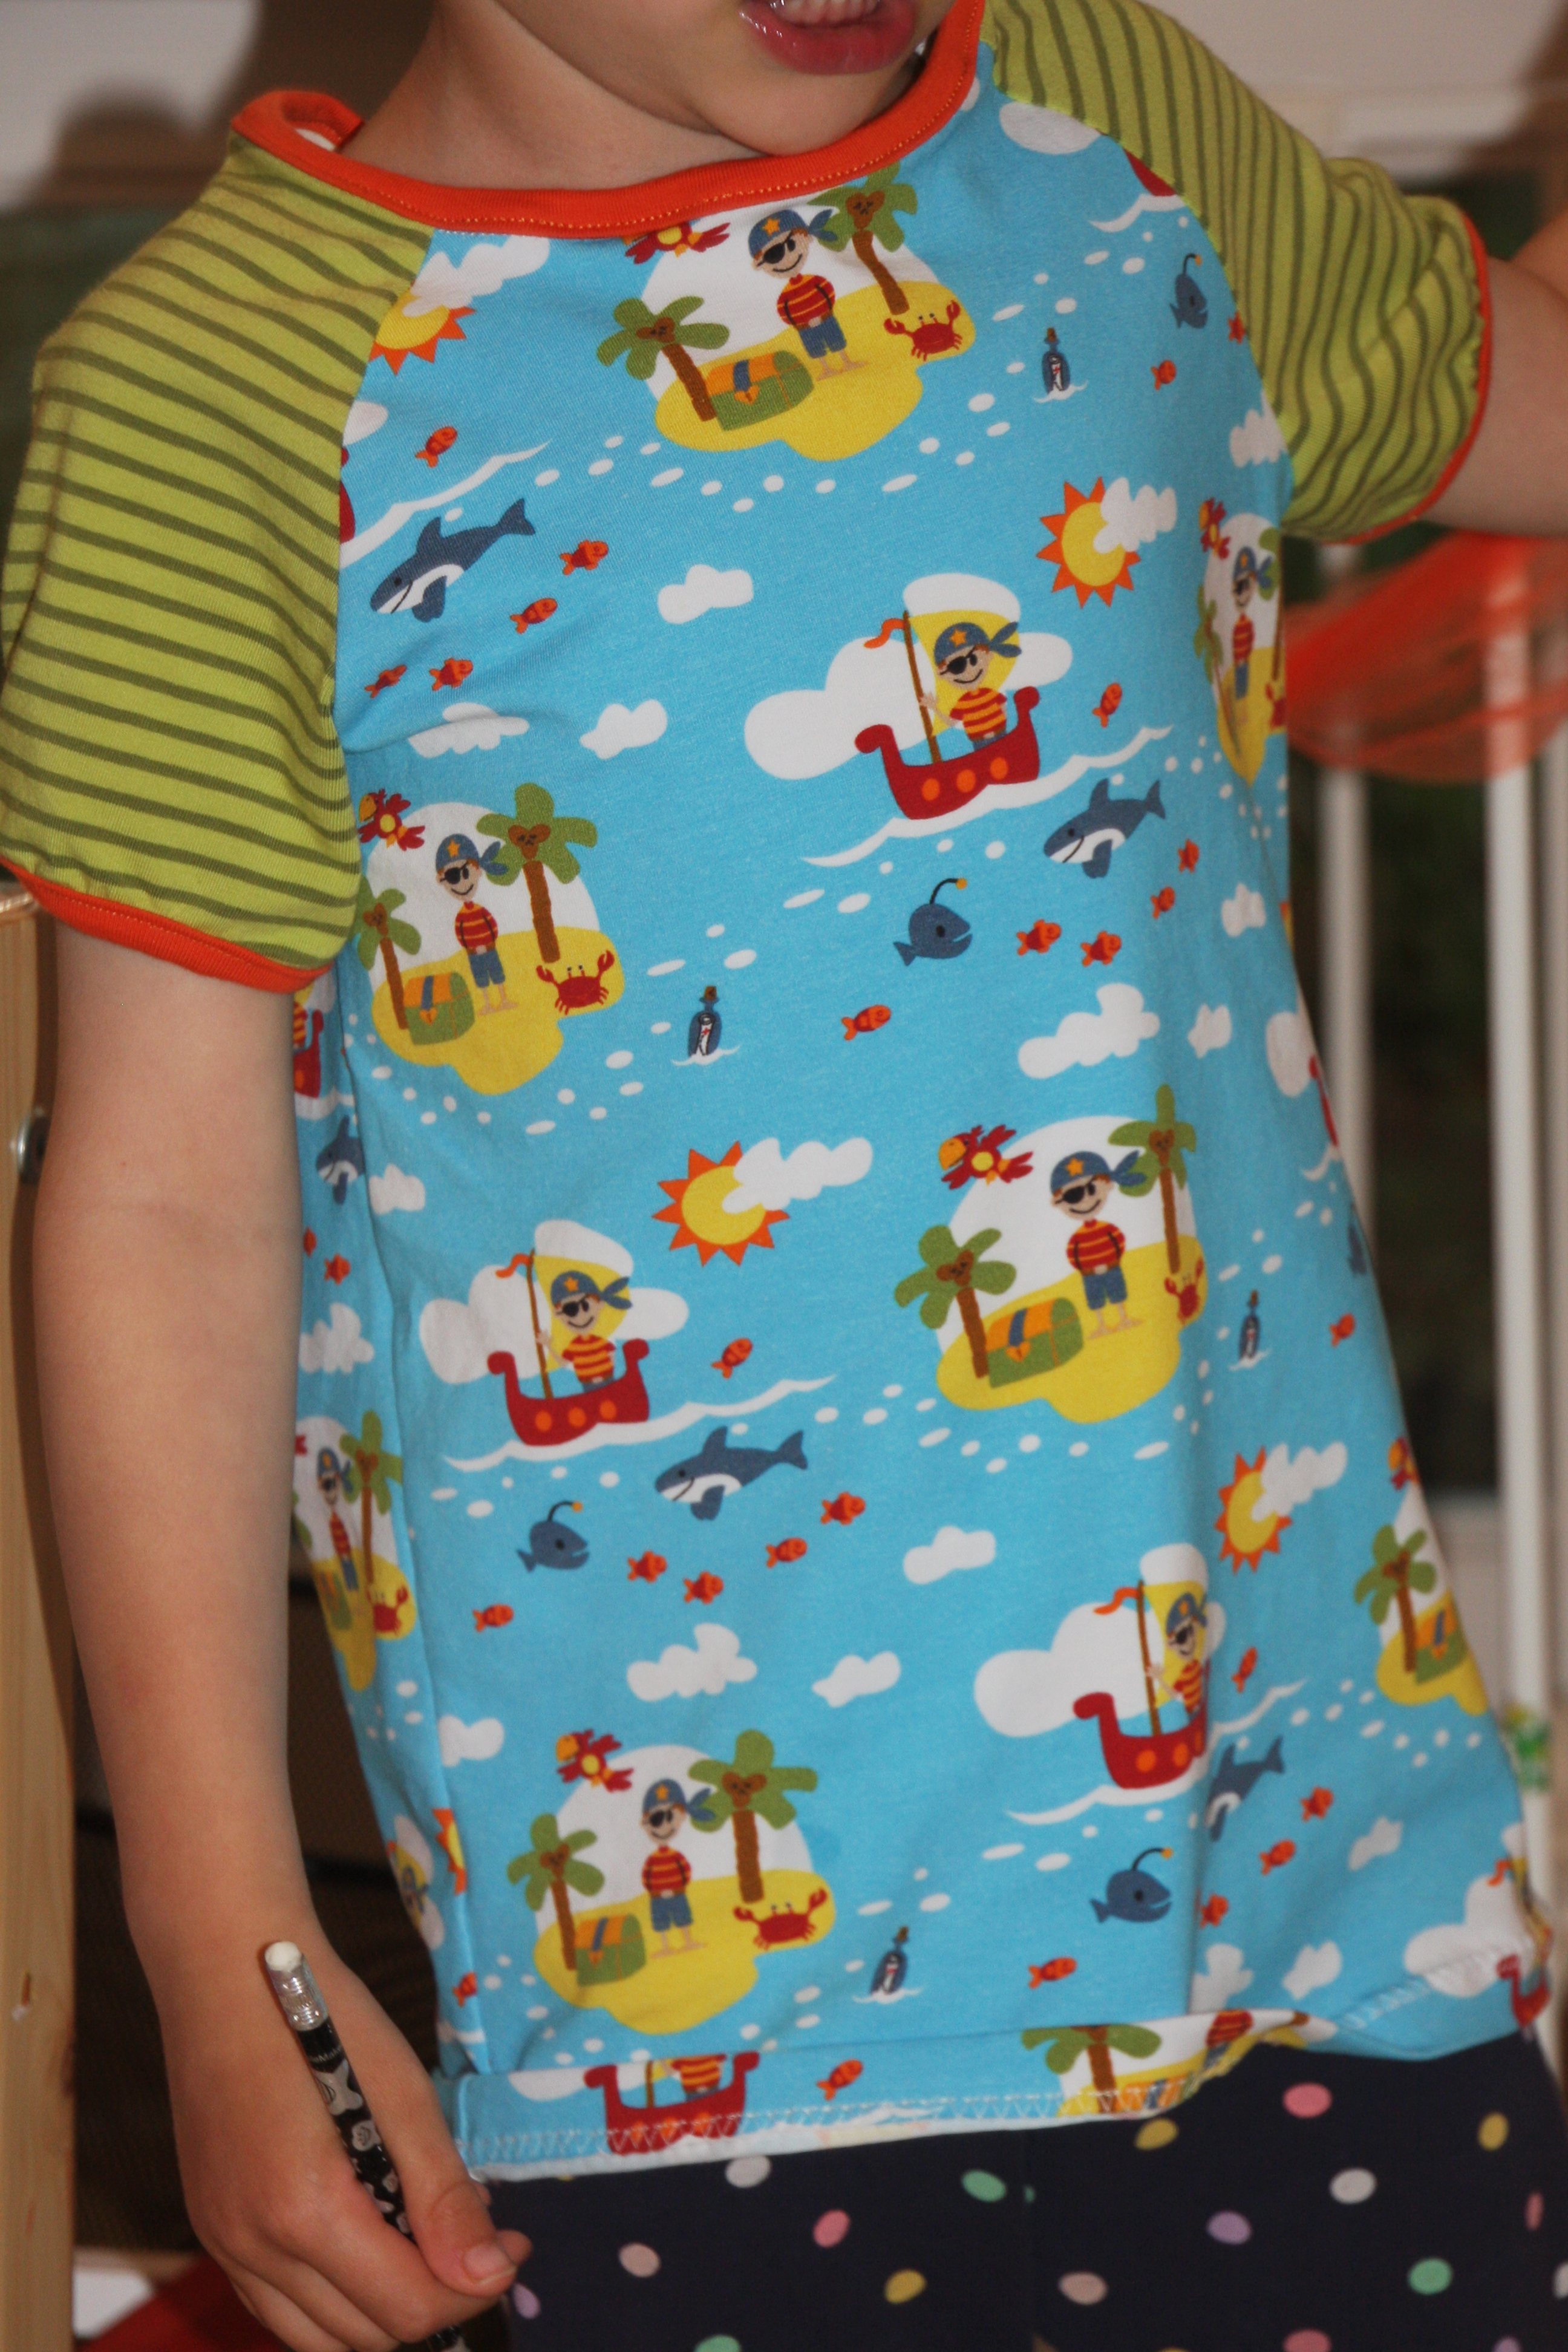
After I had made the sleeve cuffs too tightly, I panicked and the neck binding is now slightly too loose. But I love the combination and have decided to make a similar combo for his brother. I don’t normally like matching children but I guess pirates usually do come in bunches.

Oh, I almost forgot. I also made a pair of shorts out of scraps. The pattern suggested jogging sweat and I had grey or blue. The boy chose blue (believe it or not but I would have preferred the grey) and as I am struggling with plain colours I put lots of other stuff there, like a double layered application. Which is also a good way of using up tiny pieces of scrap 🙂

IMG_5182

I am a teeny weeny bit unsure about the material choice. Obviously a certain thickness is needed for robustness. But then it might get quite warm. Which doesn’t make sense for a pair of shorts. Hmm. I might just try the same pattern with a woven fabric. It will be much cooler and we will see how long it will survive. But that will have to wait a little bit as this week it will be my and mini pirate’s turn.


Shirt Dress Take 2

This me made may week has been rather successful, I finally sorted out my wardrobe and got rid of all the maternity stuff and there is not much left.

This week might be a bit tricky as we are off to Austria and there is only so much place for my clothes in the suitcase. I am pleased to say though that the children chose quite a few of the mum made items.

However, my main focus was on the dress which I intend to wear on the baptism on Saturday, remember breastfeeding friendly Vintage Shirt Dress by Sew Over It.

So after a few pattern alterations like shortening the skirt by 2cm and elongating the bodice by 2cm (including the folds) and making armhole facings, I was ready to make dress No 2 with the more expensive Hamburger Liebe fabric.

After the cherry dress, I thought I would make this one with the collar in the same fabric as the main dress but already when I cutted out, I wasn’t sure anymore and cut only the main dress. In the meantime I bought navy blue fabric for the contrasting collar (there are small dots of navy blue in the main) but then I decided, whilst it would be beautiful, it would also be too dark for a summer dress. So I consulted my friend. Which made things worse 🙂

I was then not sure if light yellow or beige would be better, bought both and needed another day and lots of opinions (someone threw orange in the pot!) before I settled on…. beige.

When the dress was finally finished, I realised that the initially purchased navy blue buttons were not only too dark but also too big. So I went back to the shops. And came back with really ugly buttons in the main colour and slightly too small orange ones.

So I have now enough contrasting fabric and buttons left to make another whole dress 🙂 I guess I could use the left overs from the patterned fabric to make a contrasting collar.

But lets have a look:

with belt

IMG_4956 IMG_4953 IMG_4950

without belt:

IMG_4958I am very pleased with the result, maybe the waist line should be even lower but then it might go against the style of the dress. And it was definitely a good idea to make facings for the armholes. However, I can’t wait to make a version with sleeves.

And now, over to RUMS to see what others have been up to.


Scrap Sunday: Fundraising with scrap fabric

Today is a bit more serious than usual.

One of my friends is part of a women’s circle which meets monthly. I think it started to support each other in all those little and not so little daily issues but now they have decided to organise a fundraising event to support other mothers and their children – refugees in Calais.

I was very much looking forward to be part of this community event and to contribute time and skills but we will already be away for a team baptism. So all I can do it to invite others to support this project by going to the fundraising event  – a fun family event with arts and crafts, a raffle, food and more.

IMG-20160521-WA0005

For those who would like to contribute but are unable to attend, there is also a fundraising page where you can  donate as much or little as you can give. And obviously please share all these links through all your social media thingies.

And whilst I can not physically attend and help at the festival, I have still prepared a crafts activity that people will be able to carry out without me supervising them 🙂 :

fabric mosaic cards

I have been busy cutting small scraps into even tinier pieces, naively hoping it would reduce my stash significantly

IMG_4932Doesn’t it look beautiful?

And I made a sample card.

IMG_4936

If you are unsure how to get from picture A to picture B, then check out this brilliantly written tutorial by my first and only guest writer.

Apart from this amazing activity I will also donate two pieces of handmade children clothes. I just don’t know yet if I will make them and donate them to be auctioned or if I should donate vouchers, as then the winner could choose size, style and colours, isn’t it. I am just not sure if that doesn’t get too complicated.

Might be a timing issue anyway, as I still need to make one baptism present sun hat and a dress for the mother of the other baptism team member. And we will be leaving on Thursday. I better get to work now.


Why the working title “Have you ever pressed a prefolded bias tape open?” needed to be changed to “The danger of the seam ripper”

Time for a little Me Made May update. I did manage to wear me made outfits three times this week, but there hasn’t been much variety and I have realised that I can not really combine those items with anything else. The wardrobe remains unsorted but it really has to be done until next Thursday.

So I have mainly been busy working on a dress. I was looking for  a breastfeeding friendly dress. I have used “breastfeeding friendly” a few times in my last posts but what does it actually mean? It is just a normal piece that allows to breastfeed a child without taking the whole thing off. My prefered choice is the two layer look, one up one down. Obviously with a normal dress this would be a bit difficult….

So, I was looking for something with buttons and found The Vintage Shirt Dress by Sew over it.

I bought a lovely vintage-y fabric with cherry print in Goldhawk Road but ended up making a very quick calico version first to not waste the trial fabric and to see if it would actually fit me. As usual, the dress would have been too wide at the shoulders and I also decided to make the skirt just a tiny bit narrower to even out the different sizes my body actually needs. I also decided to use a plain colour for the colour and the facings as I had seen one lovely version somewhere on Pinterest. As it turns out my alterations let me cut out so much more effectively that I saved roughly a meter of fabric.

But enough talking, let’s have a look. (Note: I had to use the self-timer with the camera balancing on some books)

IMG_4918

IMG_4913

IMG_4915

So it is definitely a wearable trial version but lets use it to improve the next version. I am not sure about the green collar.

IMG_4919

I think black would have been better but guess what, I do not own black fabric.However, the buttons in black just show it would have been the better choice. Plus, I am not sure anymore if a contrasting collar is really what I want.

The waist is a bit too high, after the photo session I pushed down the belt to where I think my waist really sits and I liked the look much more. So I might make the bodice an inch longer and the skirt a bit shorter.

The finish of the armholes with the bias tape at the inside was new for me. When I read the description I got confused and decided to follow step by step. Apart from cutting my own bias binding. I felt that would be a waste of that lovely fabric. I realised that my shop bought bias binding was slightly wider than the requested 4cm so I decided to trim it and ended up pressing the bias binding flat to make sure it had no more folds! (Title No 1), then I trimmed it and followed the instructions from there.

IMG_4925

I really don’t like it, I am not sure if it is only my fault, there was a lot of tension on the binding and I am not sure if it would be that easy to slip stitch it. I might try again on a little sample before ruining the next dress 🙂

I guess you are by now really excited to learn the reason for the danger of the seam ripper title, so if you feel you are strong enough, here it comes:

IMG_4924

I had just finished the second button-hole and opened it with the seam ripper when I slipped and slashed the whole dress open over a length of about 4cm. Great.This has been my first ever button hole accident and I usually cut it open with scissors. Sometimes huge fabric scissors. Never ever anything has happened.

I fixed it quickly with two layers of interfacing in between main fabric and facing and then I panicked and zigzagged over it. Maybe I should have thought about other options first. It is not too visible but there might have been a more discrete option. And it is just one of these things, no one might notice but I know it is there.

Up until that incident I thought this might actually be the dress for the baptism not just a trial version. But now that there is this mistake sitting on my waist, I will just keep thinking of it and that zigzag line with eventually burn a huge hole into my dress. We will see if I consider it suitable for the school run. I would definitely get a few looks. After all they only know me as a trousers and top kind of person. I definitely like making dresses much more than actually wearing them.

But enough of me, I’ll send this over to RUMS and will then have a look if others have made things to wear or trial onlys.