Scrap Sunday: A little something

See, I told you I was going to post before the new year and none of you believed it!

I have a little something to show you. I made it out of the content of one of the advent calendar bags:

IMG_4372

But lets have a closer look:

IMG_4373A piece of polyester strap material, a pretty woven ribbon, a key ring and a strange clip thingy. At first, I wasn’t sure what this random selection of small pieces was all about but then I realised: A key fob! That’s what I was supposed to make. Well, the key ring was a pretty strong clue 🙂

And the clever person I am I figured out all by myself how to do this. But as the person who has recently poured dry pasta into the bechamel sauce rather than into the pot with boiling water next to it, I  confirmed with wise old internet before getting started.

And voila , five minutes later I had a beautiful key fob and a perfect little Christmas present to be sent to a friend in Italy:

IMG_4374

I am not sure if it is a very practical size for a key fob. It is quite long. But I was immediately thinking of something my mum had mentioned during her last visit: It is apparently getting more and more difficult to have a good individual marker on your luggage. All suitcases traveling round and round the conveyor belt at the airport seem to have red ribbons. So this fob might work quite well, maybe with a bigger ring to slide it around the handle.

Or it could work well as a wrist strap for a clutch. I was actually already trying to find these clip thingies but I don’t know how to even call them. And surprisingly ebay doesn’t know them as clip thingies.

I guess whilst the new year is still faaaaar away, lets not go crazy postingwise and I will just take the opportunity now to wish you all a “good slide into the new year” (That’s what we say in German before the 1st of January) :)!


What I meant to say….

Surprisingly having a new born (well, he really is a month already, so he has opened his eyes finally) does seem to reduce my time on the computer, sewing machine, knitting needles,… a tiny bit. So, what I meant to say/post…

+ on the first Sunday of advent:I hope you are all having a lovely advent, getting ready for Christmas.

IMG_4216

This is our advent wreath. I bought the wreath and put the candles and the ribbon on myself. I guess, one can tell 🙂

We have also put up the knitted wreath in the window (Note: I am reusing a lot of old pictures in this post. This year’s version had been put up in a rush – still took me two days in total – and therefore looks like a horse shoe with a bow, not worth a picture :))

IMG_2771

+ on 1st December: Time to open the advent calendar:

IMG_2787

IMG_4229

This year, mummy got one, too. I thought I’d deserve it this year. I ordered it from VRENIding, a German online fabric and haberdashery shop. There was not only a choice of calendars but I could also give some information about the age of my children (as I went for the calendar “mum plus daughter and son”) but also likes and dislikes re colours, fabrics,….

IMG_4227

I was very excited when the box arrived. I wish I could hang up my bags too. But that would be too tempting and there is simply no space.

Anyway, opening the first bag brought back some childhood memories 🙂

IMG_4230

But I have to admit, I didn’t quite get what the first item was, until my daughter explained it to me. Cookie cutter ok. But what was it? A rabbit? An alien with two heads? And what has this to do with sewing?

IMG_4231It’s scissors, mummy! of course. Silly me.

When I ordered the calendar, I took a slightly risky decision. After all it cost around 75 Euro as far as I remember. From a shop I had never ordered before. But so far, I am really pleased. We are only on day 7 and I got already 3 pieces of fabric and one piece of ribbing. I would say, not bad at all. Of course the fabrics are not huge so it might not always be straight forward to choose what to use them for. But then, for roughly 3 Euro per bag, I can not expect a meter of nice fabric each day. And I guess, it is almost like buying lots of scrap fabrics to make lots of scrap projects for Scrap Sunday 🙂

+ any day really: I just wanted to post a picture of the trio of scrap cardigans as I have not only finished them but also given them to a special courier who will hopefully deliver them to the right babies.

First of all, the three blankets. Ours is the one with the red-orange border. It would have looked much better without the green centre. But I loved the green. And the two other blankets in our house have green in it. So it seemed like a clever idea. The purple turquoise one is my niece’s and the blue green one is my nephew’s.

For the cardigans, I used a slightly lighter blue than the dark one used in the boys’ blankets. I had ordered it as the second blue for ours but it was too close to the dark one. So it was enough for three cardigans and I almost completely used up the other colours. In fact, another orange stripe would have been perfect but I was short of half a row only and had to unravel to the last complete stripe.

IMG_4258.JPG

And looking at the picture now, I realise that the contrast between the orange and the red is not quite strong enough. It would have been better to use the blue for the thin stripes, just as I did with the green version. Hmm. Never mind. He will never wear it anyway. He vomits far to much to be allowed a hand knitted woolen cardigan 🙂

And I would have preferred green buttons for the green one. Why are there no decent green buttons? Anywhere? This is something I am wondering since a long time.

I have made these mainly whilst waiting for an overdue baby. Since he is born I have managed this much (knittingwise):

IMG_4274.JPG

I meant to knit a pair of fingerless gloves for my lovely midwife. Considering that this is only the first one, winter might be over before I manage to finish the pair. I also find it slightly too big. If it was tighter, the pattern would come out much better, no? So I am actually considering to unravel the whole thing. Luckily I have at least made her a neck warmer already which I will show in the next post. Probably. But for now. Good night.


Downsizing: Klimperklein jacket modified

We are a bit short of baby clothes because I lent them to someone a few years ago and never got them back. So I decided to use up the lovely Viking jersey initially purchased for my nephew’s birthday jacket to make a baby version of the same Klimperklein pattern.

Klimperklein is the brand of an amazing woman with 5 lovely children who still manages to create lovely patterns for baby and children clothes. Her blog is in German and I think the e-books are also only available in German but they are brilliantly written and with so many pictures that even those professional looking jackets were fairly easy to make. So I guess, what I am saying is “Learn German” 🙂

So far, I have made these for my children…

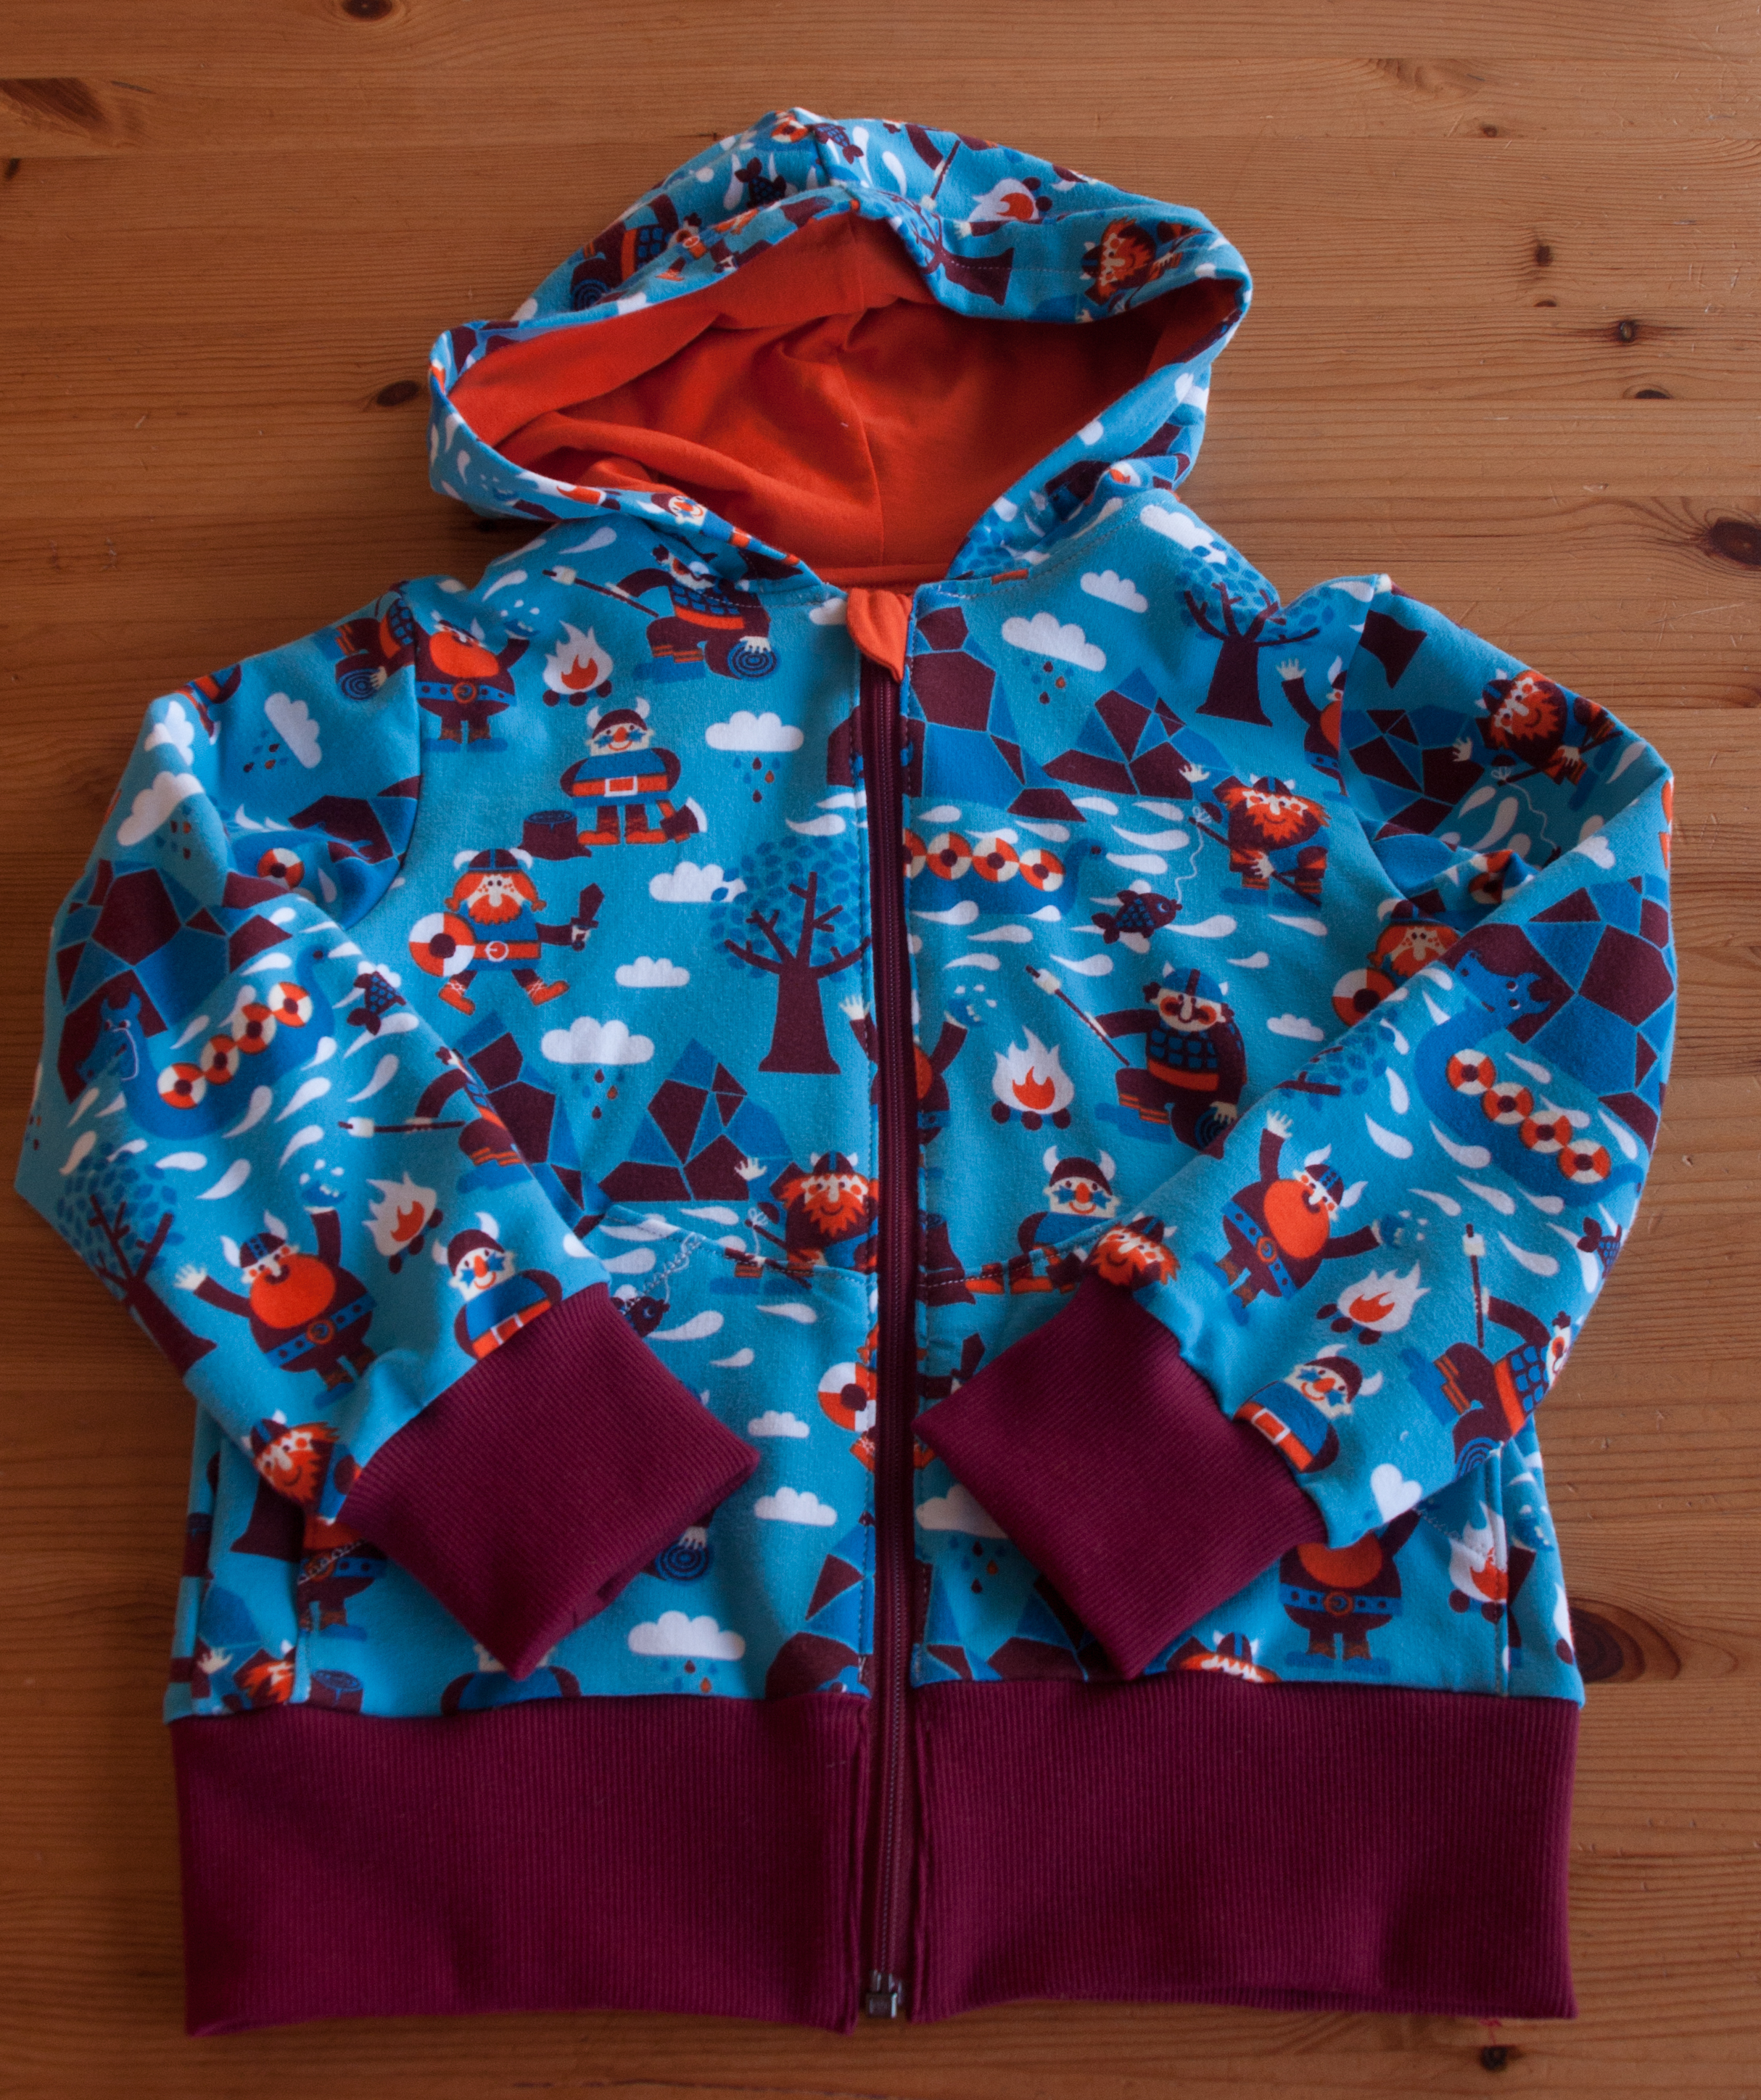
and this one for my nephew…

IMG_3912

I love the colour combination of this one, I made the cuffs and the hem (I really have no clue how you call the red piece of the main body: hem, waistsomething? Help, anybody, please) slightly wider as I had one of the pattern pieces accidentally folded on the wrong line and the main body would have gotten too short. Oops.

But back to the modified baby version. As you can see the original klimperklein jacket has a zip and in my case a hood but there is a collar version too (and many more options to choose from).

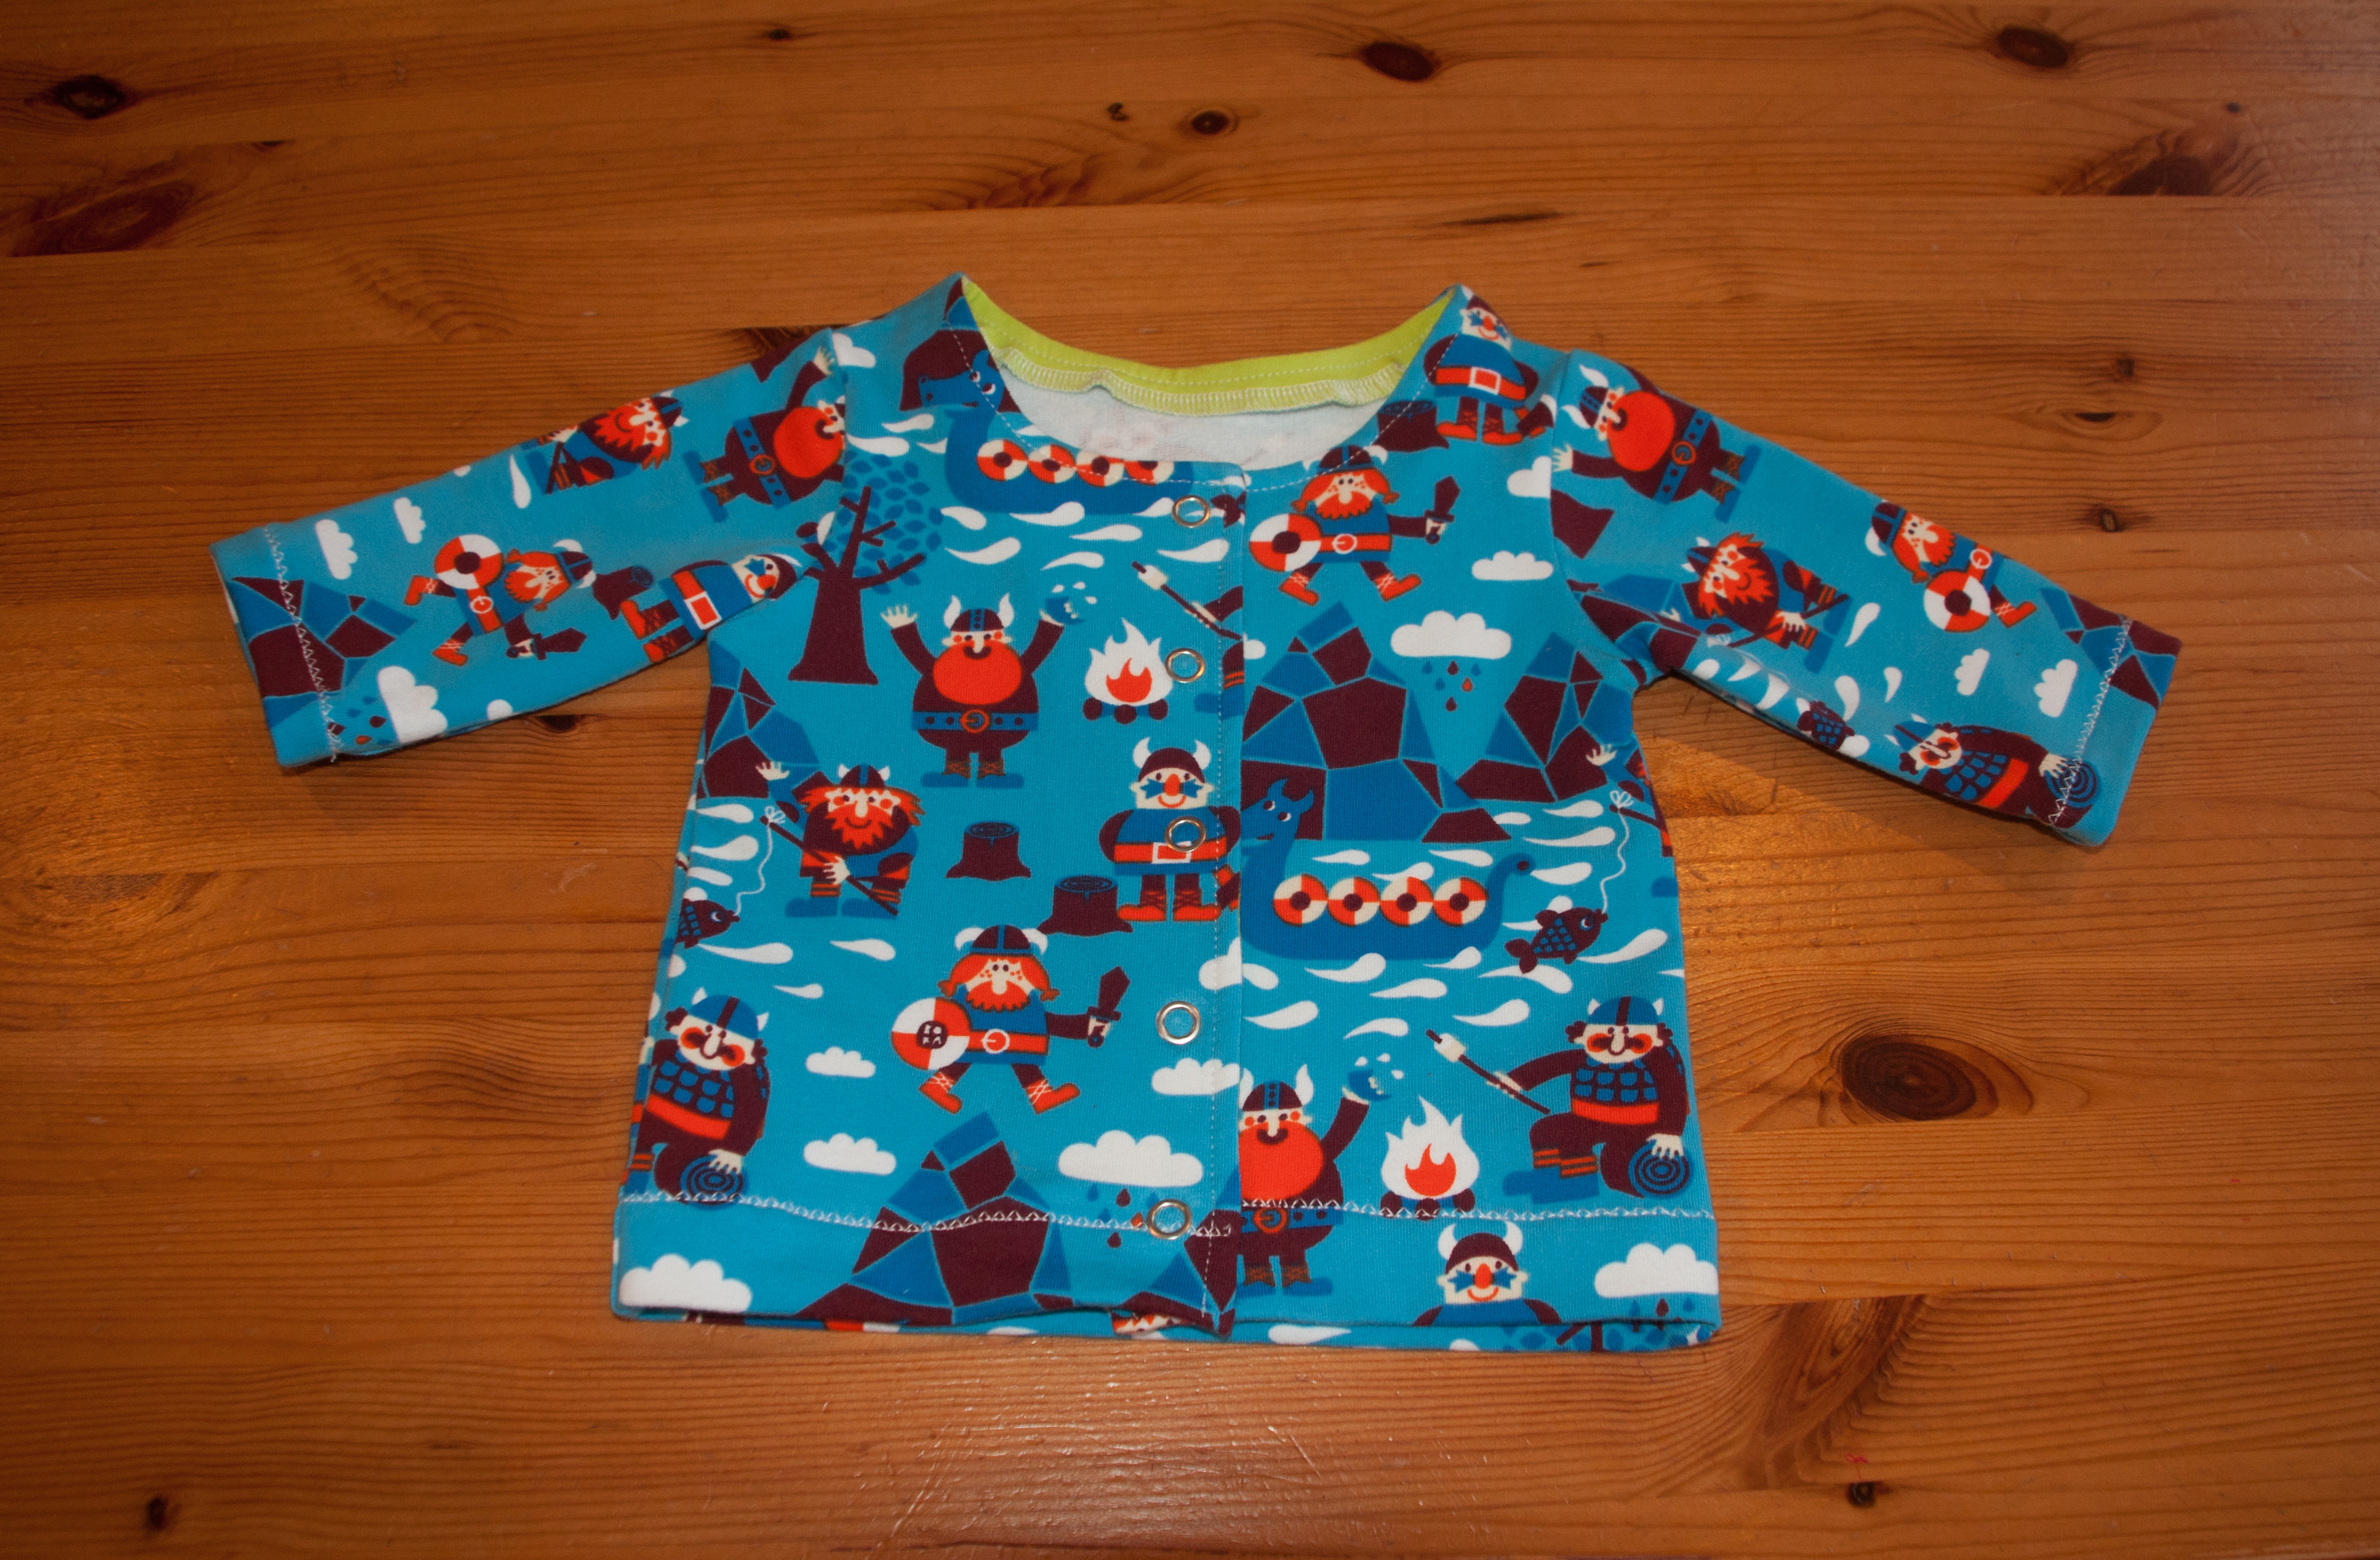
But I thought for a baby, none of these things are very suitable, all I wanted was a simple jacket with snaps, normal neckline and simple hem and cuffs. Something like this:

IMG_3946

At first glance it is what I wanted but actually I have mixed feelings about it so lets have a closer look.

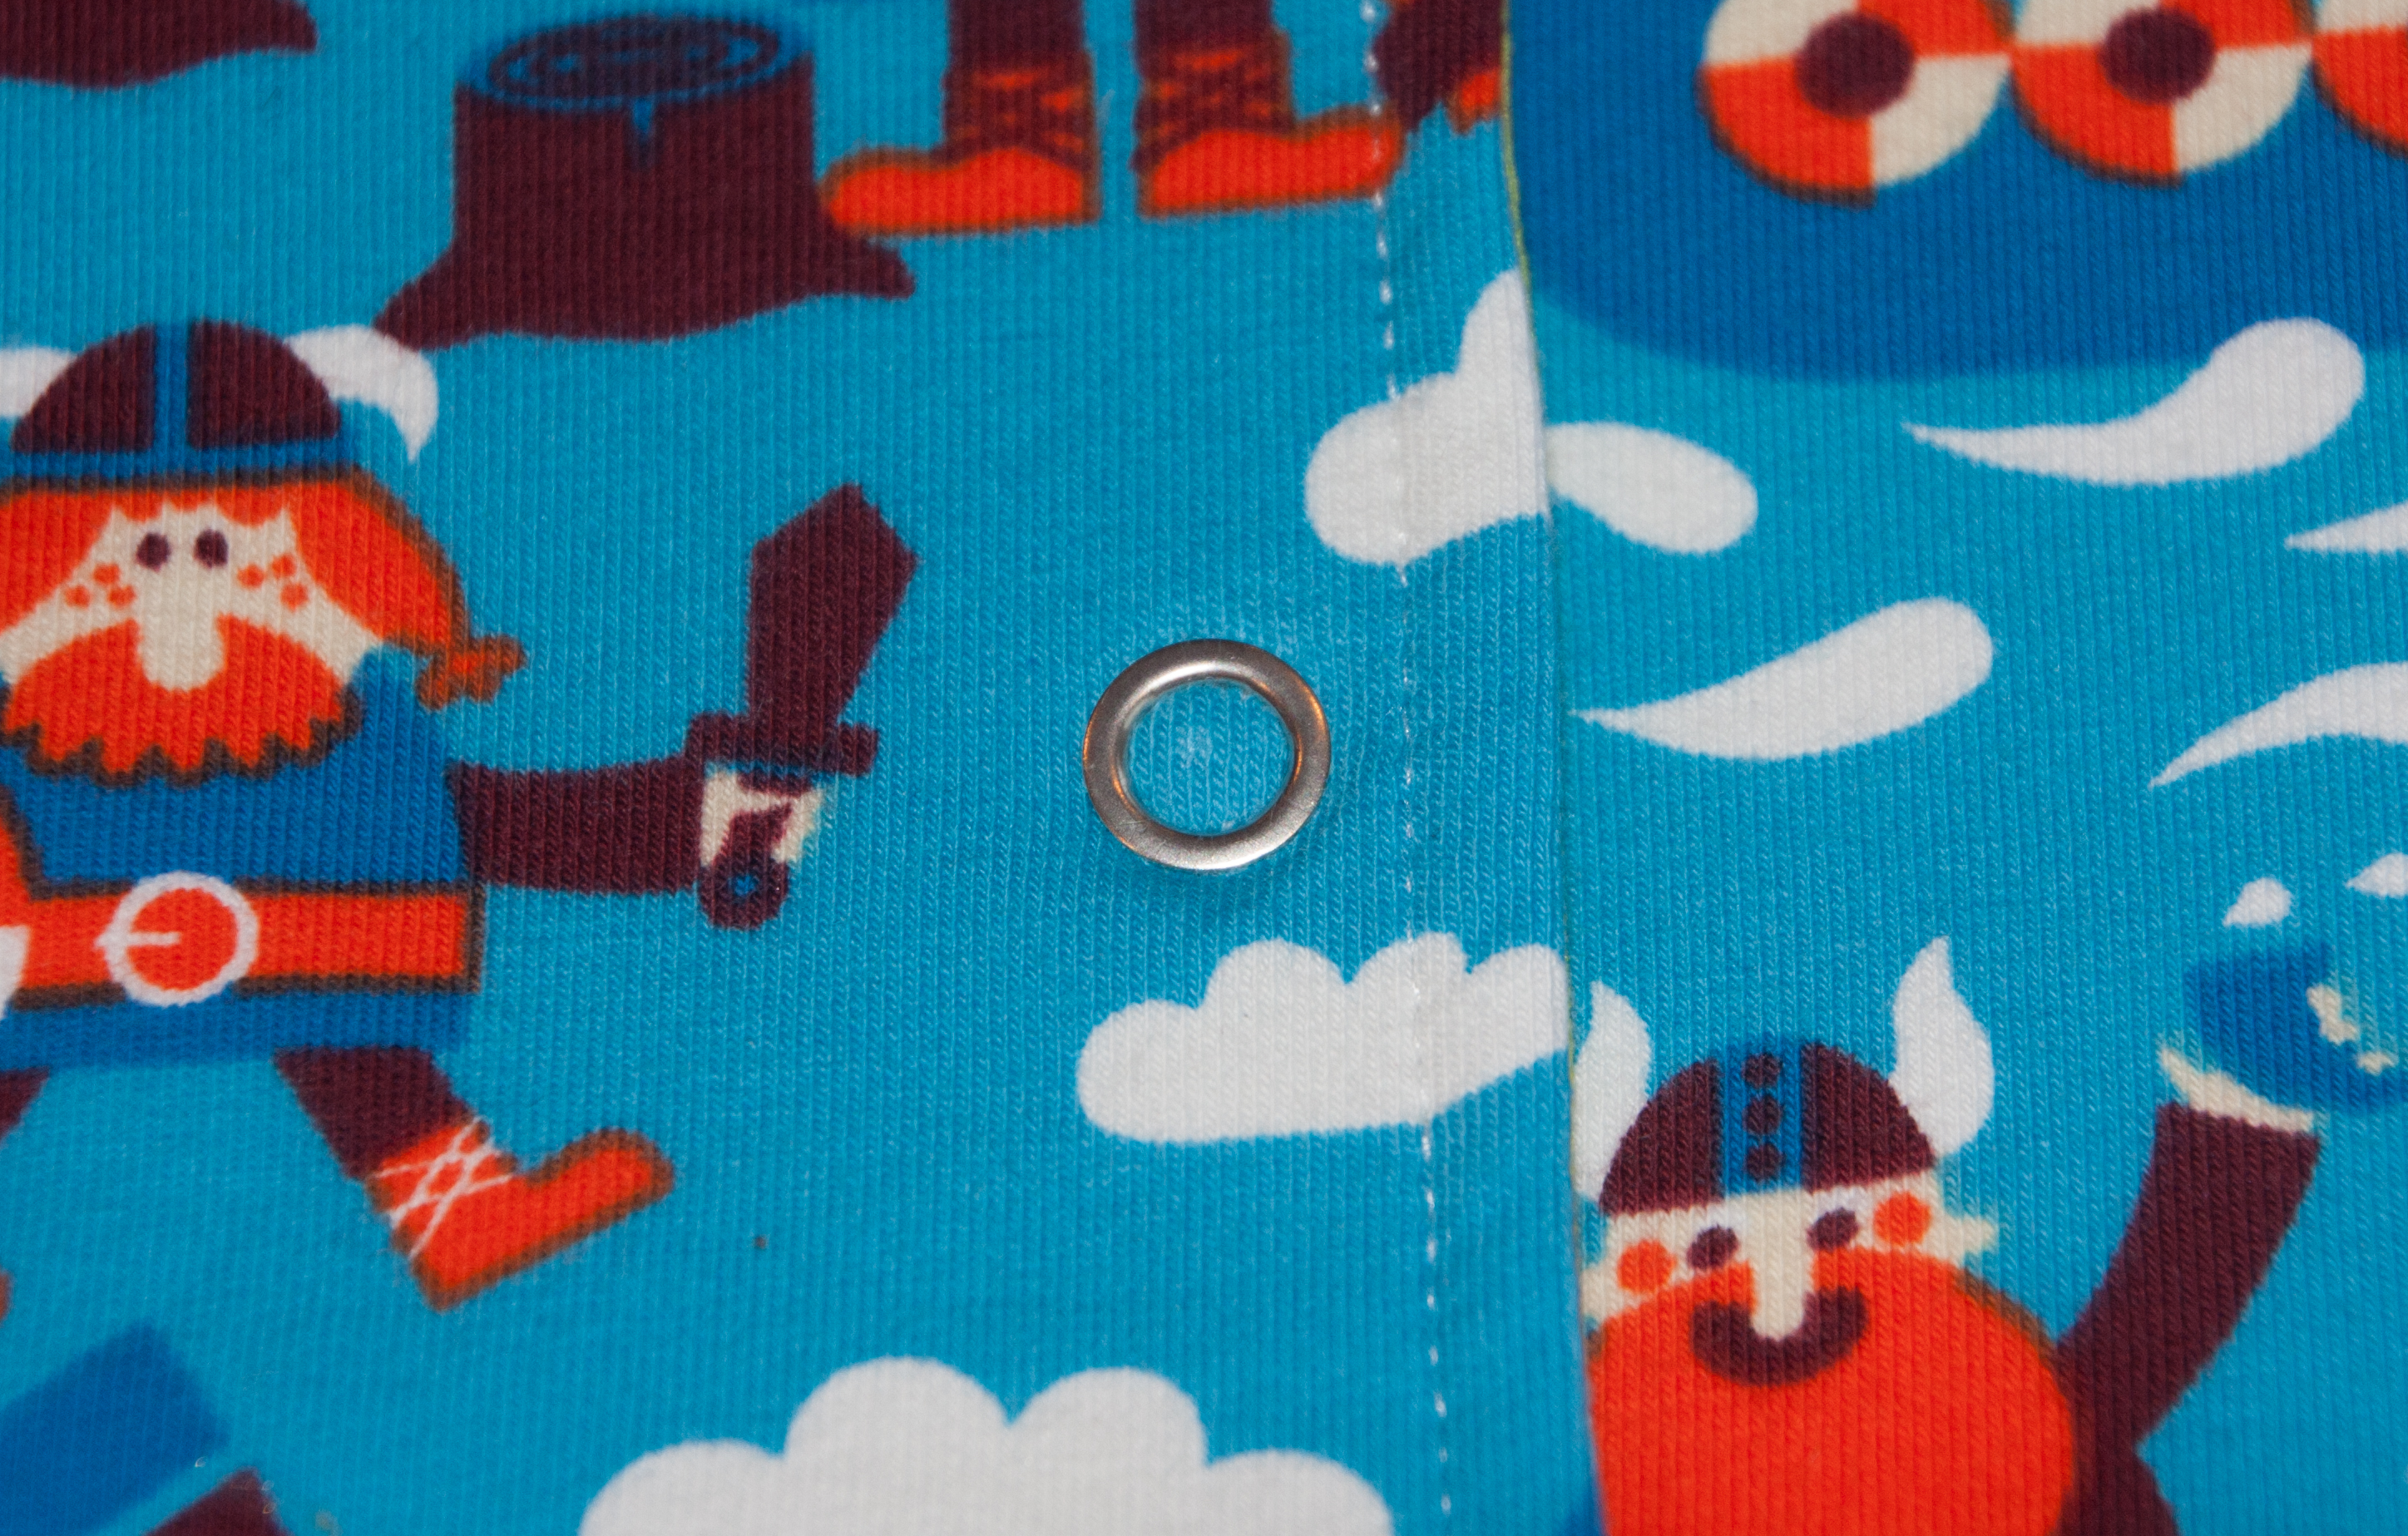
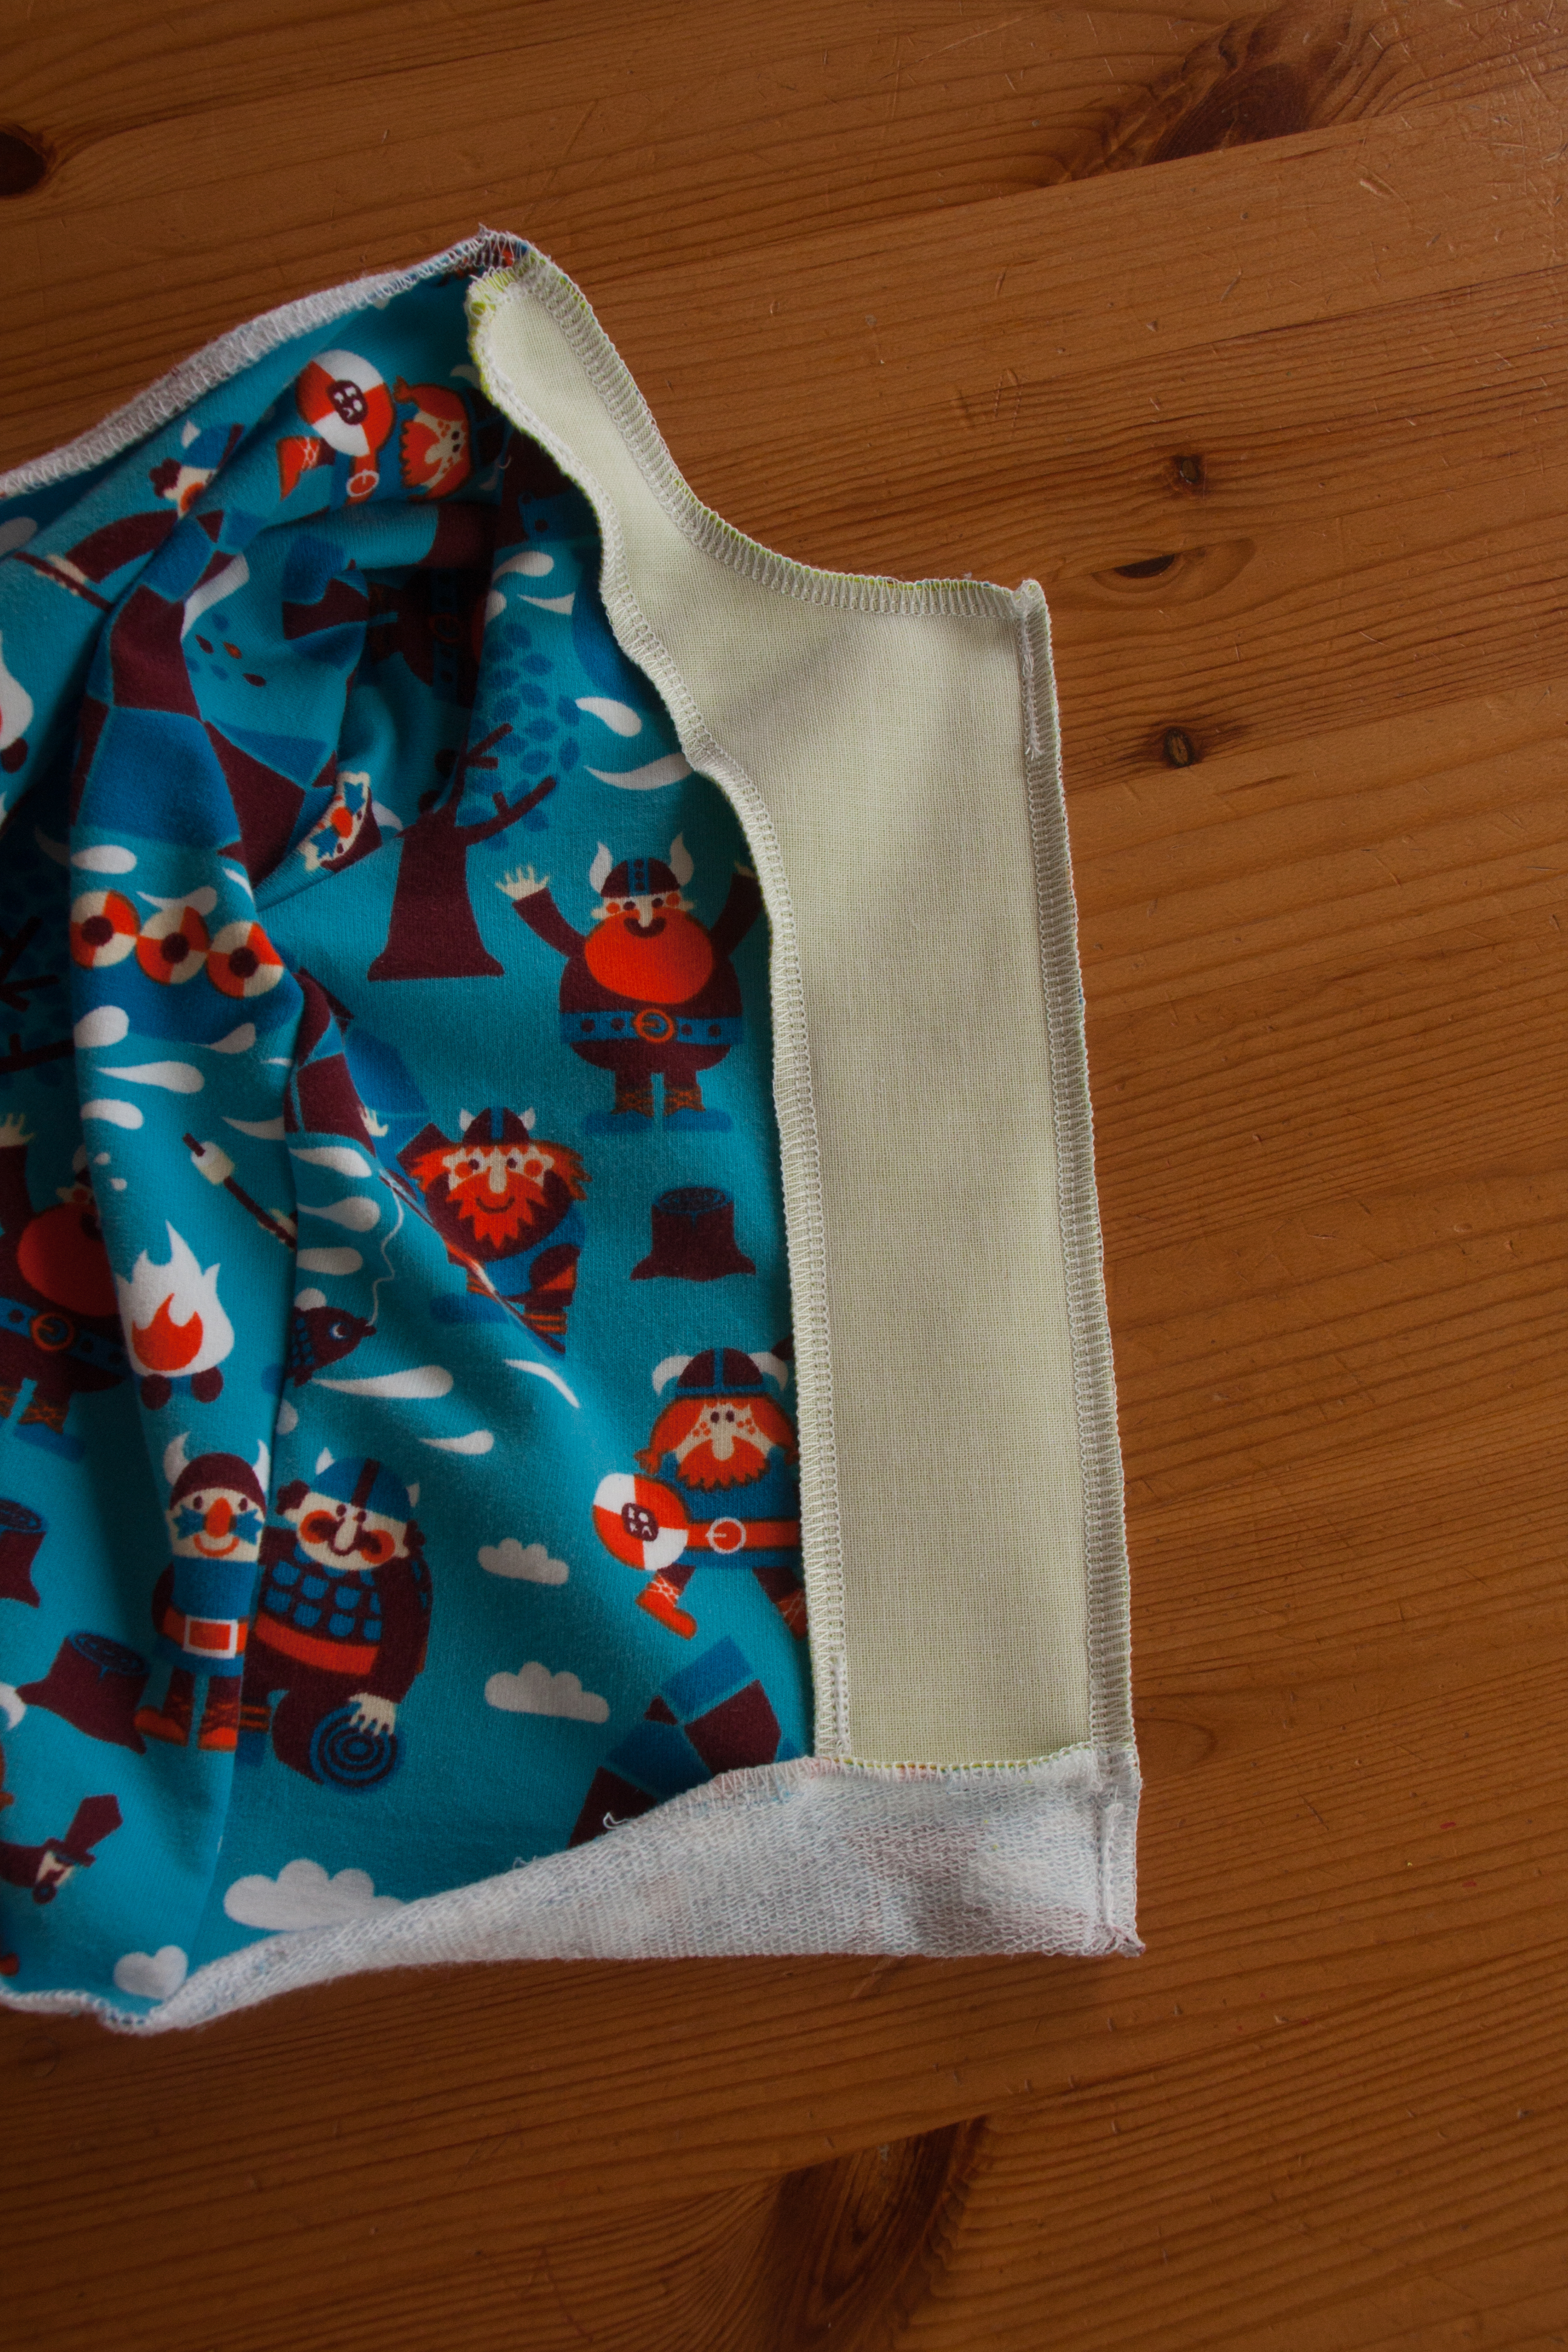
The most important modification from zip to buttons or snaps is obviously that the front pieces have to overlap rather than just meet in the centre. So I added 2cm to the original front pattern and the initial zip facing to make sure that I would have a wide enough button border.

IMG_3947

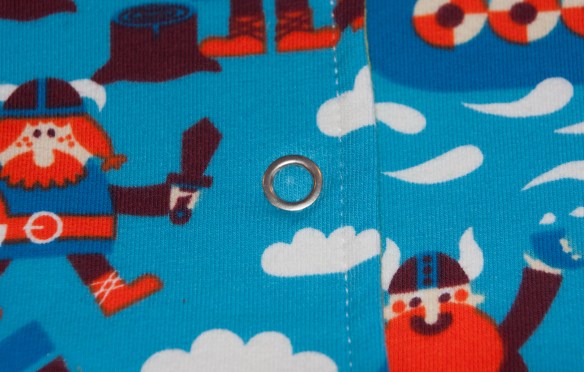
First jersey snaps of my life, 10mm from Prym, I think I want to find slightly smaller ones for those children clothes. Also, I need to get stronger, they are slightly on the loose side I think.

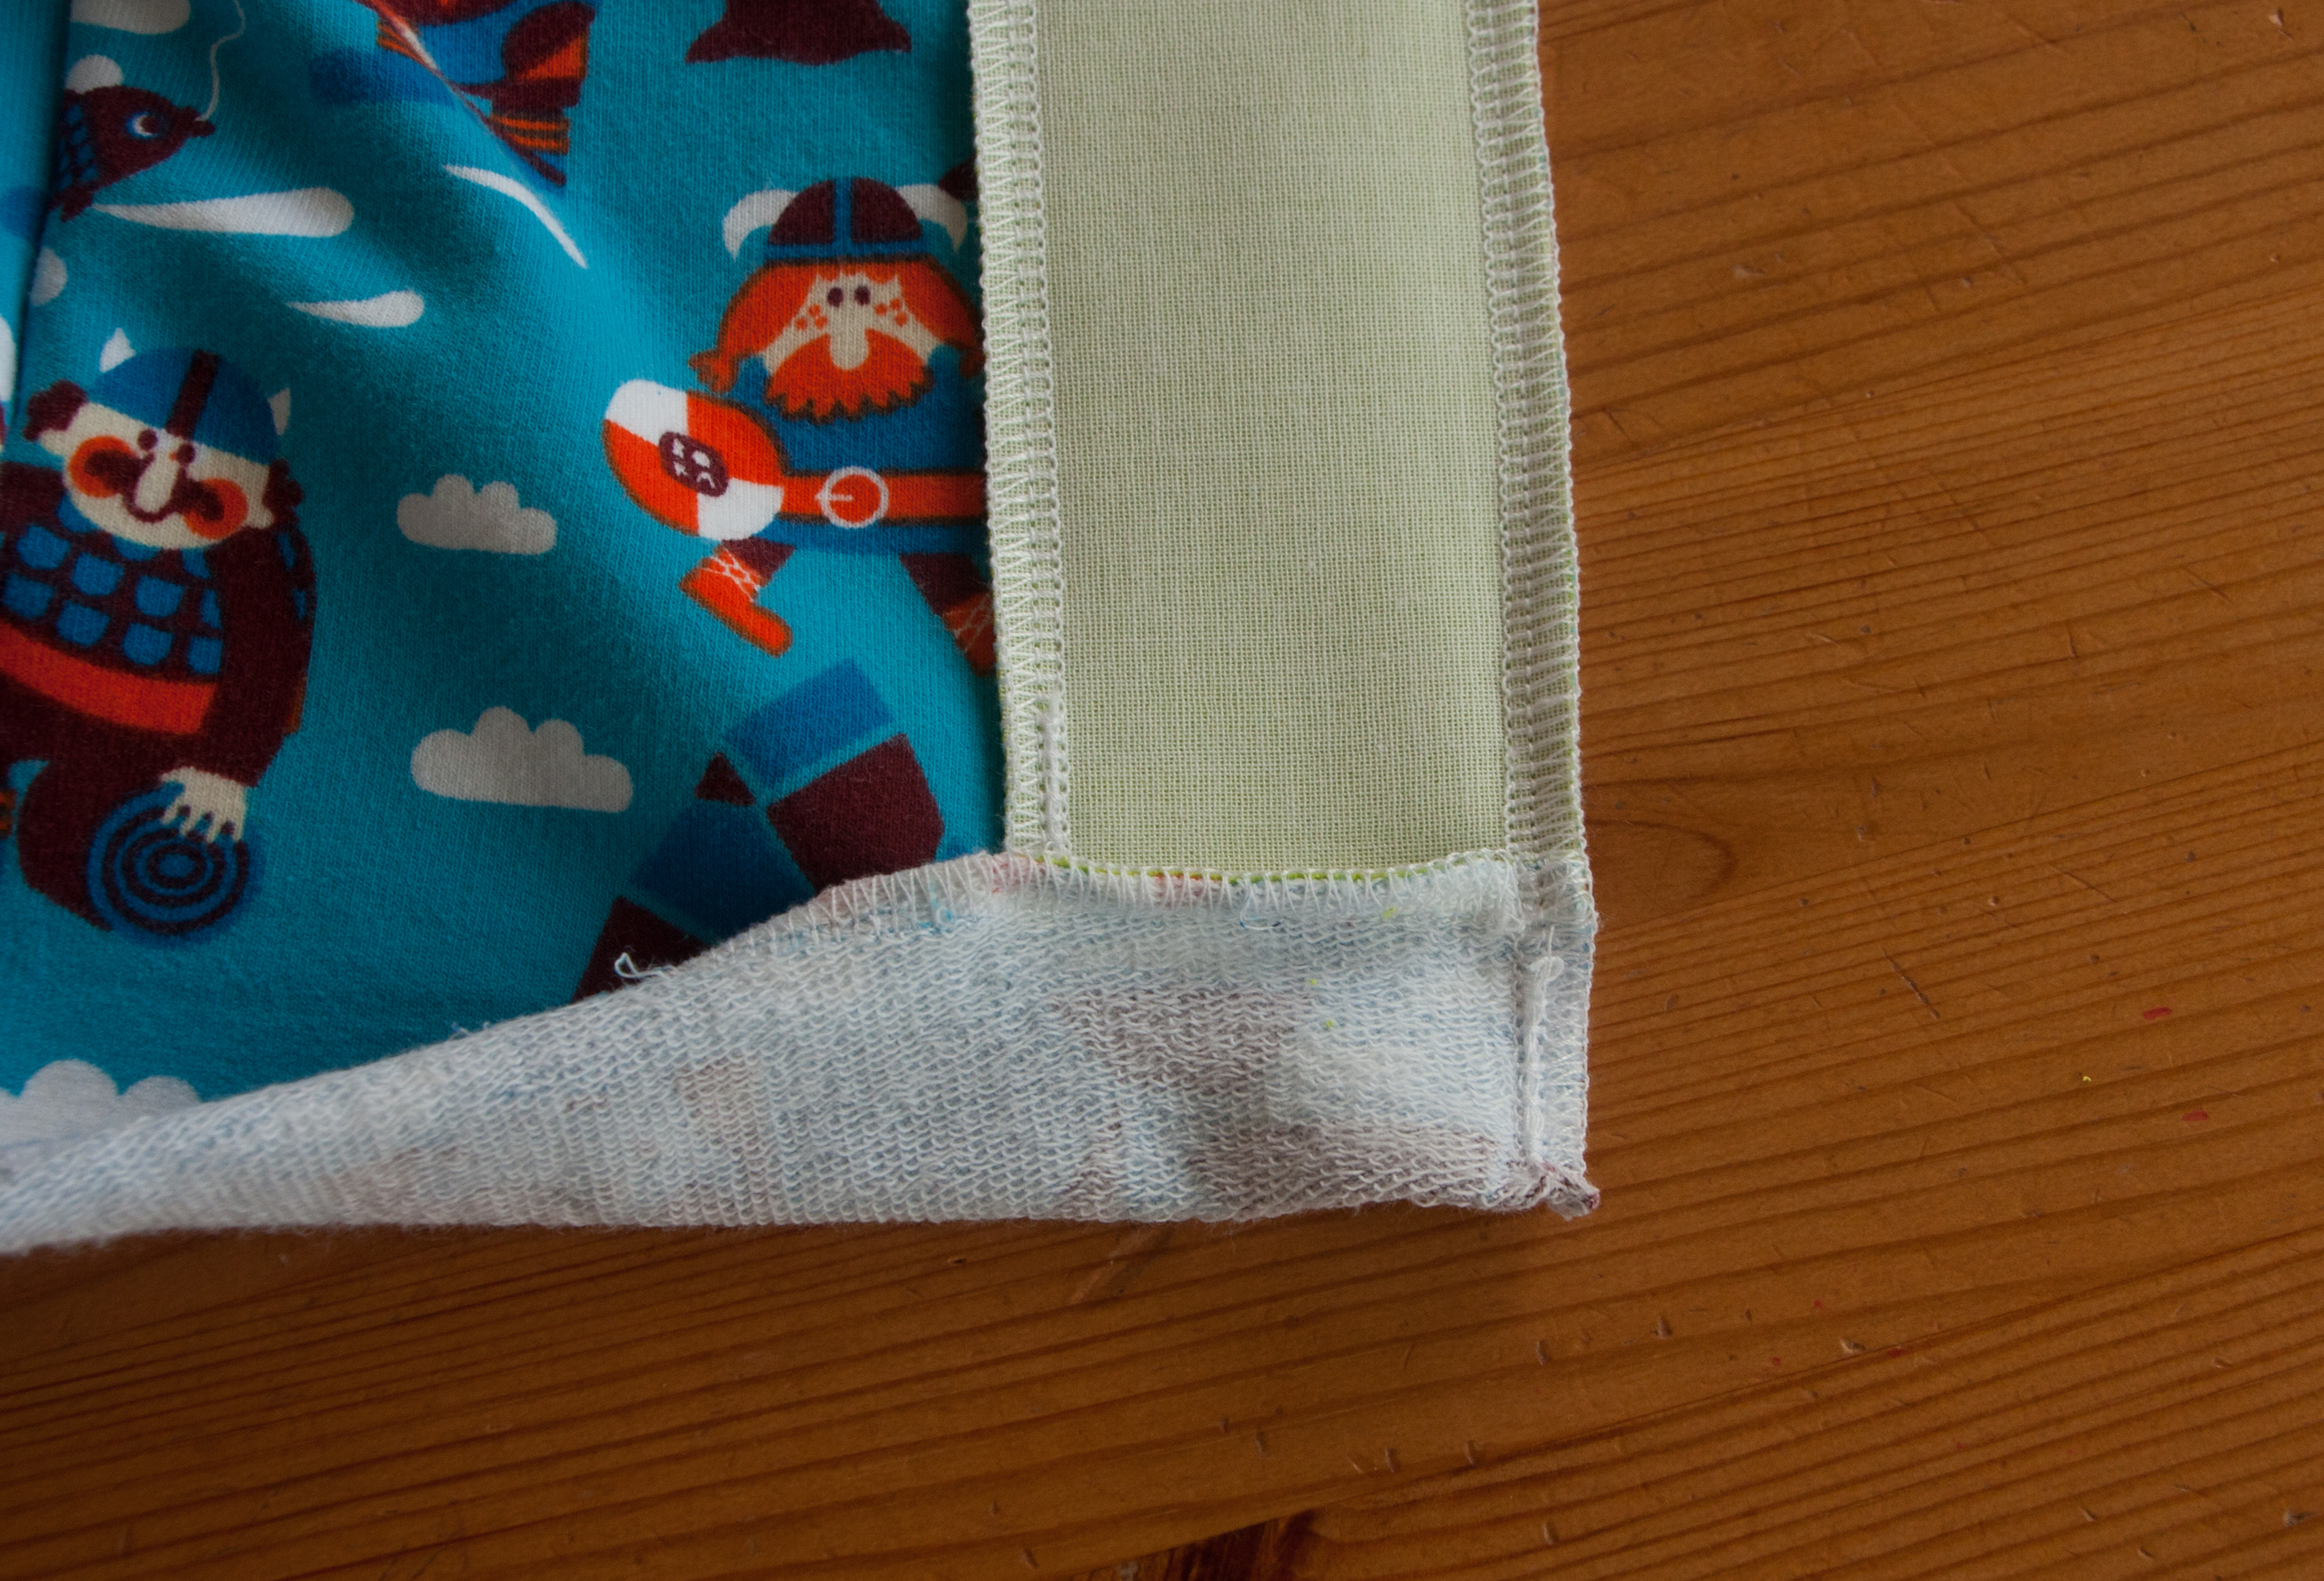
Instead of using a ribbing for waist and arms, I just added 2cm seam allowance, neatened the edges with the serger, whilst at the same time closed the seam between the button facing and the hem

IMG_3943

Usually I am using the twin needle to give the hem a professional finish…IMG_2277a

but as I have recently noticed that these seams seem to fall apart easily (not sure what I am doing wrong) I wanted to do something different and went for another stitch.

So, I ironed the hem to the back, estimating 2cm instead of using a ruler. But then suddenly I took it very seriously and actually tacked on the serged edge to give me a line to follow when sewing on the right side, making sure that I am really sewing on the serged edge… Which was a good plan but I never actually compared the ends of my tacked line and also got a bit caught up when finally topstitching it with my fancy stitch. So….. good idea but really bad execution led to this:

IMG_3950

Whilst I am really unhappy with the result (especially as this was a very obvious danger and something I knew about), I think that it has been a necessary mistake to be made once. And hopefully I will forever remember and for once really learn from it 🙂

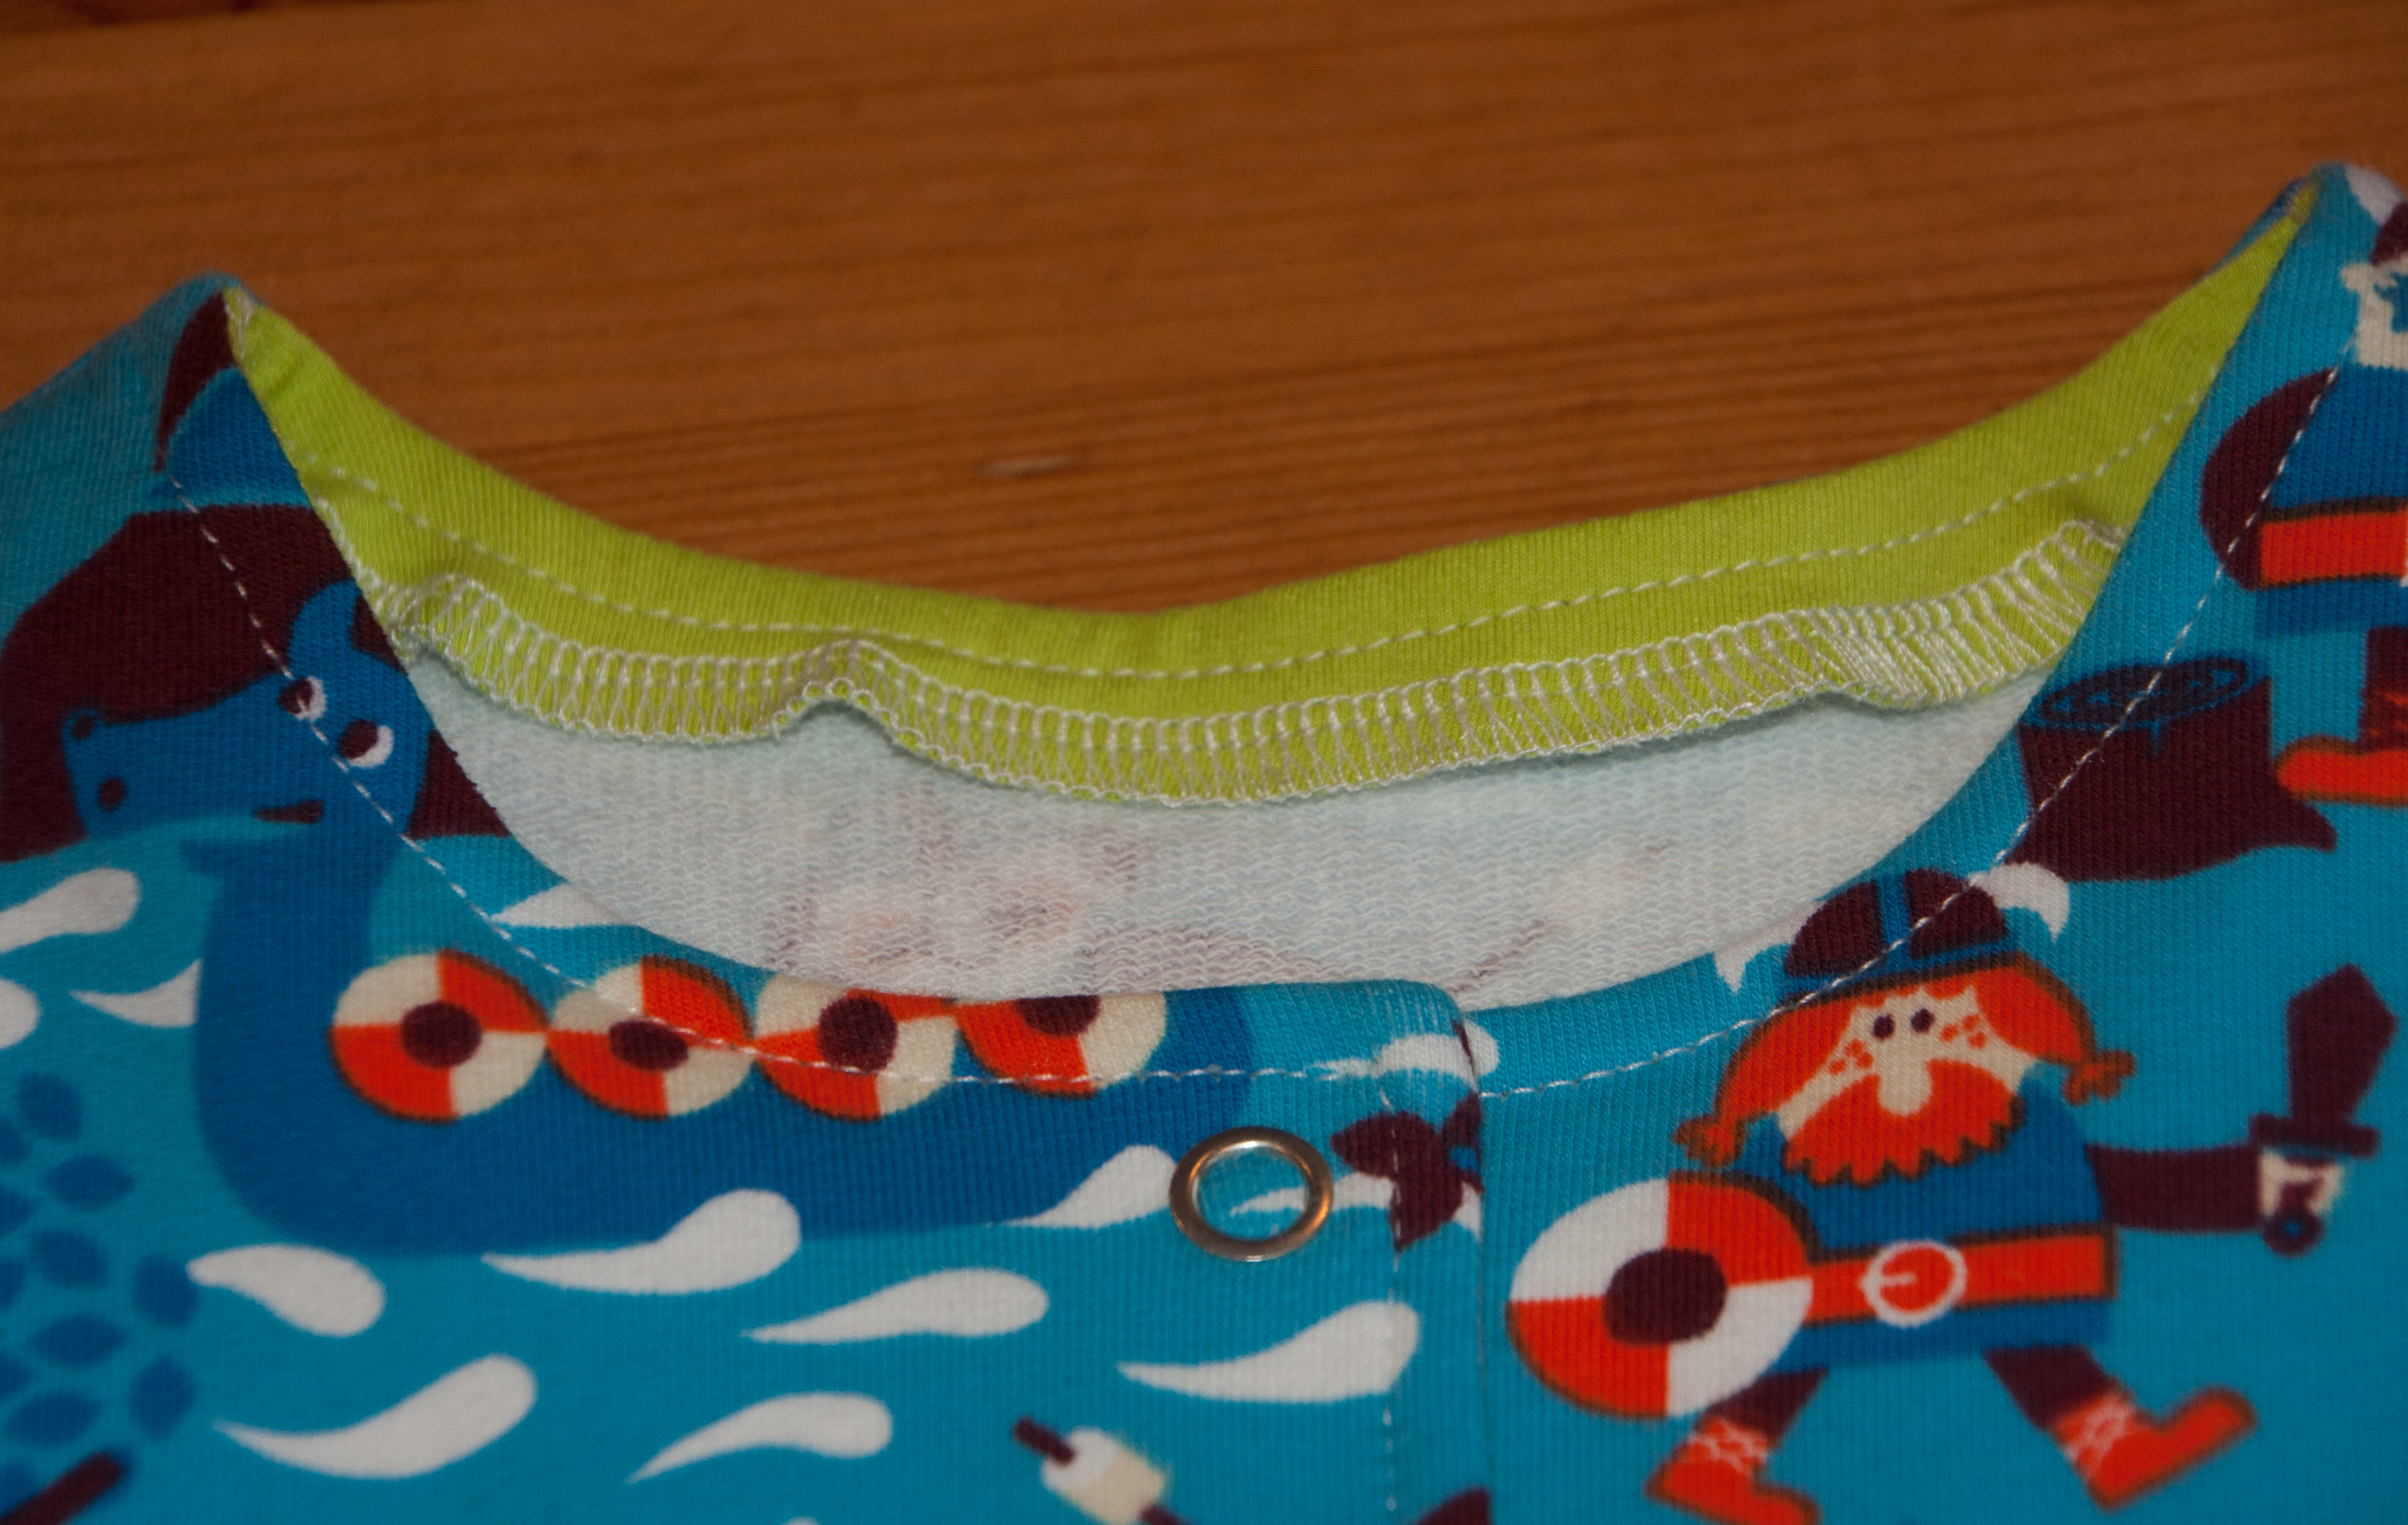
The other section that needed alteration was the neckline. My initial idea was to use the pattern for the hooded jacket and cut the neckline without seam allowance and to finish with some bias binding.  But when I stitched the facing to the front openings, I thought it would be clever to just continue the seam where the facing goes into the neckline to make the whole bias binding attaching more straight forward. Which was a big mistake. Obviously, if you are stitching facing to jacket right side to right side and then turn it,  you will loose the width of your seam. So there will be a gap  or maybe rather jump between the part of the neckline with facing and the part without facing. IMG_3941

It wasn’t a big deal, it just meant that my whole neckline became slightly wider (which does matter in the case of a tiny newborn jacket), but at the same time I realised that actually I would prefer a normal neckline with facing all around. So I copied the neckline from the pattern to make a back neckline and elongated it to hide the ends on the already existing neckline.IMG_3948

As the initial facing gets really narrow the result looks a bit silly. But again, the learning curve here is really steep. If I ever make a baby version of this jacket, I will make a proper facing, widening the neckline part of the button band facing and make it longer, to make sure it would go around the whole neck. This might result in a waist of fabric but I guess, once the pattern is perfect you could split it into three sections and safe some material.

Now that I have shared all my mistakes with you – maybe one last thing I would like to add: I made the smallest size 56 which corresponds to something like 1 month or 1-3, I forgot, but to me it looks really really huge. I don’t think it will fit for the next couple of months but I will find out I guess…. considering that I still need to get the future owner out, I am actually hoping it will only fit in a couple of months 🙂

Back to the start of my sentence: Now that I have shared all my mistakes with you, I would like to point out that I am still pleased with the result. I kind of want to make another one just to see that correcting the mistakes will lead to a perfect baby jacket but then we won’t need two of these. Maybe someone else could step in and use my mistakes to make their own perfect baby jacket, please?
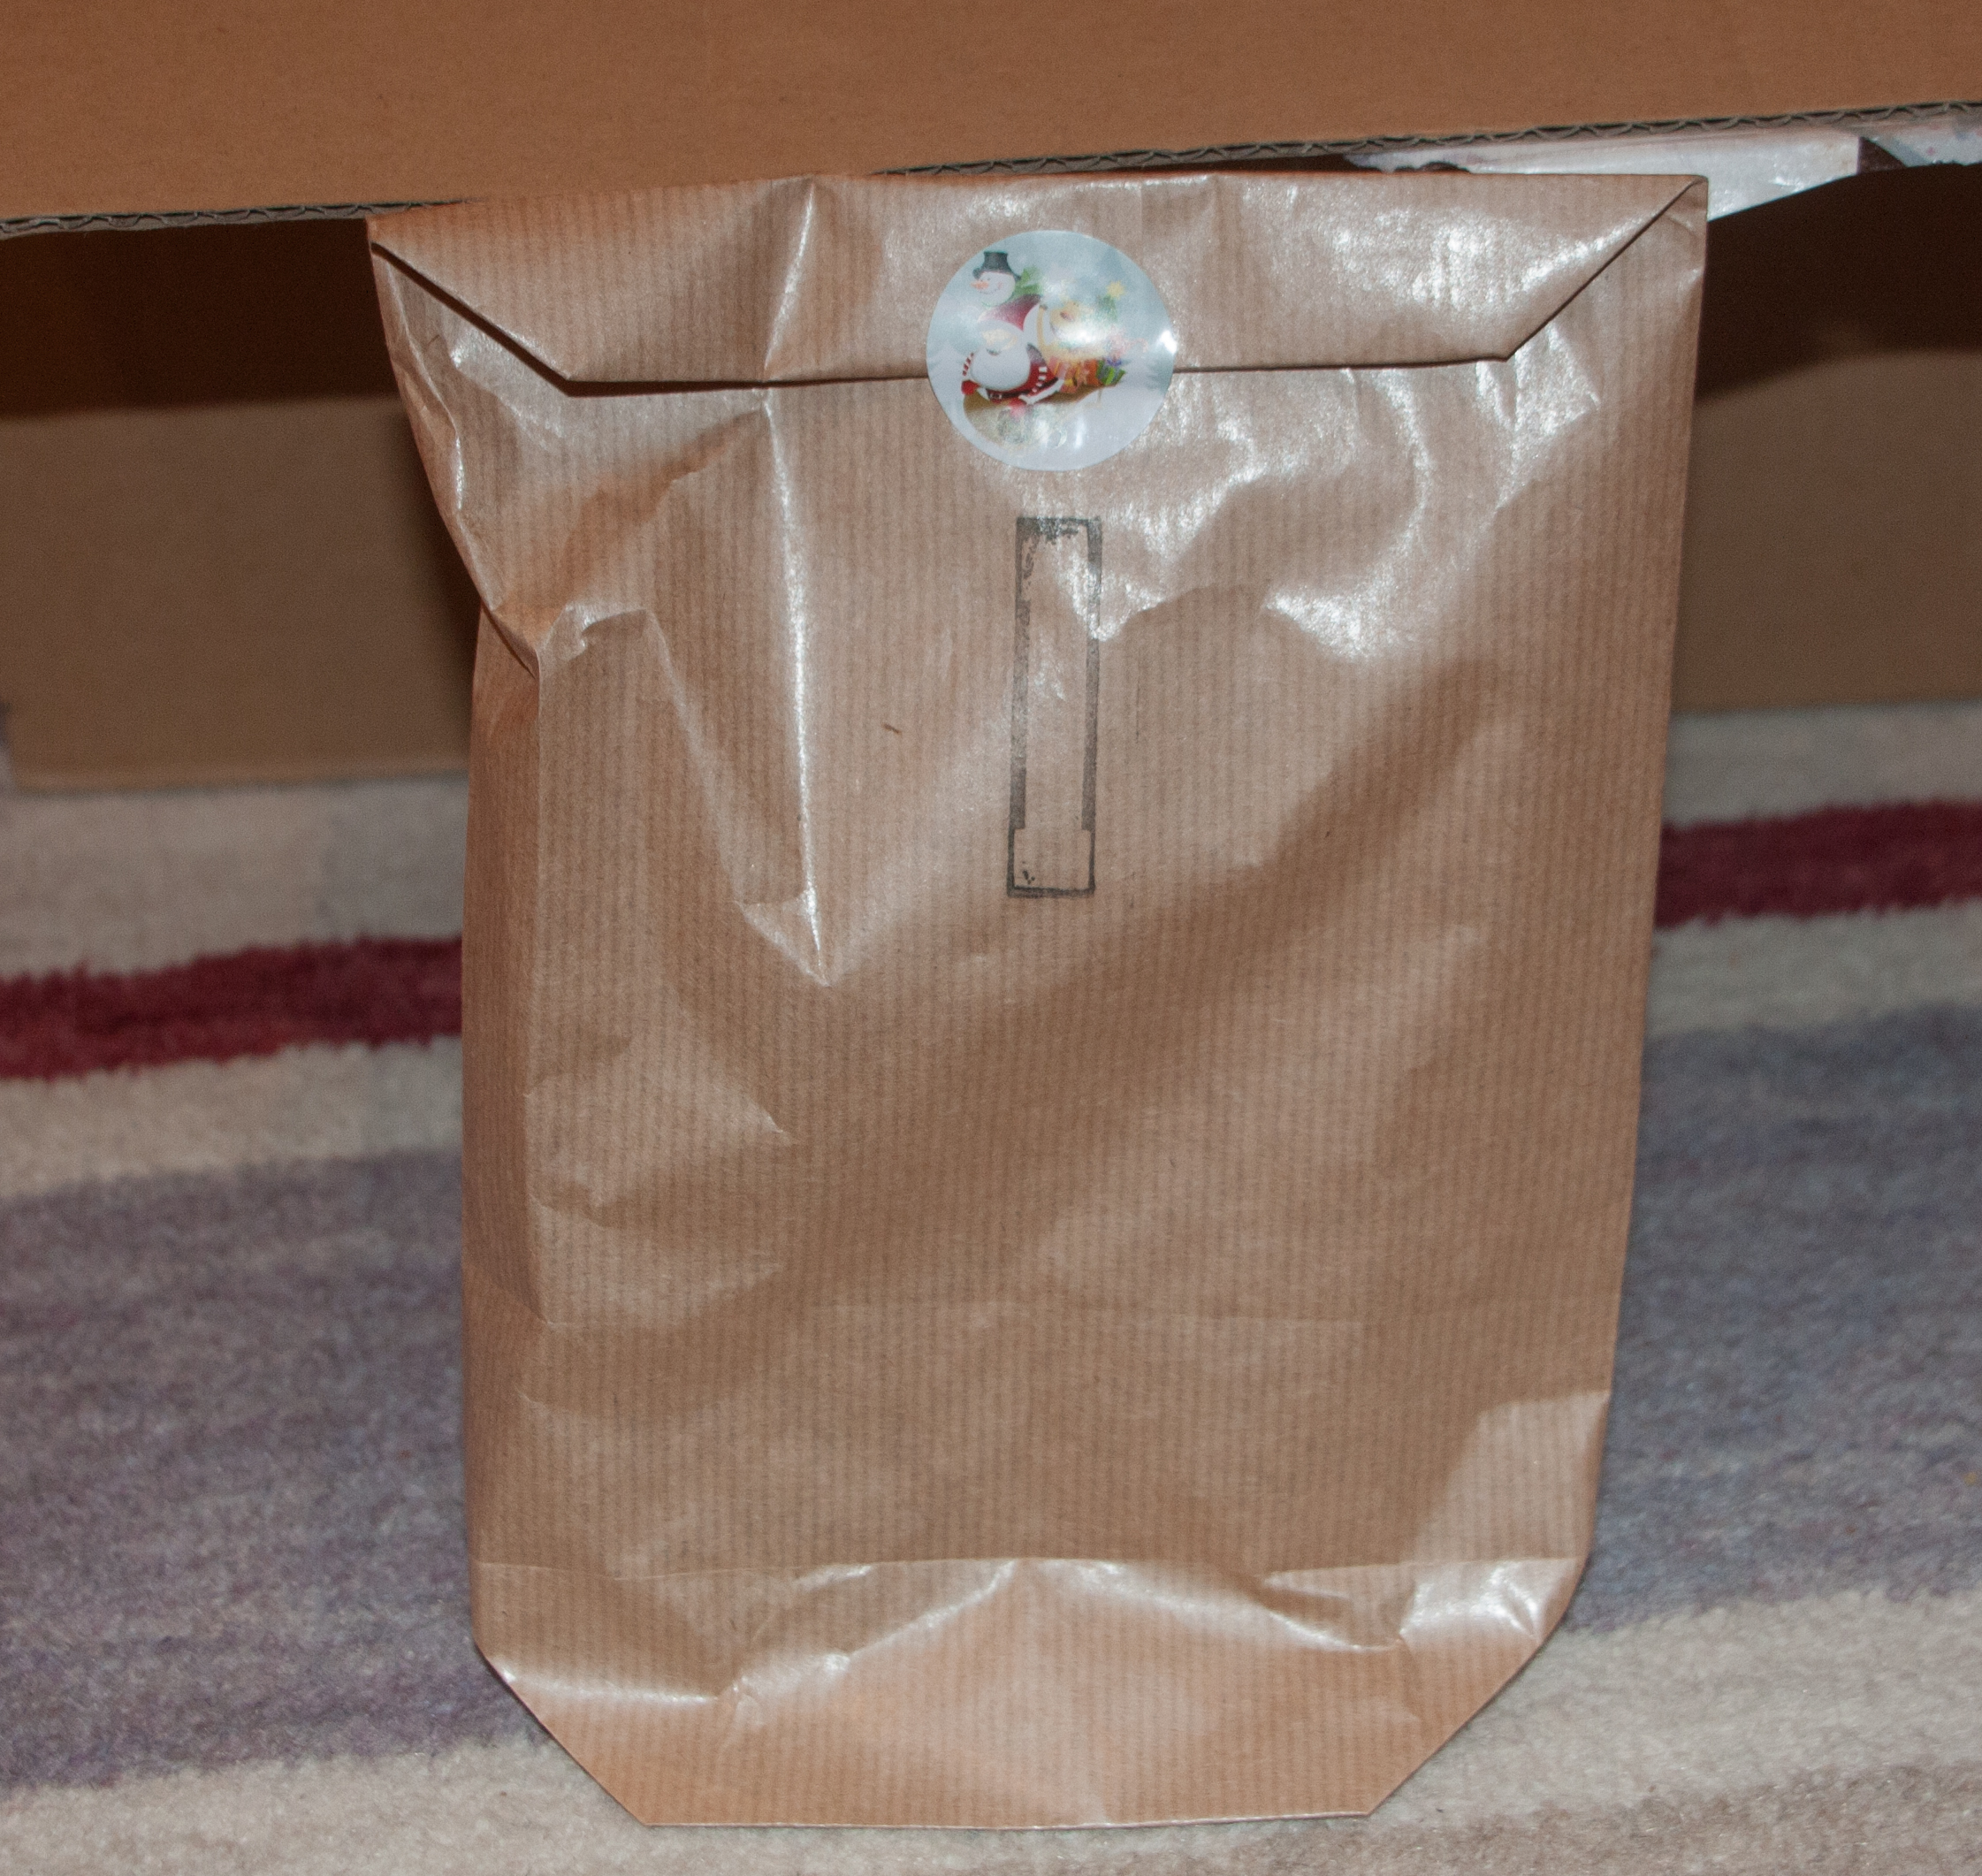


Scrap Sunday: The doll carrier

I am currently writing this post whilst waiting for a couple of babies joining the family. I am scheduling it (the post, not one of the babies) for Sunday, so when you are reading it, we might not be waiting anymore 🙂

Anyway, I made a doll carrier for the soon-to-be big sister of my future nephew and I am quite pleased with it. And I am not the only one, in fact I have already gotten complaints why ours is not so pretty. For the record, 4 years ago, I was running through all the fabric shops in Shepherds Bush to find the requested “airplane” fabric for the doll carrier of a certain young lady. Which then really wasn’t cheap. But I guess, taste can change, particularly if you are not 2 anymore but 6. And I have to agree, we chose really nice fabrics (you might recognise them from other projects) for this one.

I think this carrier is suitable for slightly younger children, so the straps look a bit out of proportion on the following picture because of the model being a bit taller. Or should the strap be fixed slightly deeper? Maybe.

IMG_3873

The carrier can be worn in front or at the back.IMG_3874

I made the straps a bit longer, same for the waist strap as it was already a bit tight on my children, depending on what they are wearing and they actually tend to be on the slimmer side.

I found the ebook initially on Etsy (at the time not even knowing what Etsy was) and whilst I am happy that I found it there, I would do a few things differently next time. Which I would like to point out (to myself) as I am sure that 4 years ago I had already thought the same but didn’t remember it this time round.

When you print out the pattern, the line is actually a couple of mm thick so it is hard to know where to cut to make sure that the straps will match their positions on the main body. Also, I couldn’t read what seam allowance is included, I do think it is meant to be 1/4 in.

IMG_3871

The pocket fabric is folded, which is a bit too stiff if you are using a thicker cotton as I did in this case but perfectly fine when using a thinner material.

I struggled quite a bit with the waist. First of all the little curve between waistband and main body but also where the waist thingy joins the strap. In the pattern the waist thingy doesn’t end in a straight line but in a slightly sloped line so I have now an edge in between the main waist thingy and the strap which doesn’t make much sense. So next time, I will have to make sure that I even this out when placing the strap:

IMG_3872The waist strap is closed with a proper side release buckle, but the shoulder ones only by sliding the strap through a bar slide buckle which I find a bit too loose. In the case of the pictured carrier it is actually ok as the material is a bit thicker and I made the straps on purpose a tiny bit wider but the first one was made of a rather thin cotton and the straps just didn’t stay in place. So maybe a proper buckle like for the waist might be better. But then it means that the carrying child needs a lot more help to get it on an off. So the loose version might be the better option anyway.

The e-book itself is done very thoroughly, lots of pictures and explanations, I was actually a bit overwhelmed and maybe for me personally, a little less would have been better. I guess this is due to me struggling a bit with many unfamiliar terms on one hand but maybe spreading the whole thing out on more pages would have been good… Which makes me realise that I tend to squeeze things when writing patterns to save paper. So this is another lesson learnt, I hope.

I didn’t mean to criticize the e-book as it helped me make already three wonderful doll carriers but for me personally there are a few things that I would do differently and hopefully these comments will help me or anybody else when using the pattern next time.