Progress update

I have started to write this progress update a few days ago, before the shockingย  attacks in Paris and initially I found it inappropriate to post about silly things like crafts as if nothing has happened. But I guess it is the opposite, we can’t stop doing the things that we like doing. A lot did happen and it doesn’t only concern people in Paris or France. It concerns all of us and the European idea of humanity, no borders, freedom and tolerance has been threatened once again (in addition to the inability of the political system to deal with the refugee crisis with dignity and as a unity).

So my thoughts are with those who have lost innocent family members or friends who were enjoying a nice time out. I really hope together we will manage to ensure a future for our children in a world of freedom and tolerance.

Following the progress post as I had initially written it – happiness and sadness so close together.

Once again, I have missed one or two posts on Sunday, but I have been rather busy lately and I guess, it is time to update you a bit.

So, as you might remember, the extended family has been waiting for a couple of babies to arrive and I am pleased to say that they finally did. One more finally than the other.

Whilst I was busy waiting and my mum – who had come over to be on stand by for childcare – was busy rescheduling and rescheduling her flight back home, I made a few little things to keep my mind off the waiting game.

So, I have started to use up the left overs from the baby blankets – I still haven’t written a proper post about them, have I? But you might remember this progress picture:

IMG_3866

Anyway, I have started to knit cardigans, using a wrongly ordered blue merino (the colour was too close to the dark blue one I had already bought) as a base colour, adding some stripes in the blanket left overs. A third one with green stripes is still in the making.

IMG_4044

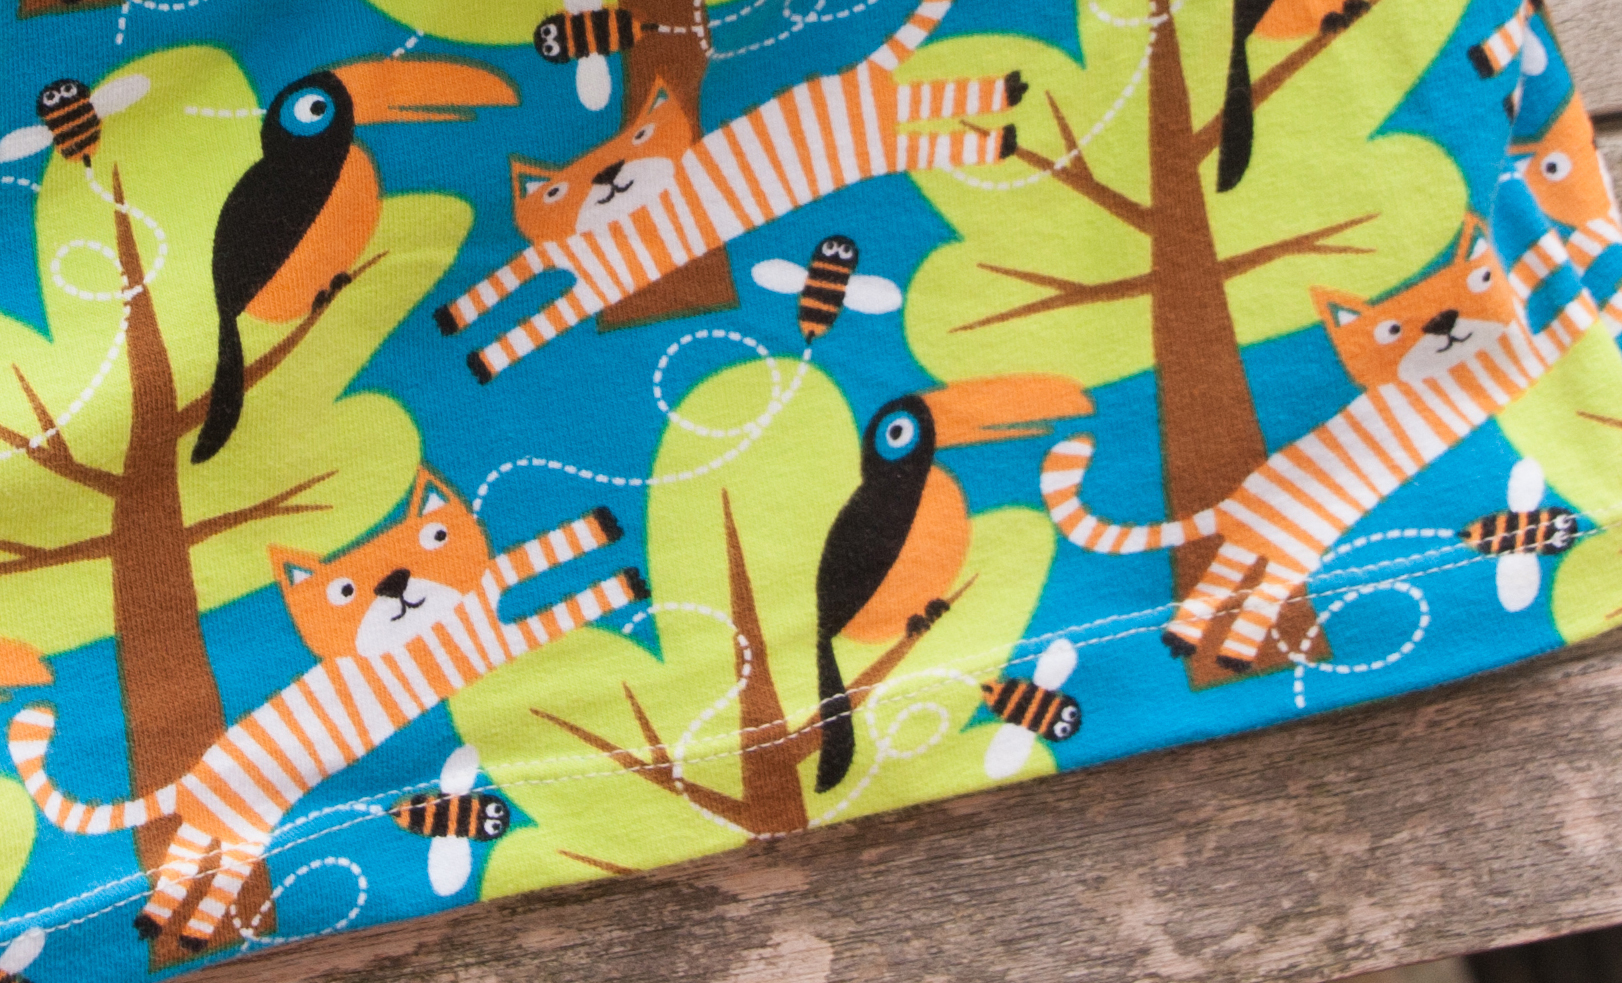
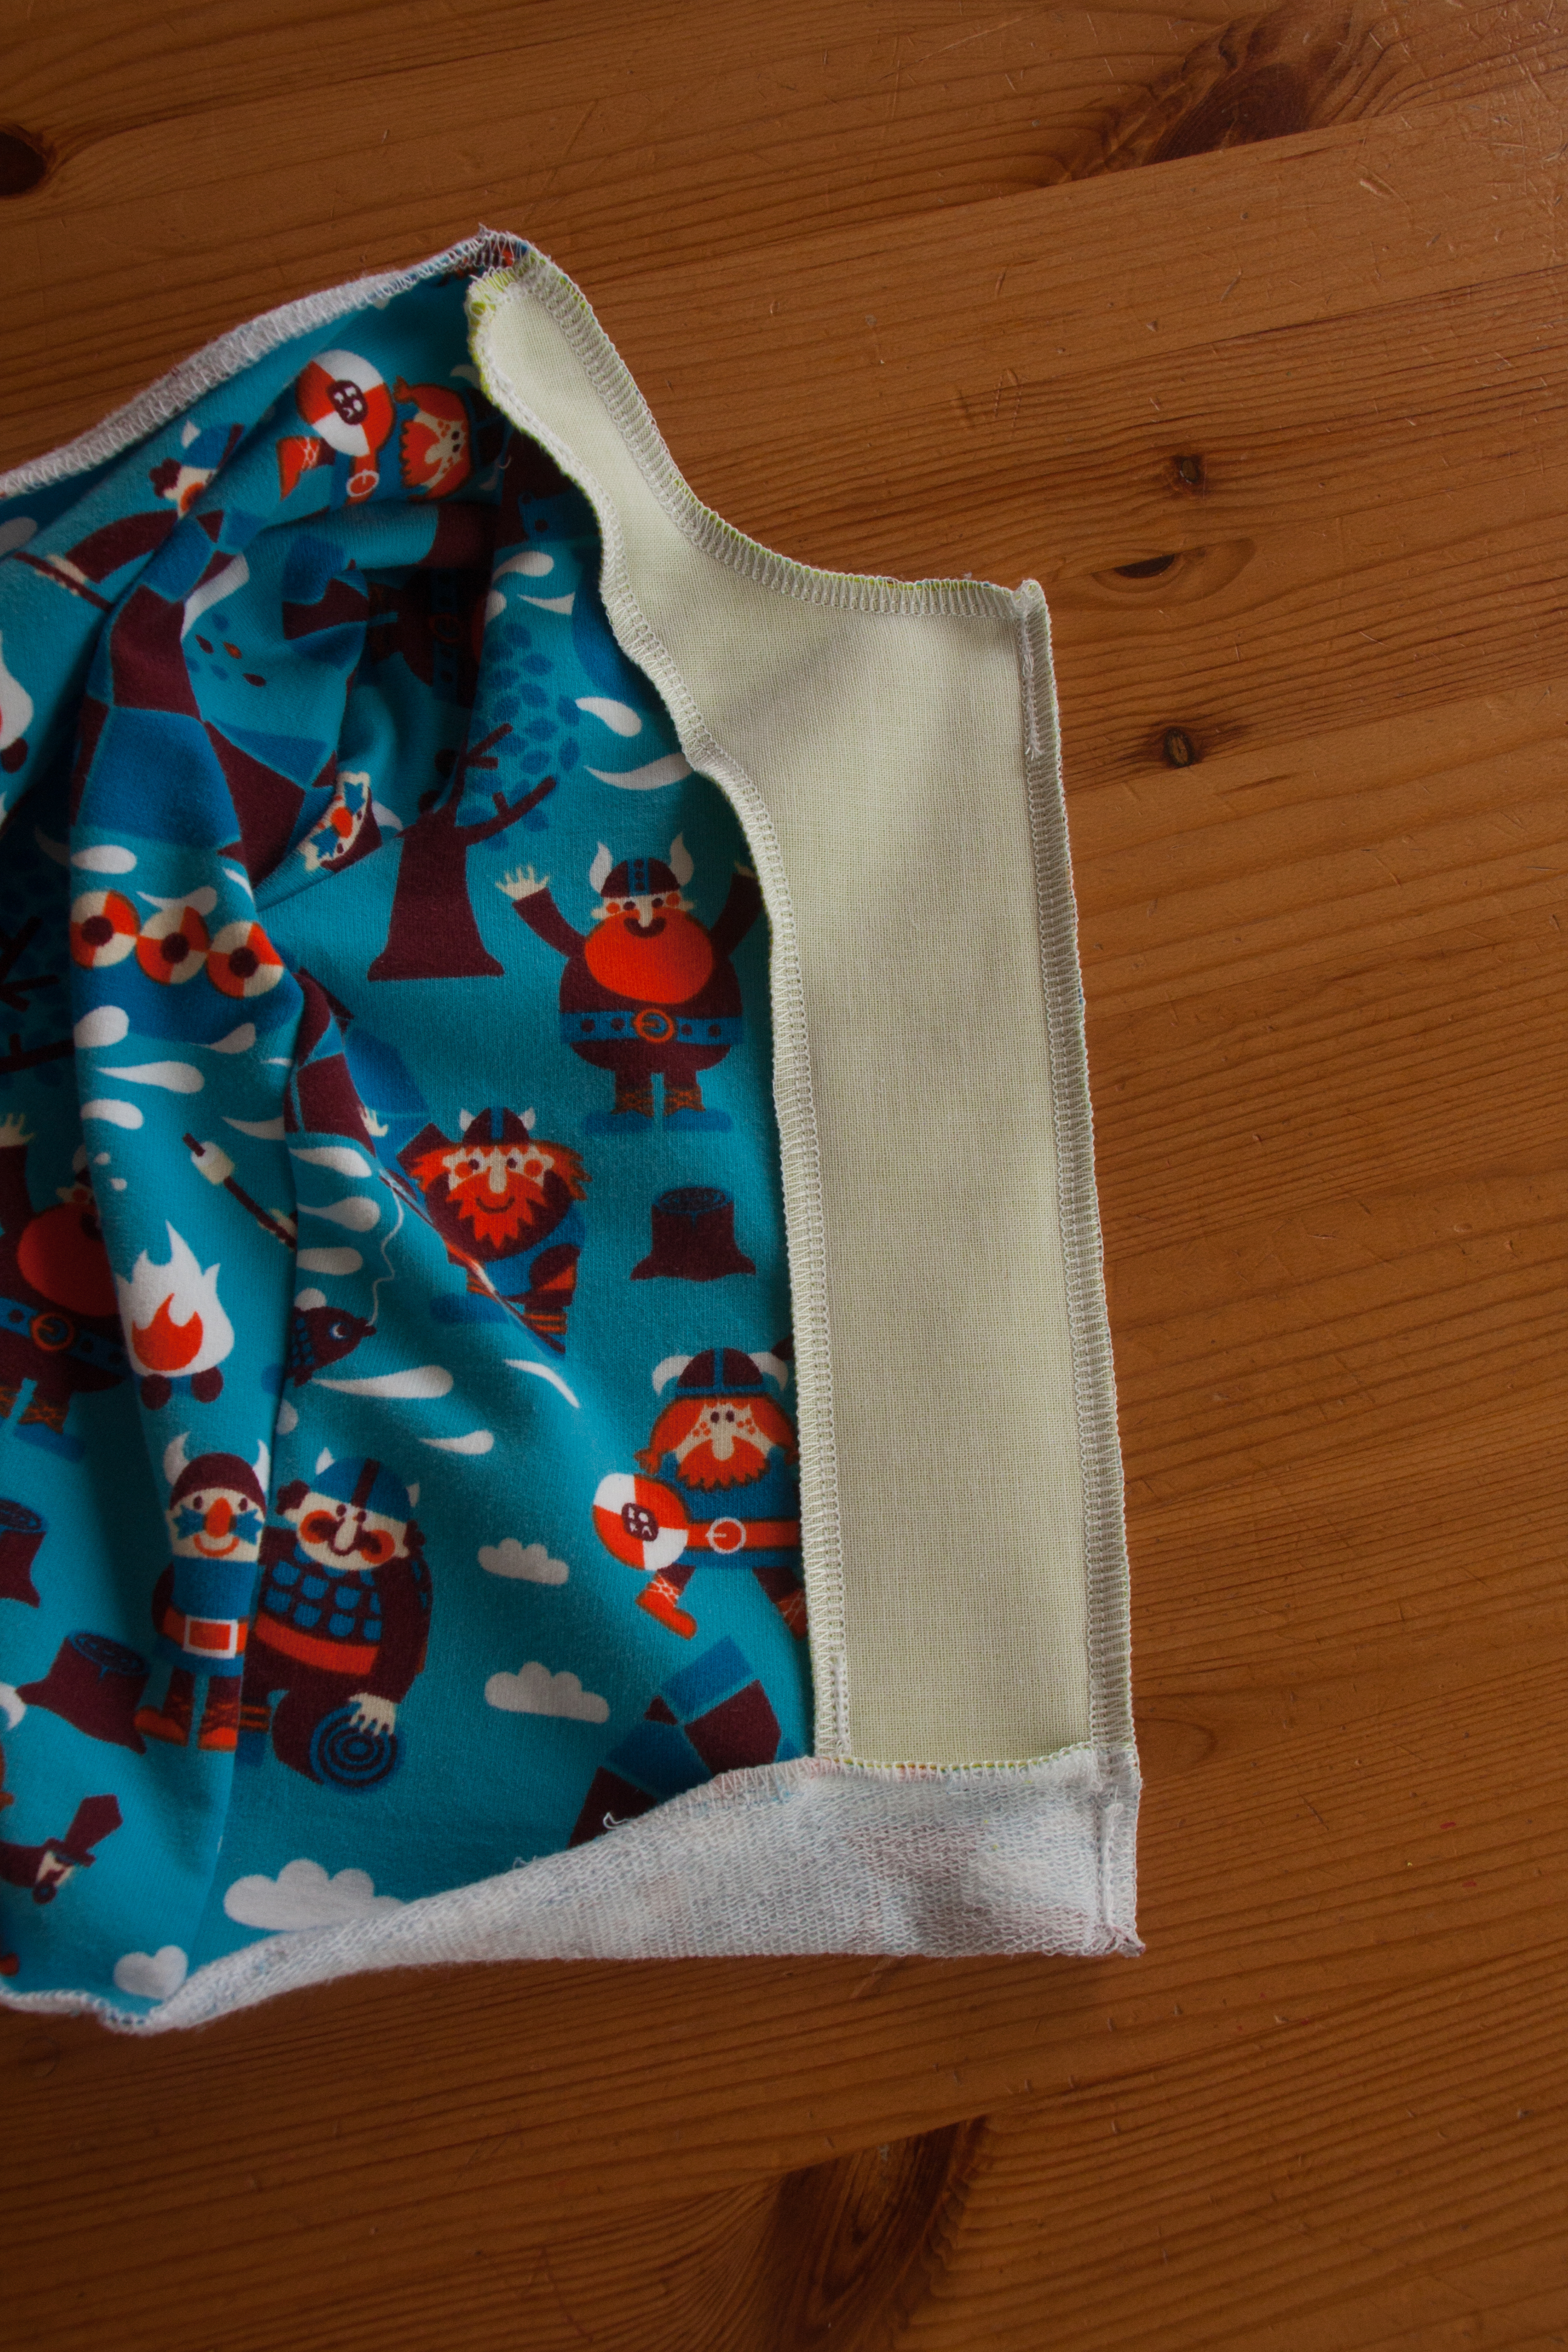
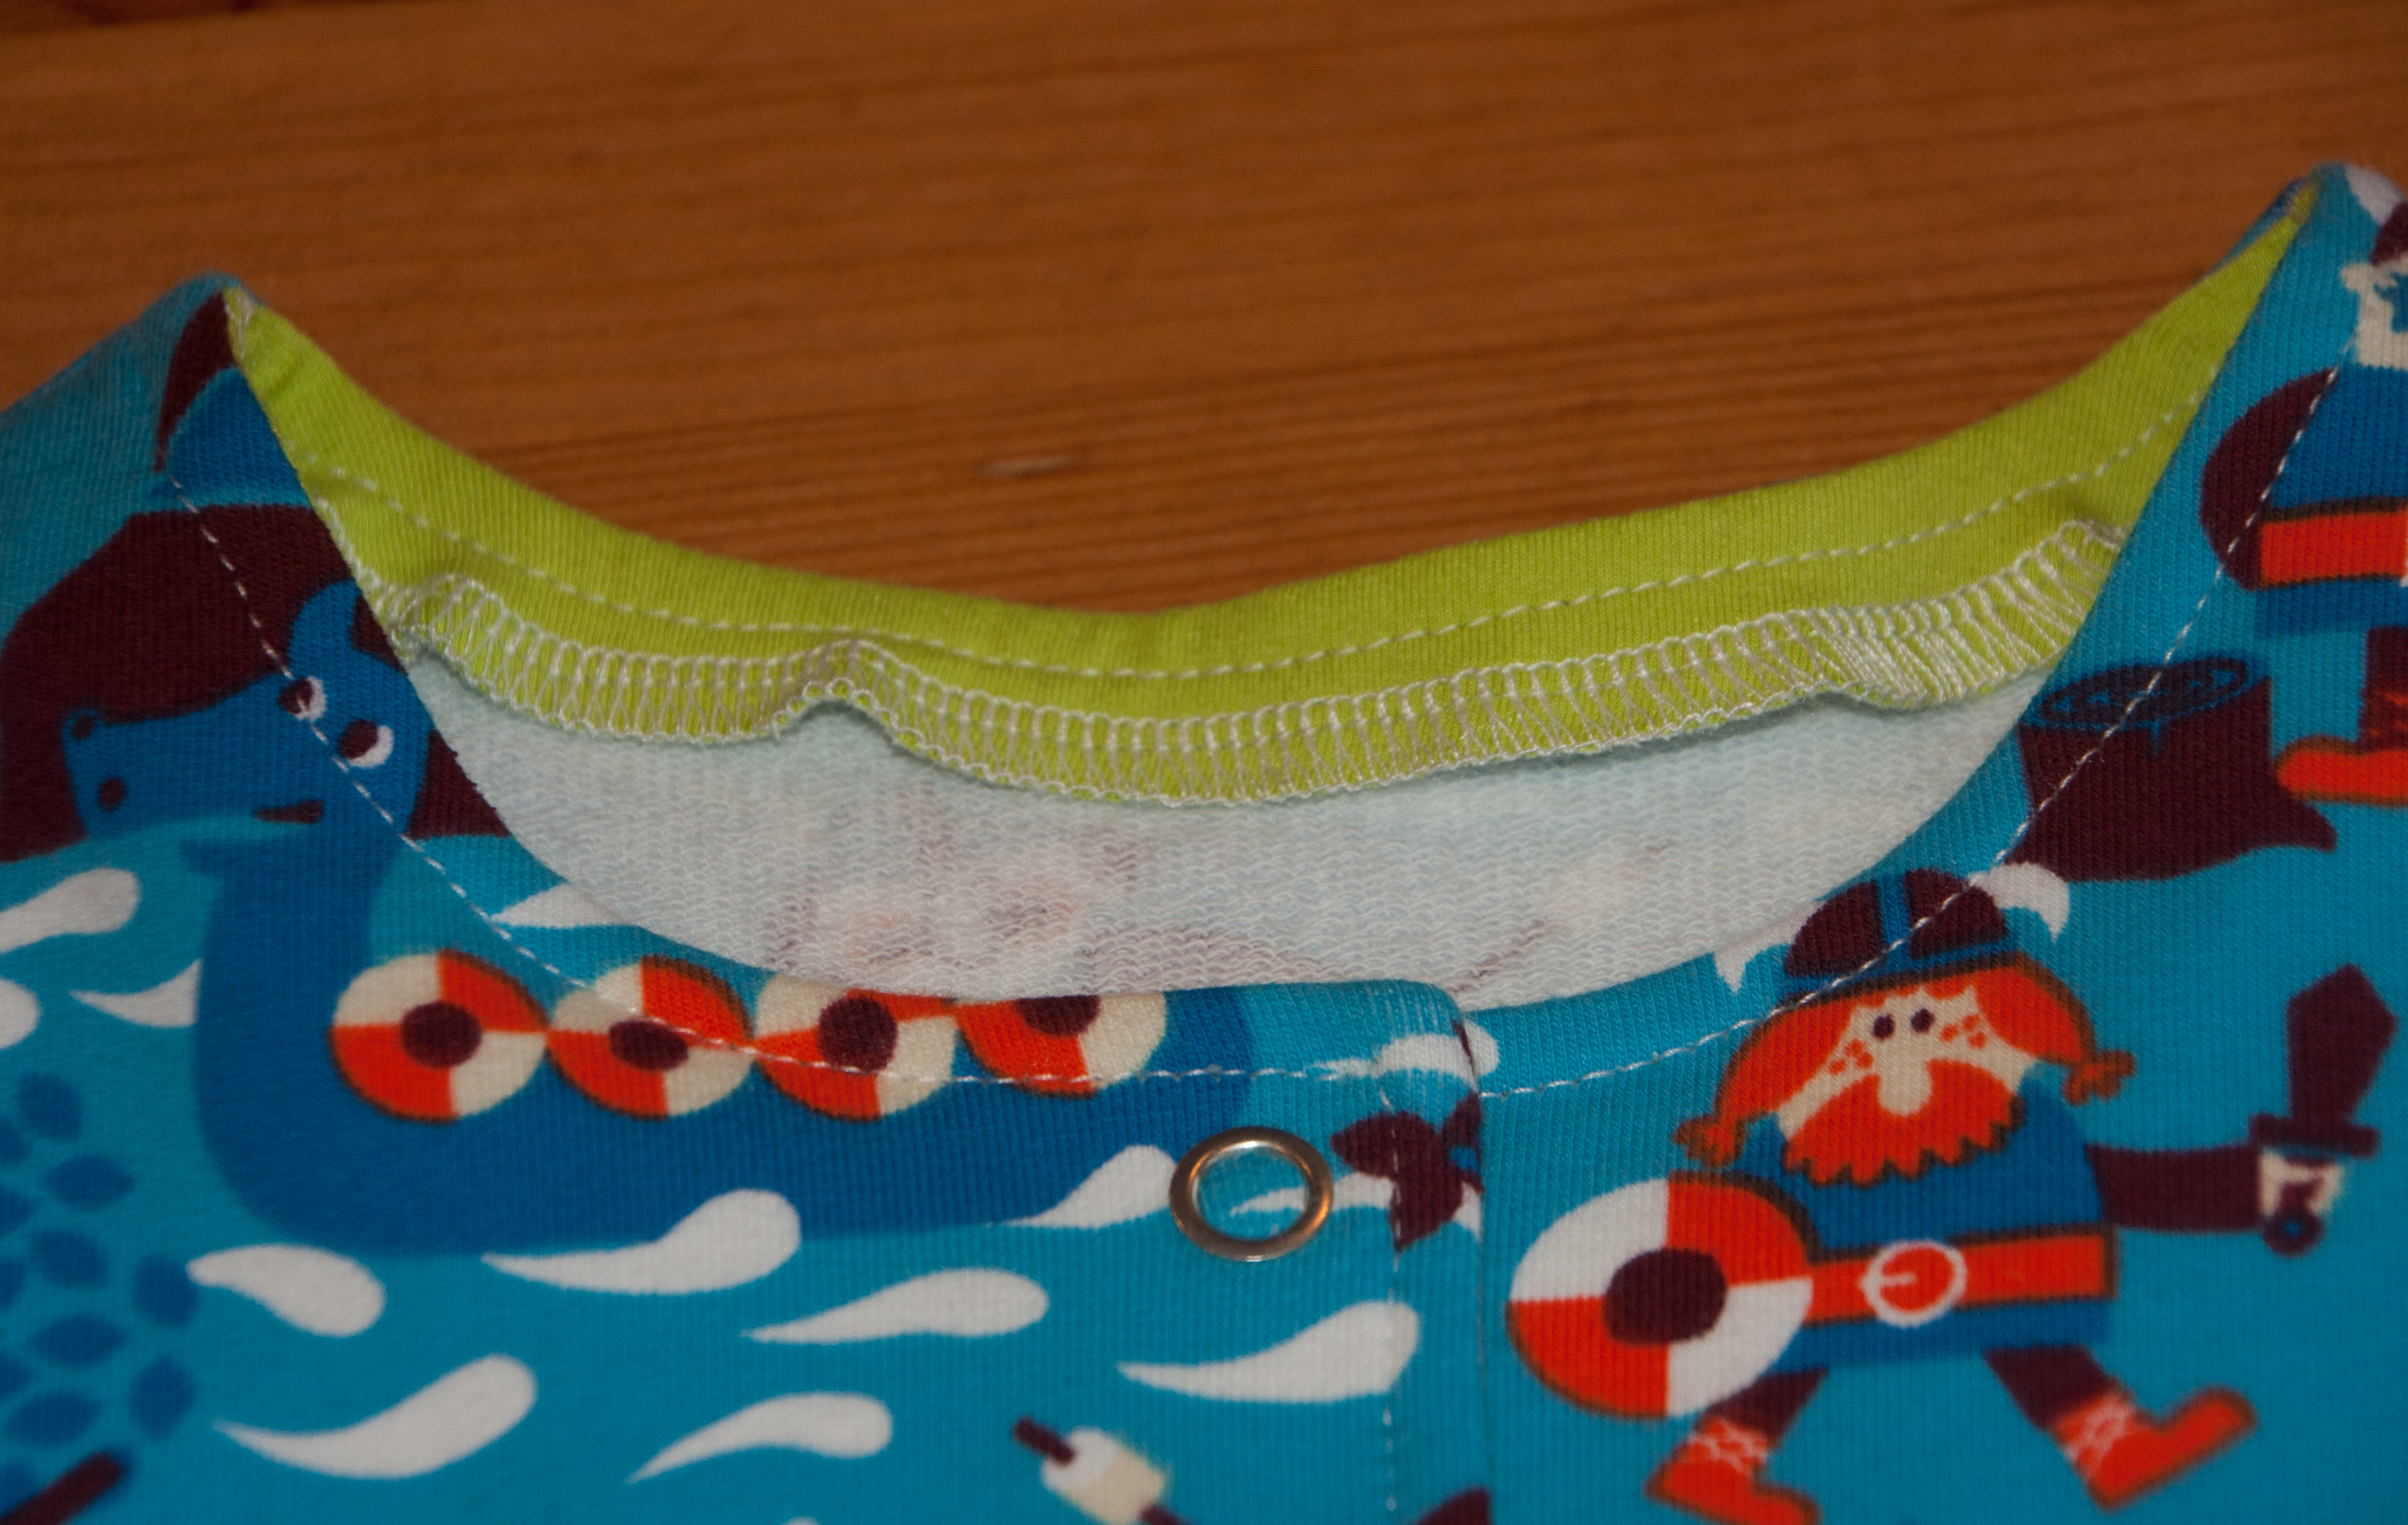
I also made a few more hats for my nephew and nieces using up some jersey. They requested beanies and as I am obsessed with the idea of reversible hats (no ugly seams inside plus getting to use two lovely fabrics instead of just one), I went for the version with ribbing at the bottom. I am not entirely convinced about the ribbing but I haven’t seen them on the heads in question. The pattern is the same klimperklein e-book as before.

IMG_4032 IMG_4038

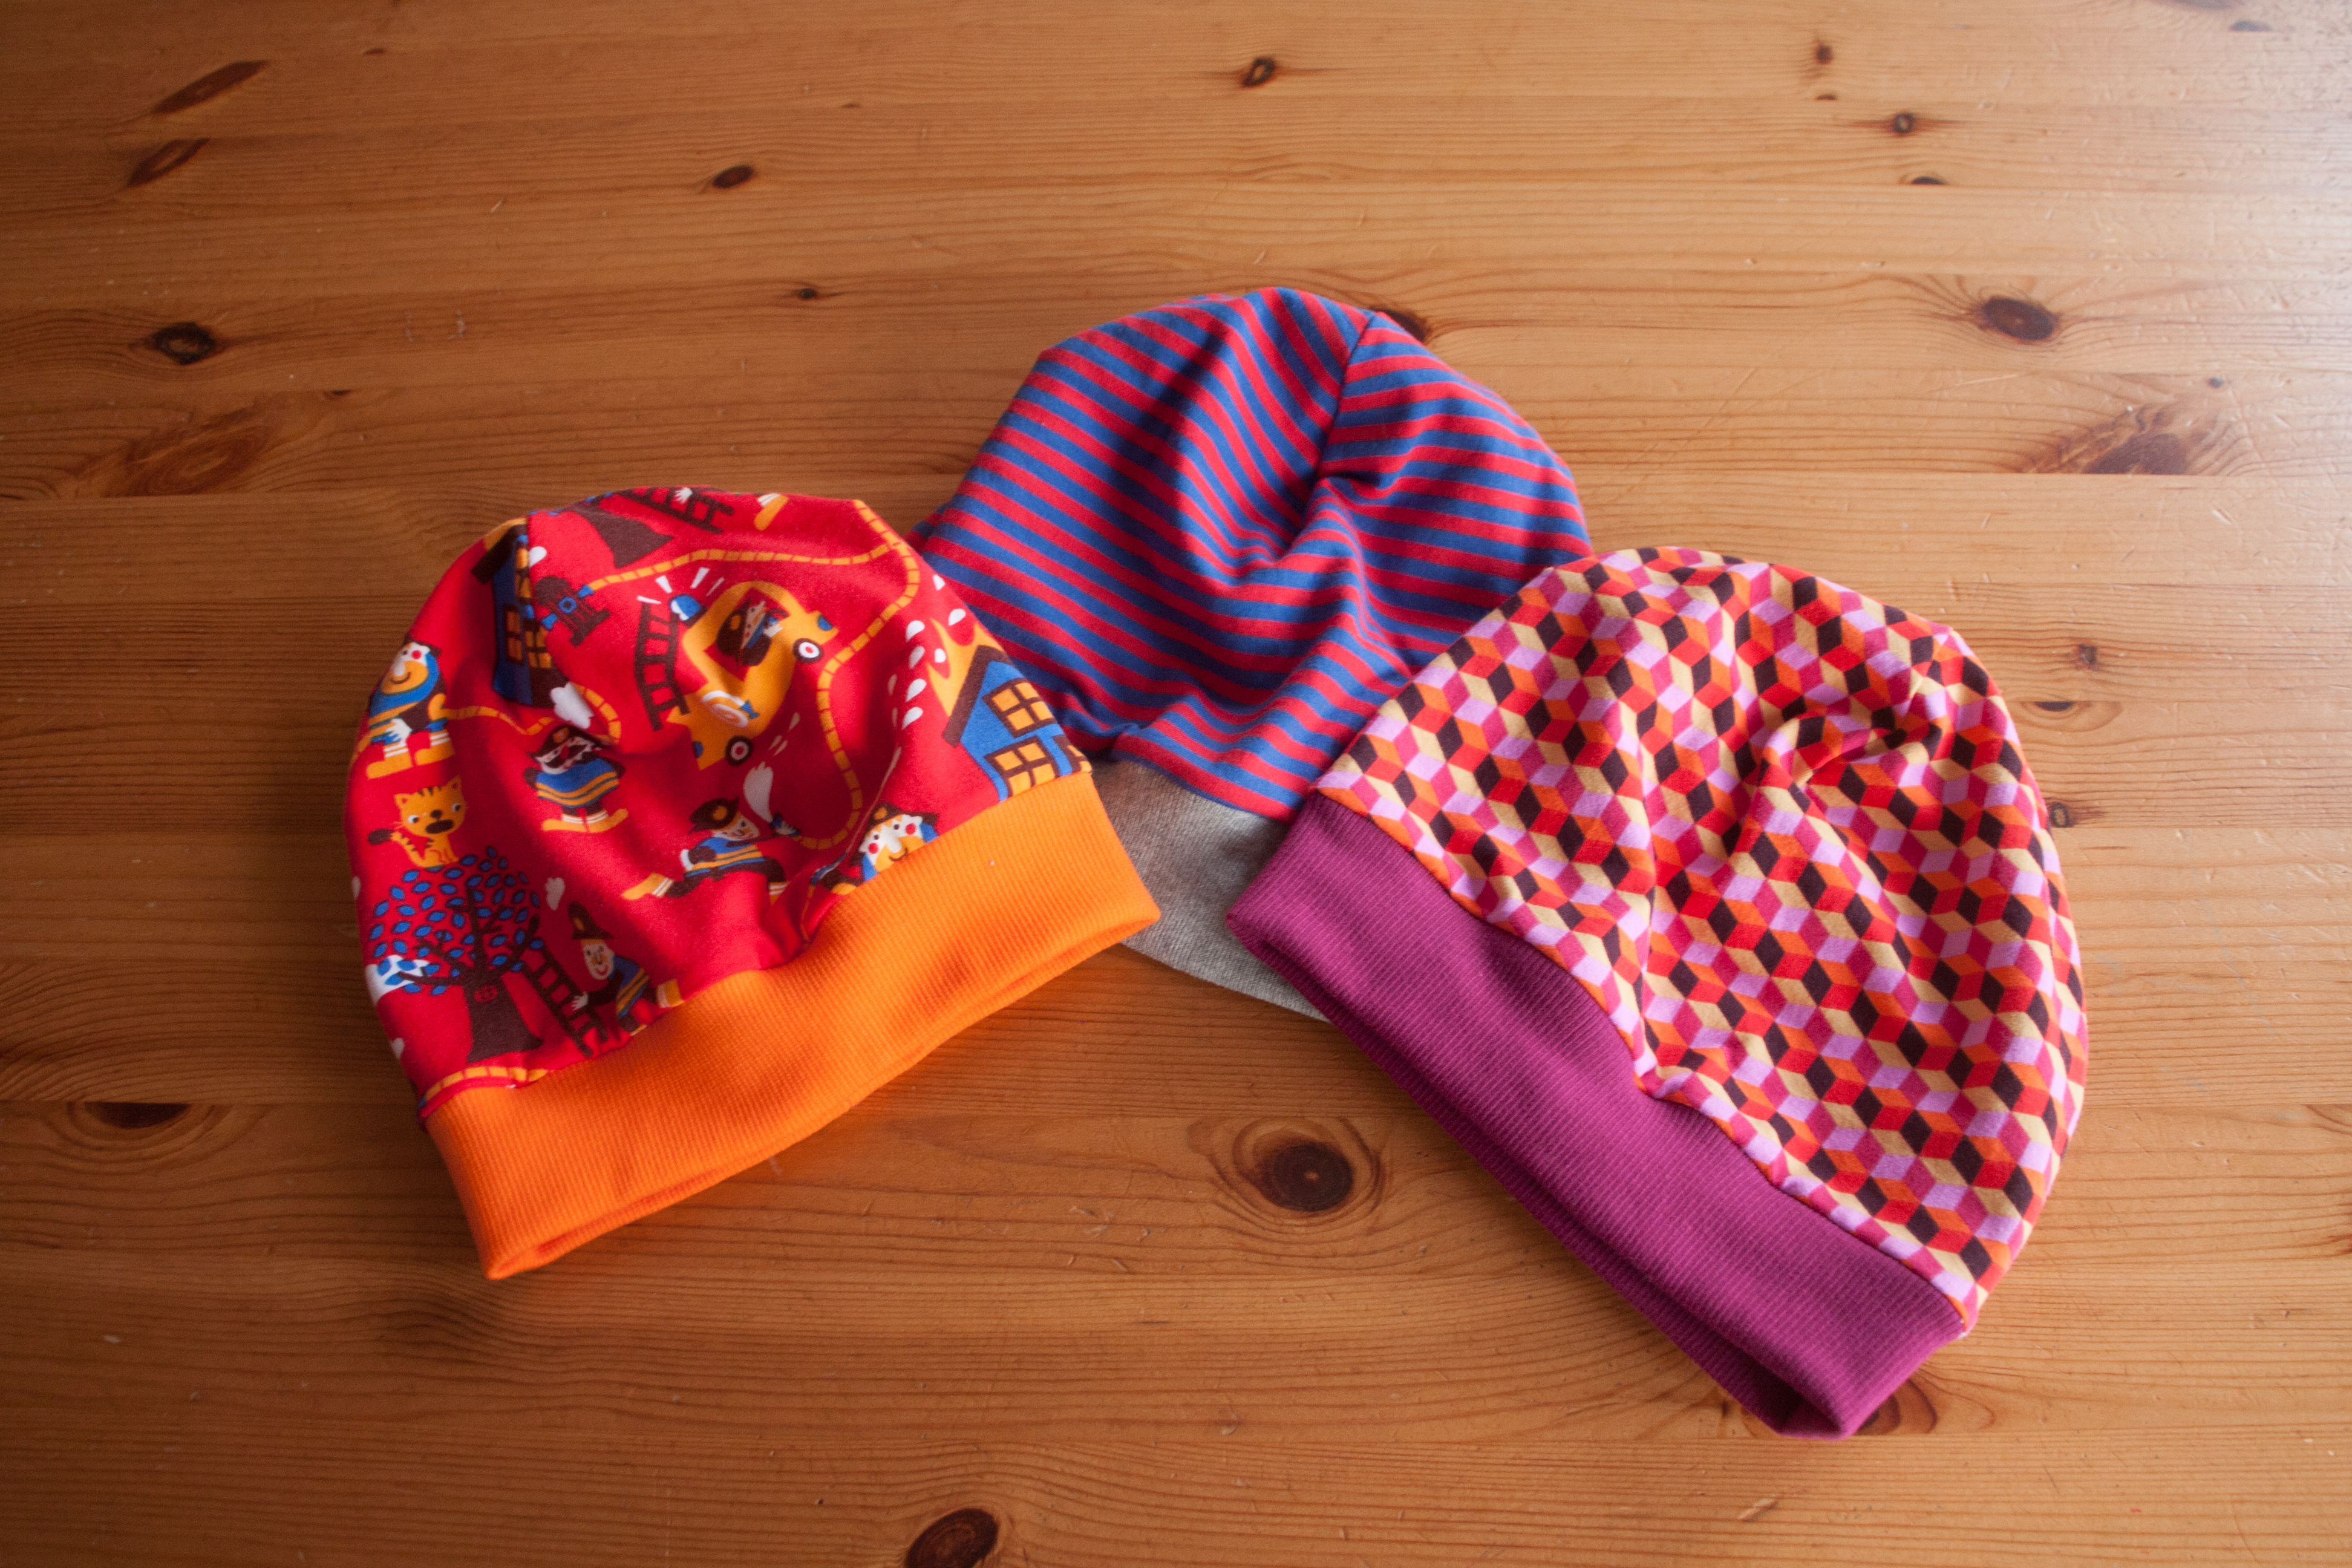
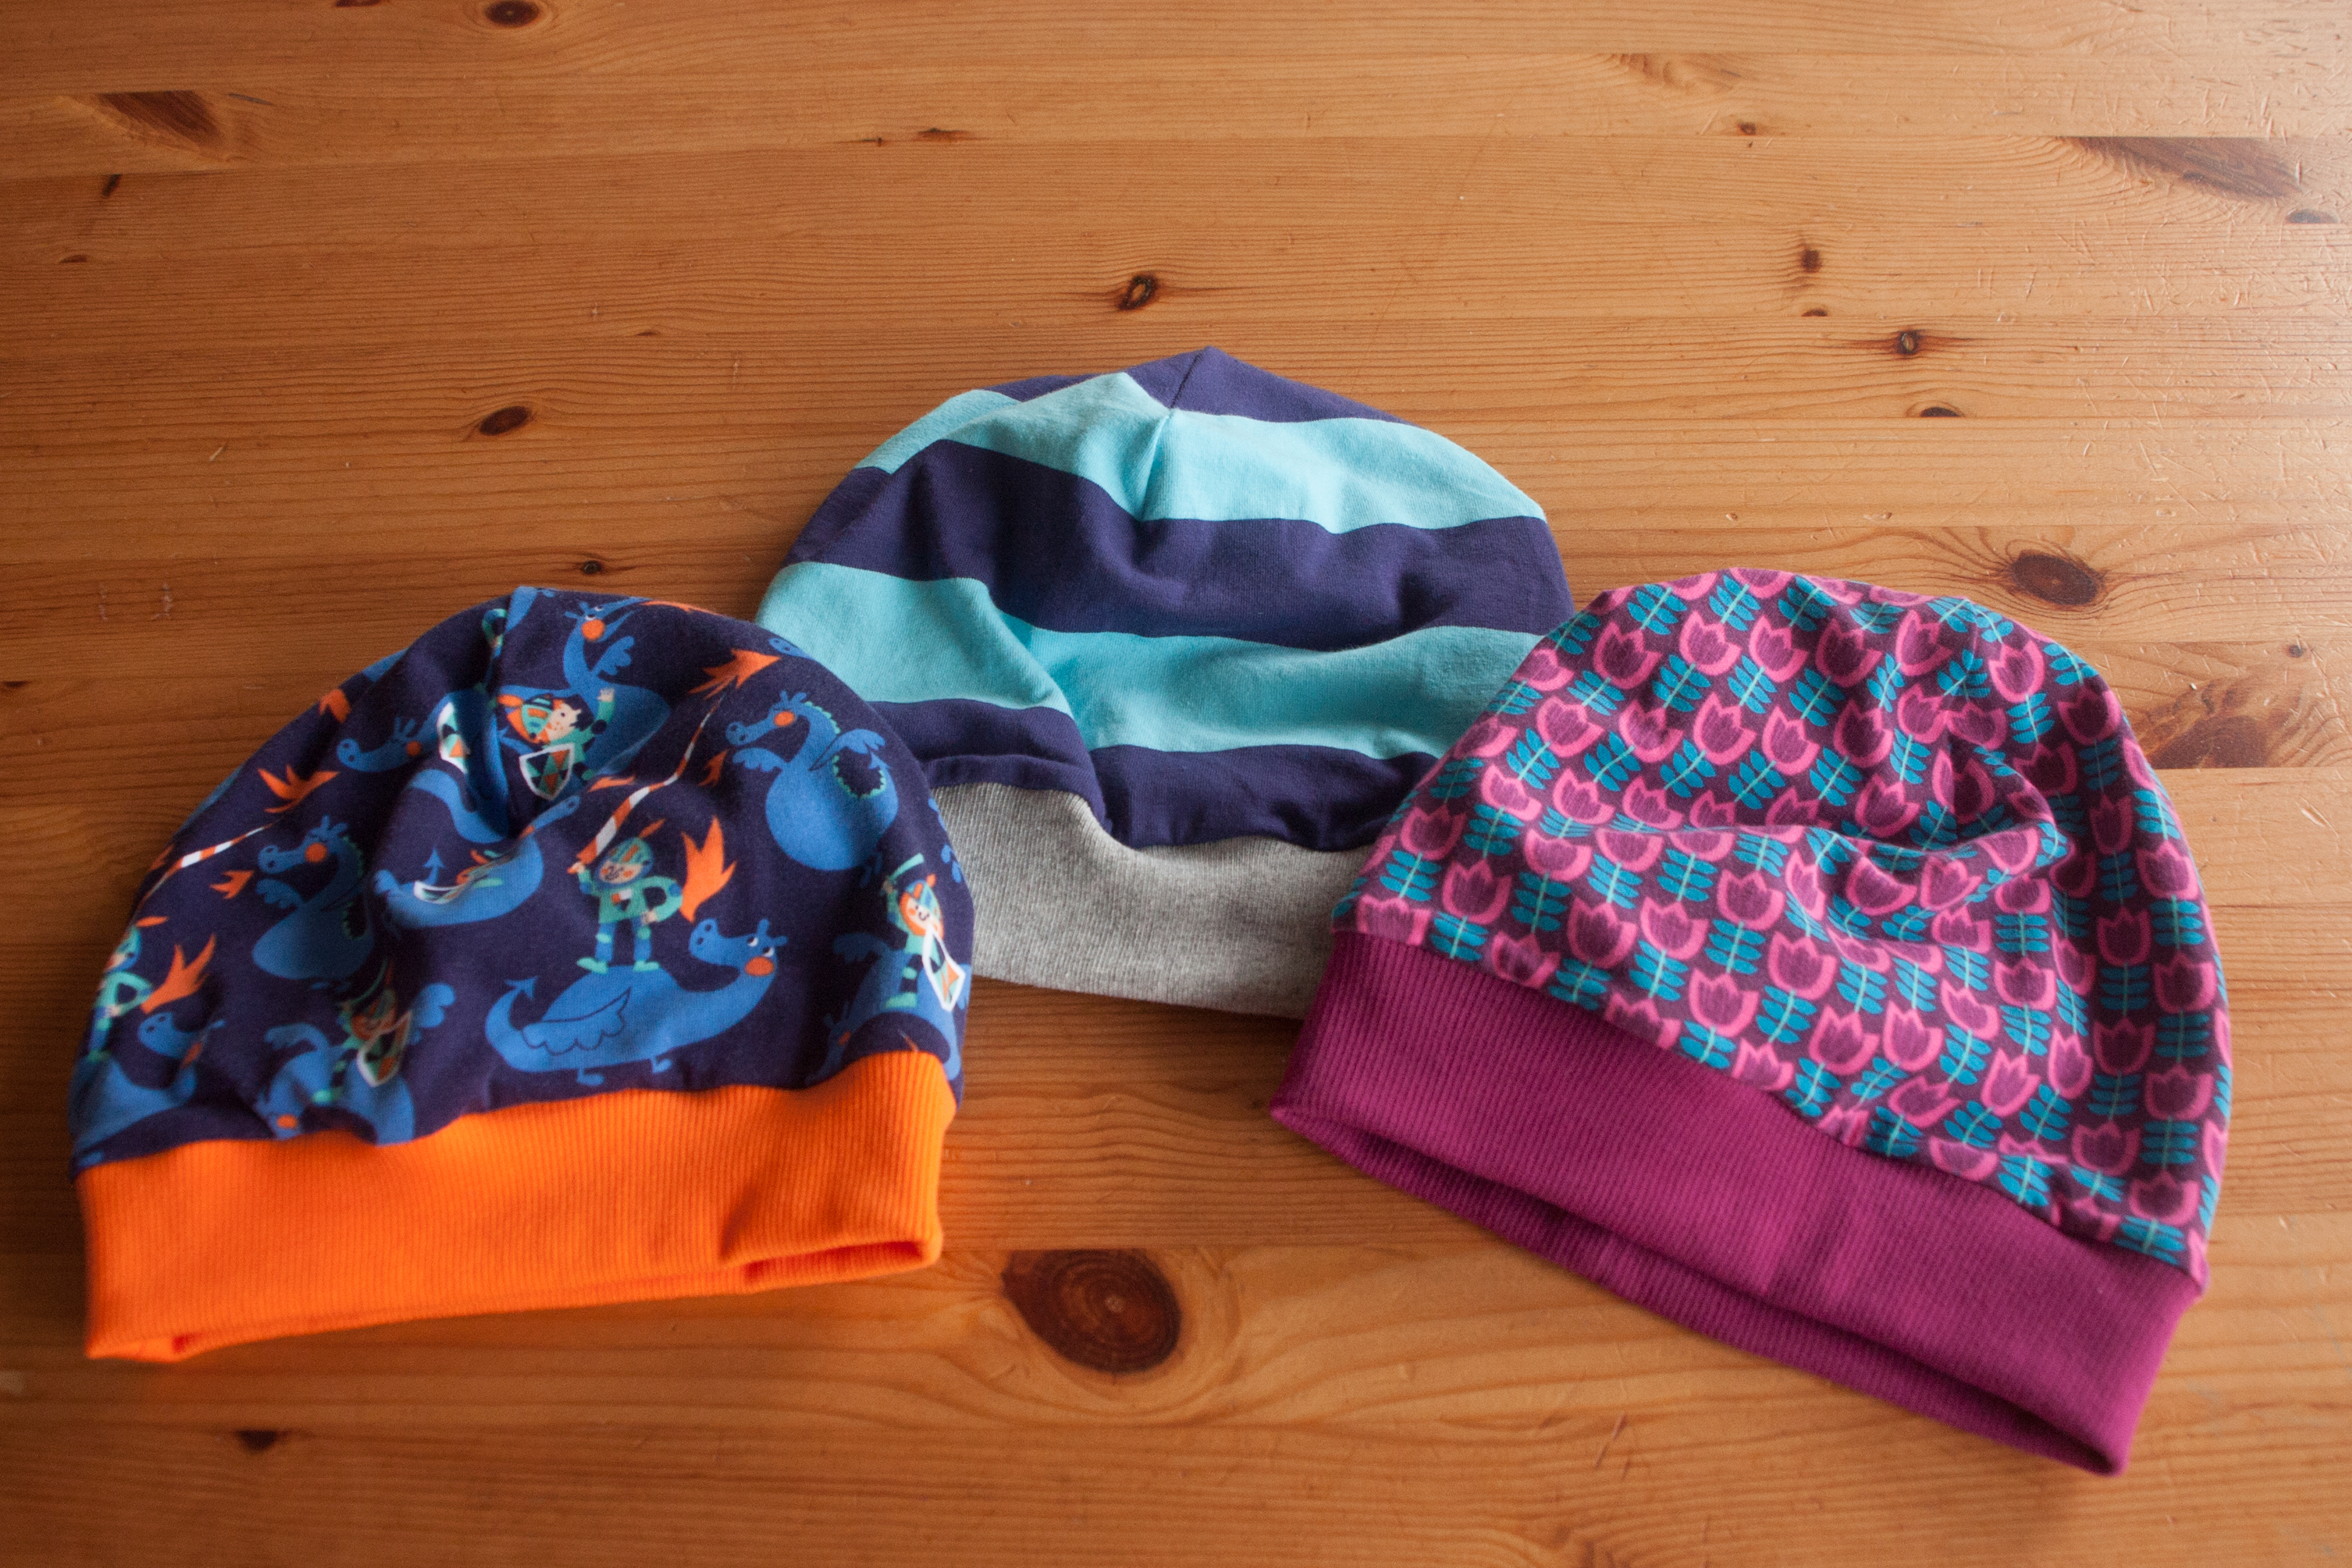
The stripy one is for my oldest nephew, both fabrics are left overs from shirts that I had actually made for him, somehow I did not photograph the red and blue version

IMG_4037

Then we have the girly one, left over from my daughters clown leggings and one future left over from a lovely fabric that I bought for myself.

And last but definitely not least the hat for the 4 year old. Left overs from shirt and leggings for my son and future left over of many little boy and baby boy things.

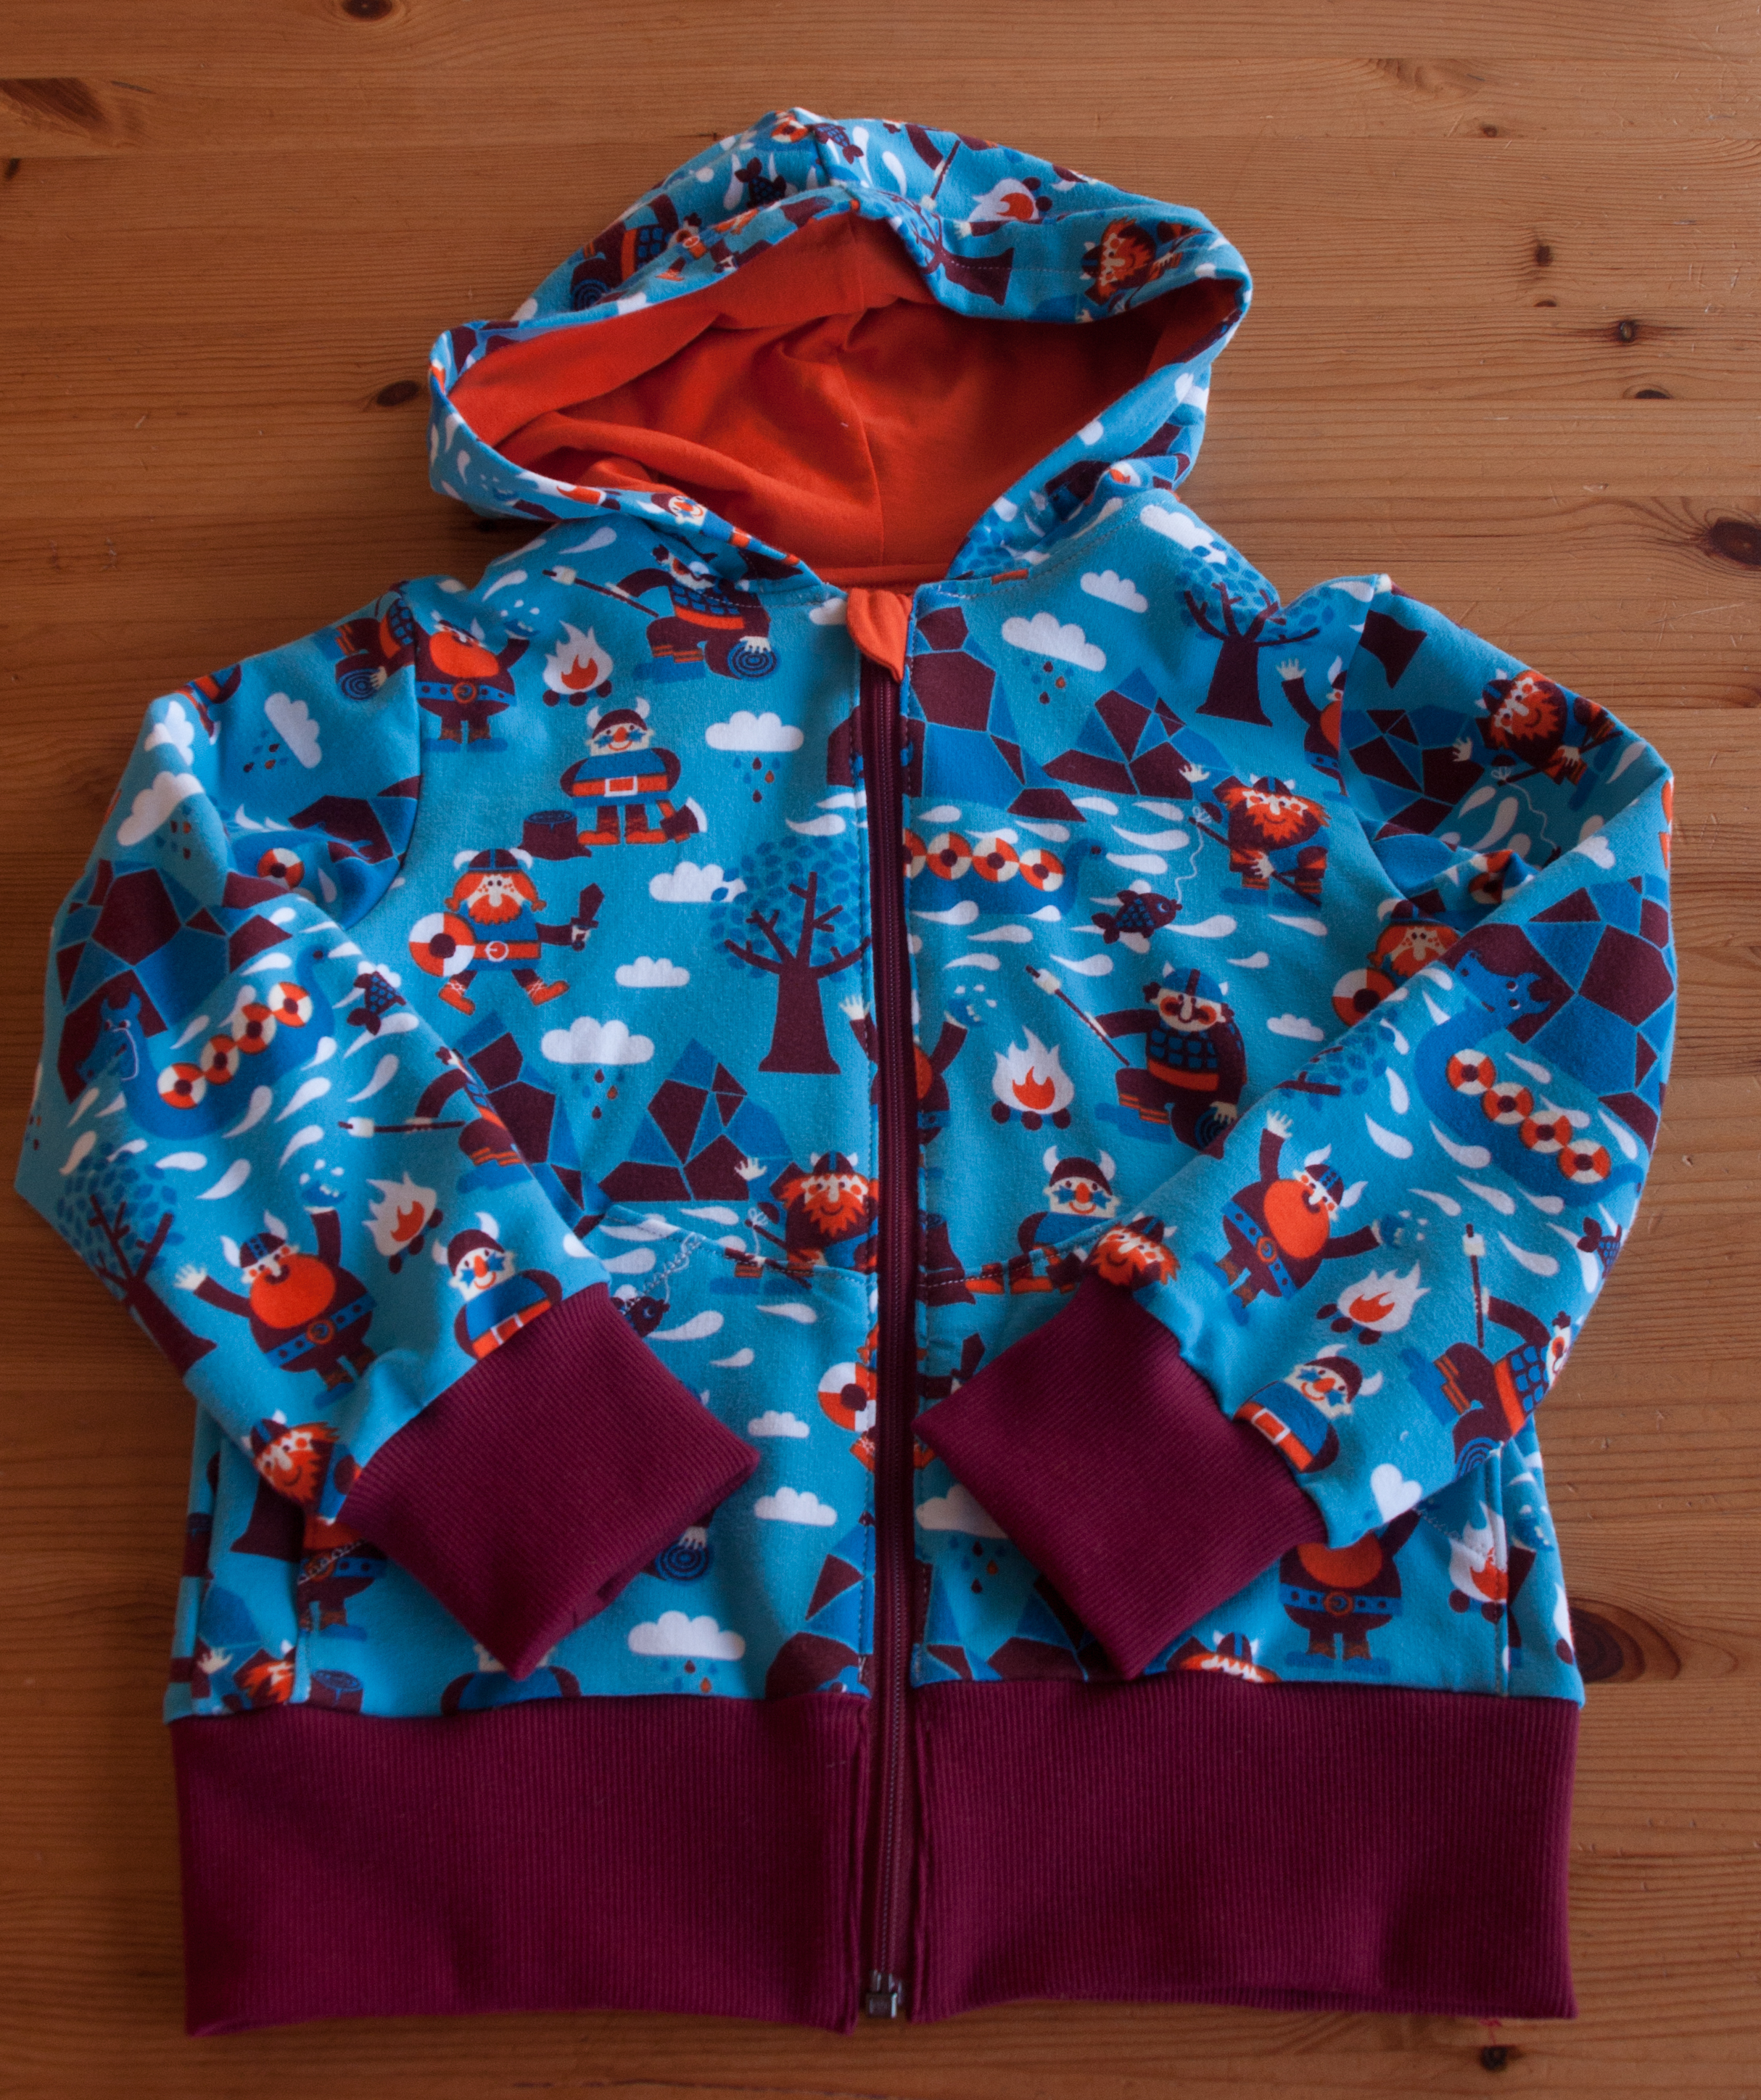
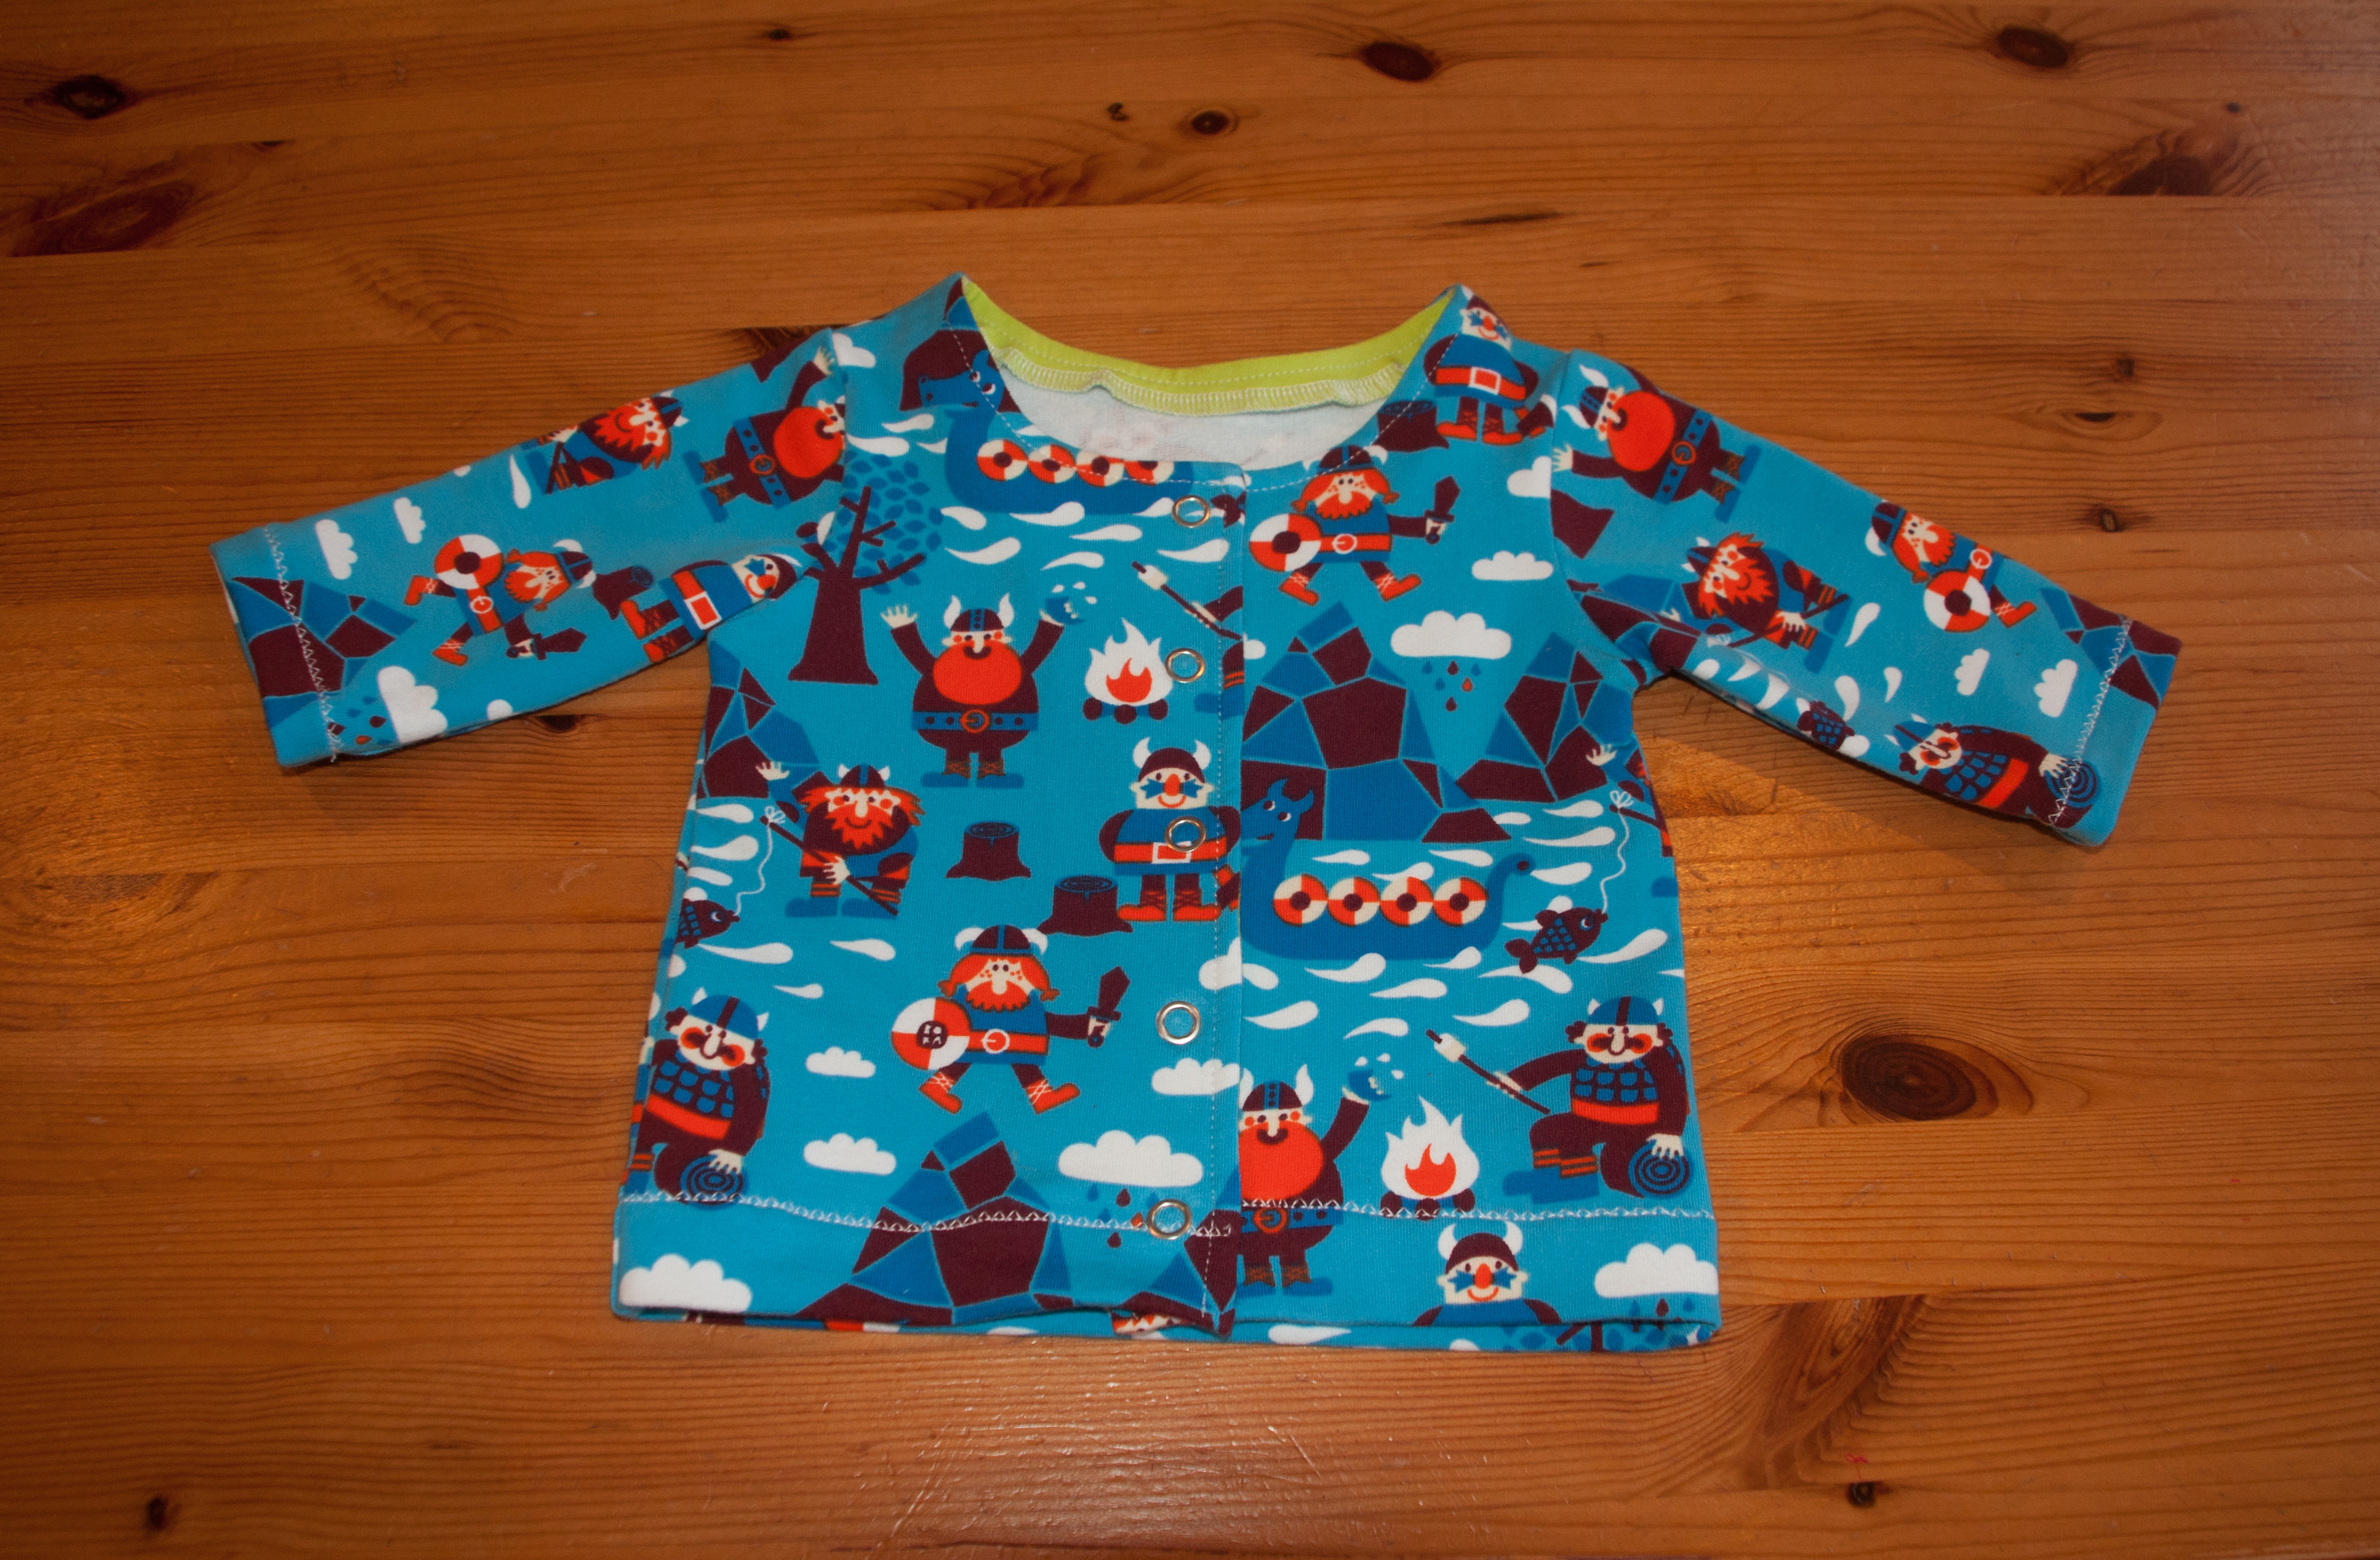
My husband loves the fireman one. He said he wants one for himself. I laughed politely. He said, he is serious. The man who never wears the boring stripy shirt I made for him. Clearly I do completely misjudged his taste ๐Ÿ™‚ And I guess, we are a perfect match.

I also made a corduroy dress for my daughter using a Burda pattern.

IMG_4148 Kleid

Again a fabric that I kind of bought for myself. I actually want to have that dress (Told you, perfect match ๐Ÿ™‚ ), well maybe a slightly more grown up version (basically without the rig rag and the buttons. But definitely with the pockets). But I don’t quite see the corduroy working as a breastfeeding dress plus I am planning to be covered in milk and vomit for the next few months, so I decided to make a dress for my daughter to be able to enjoy the fabric.

Maybe one word to the pattern: The front is not put on fold but two pieces sewn together which makes sense for one of the proposed fabric mix versions but not for this one. I really wonder why I am still not confident enough to see that right from the beginning and alter the pattern according to my needs.

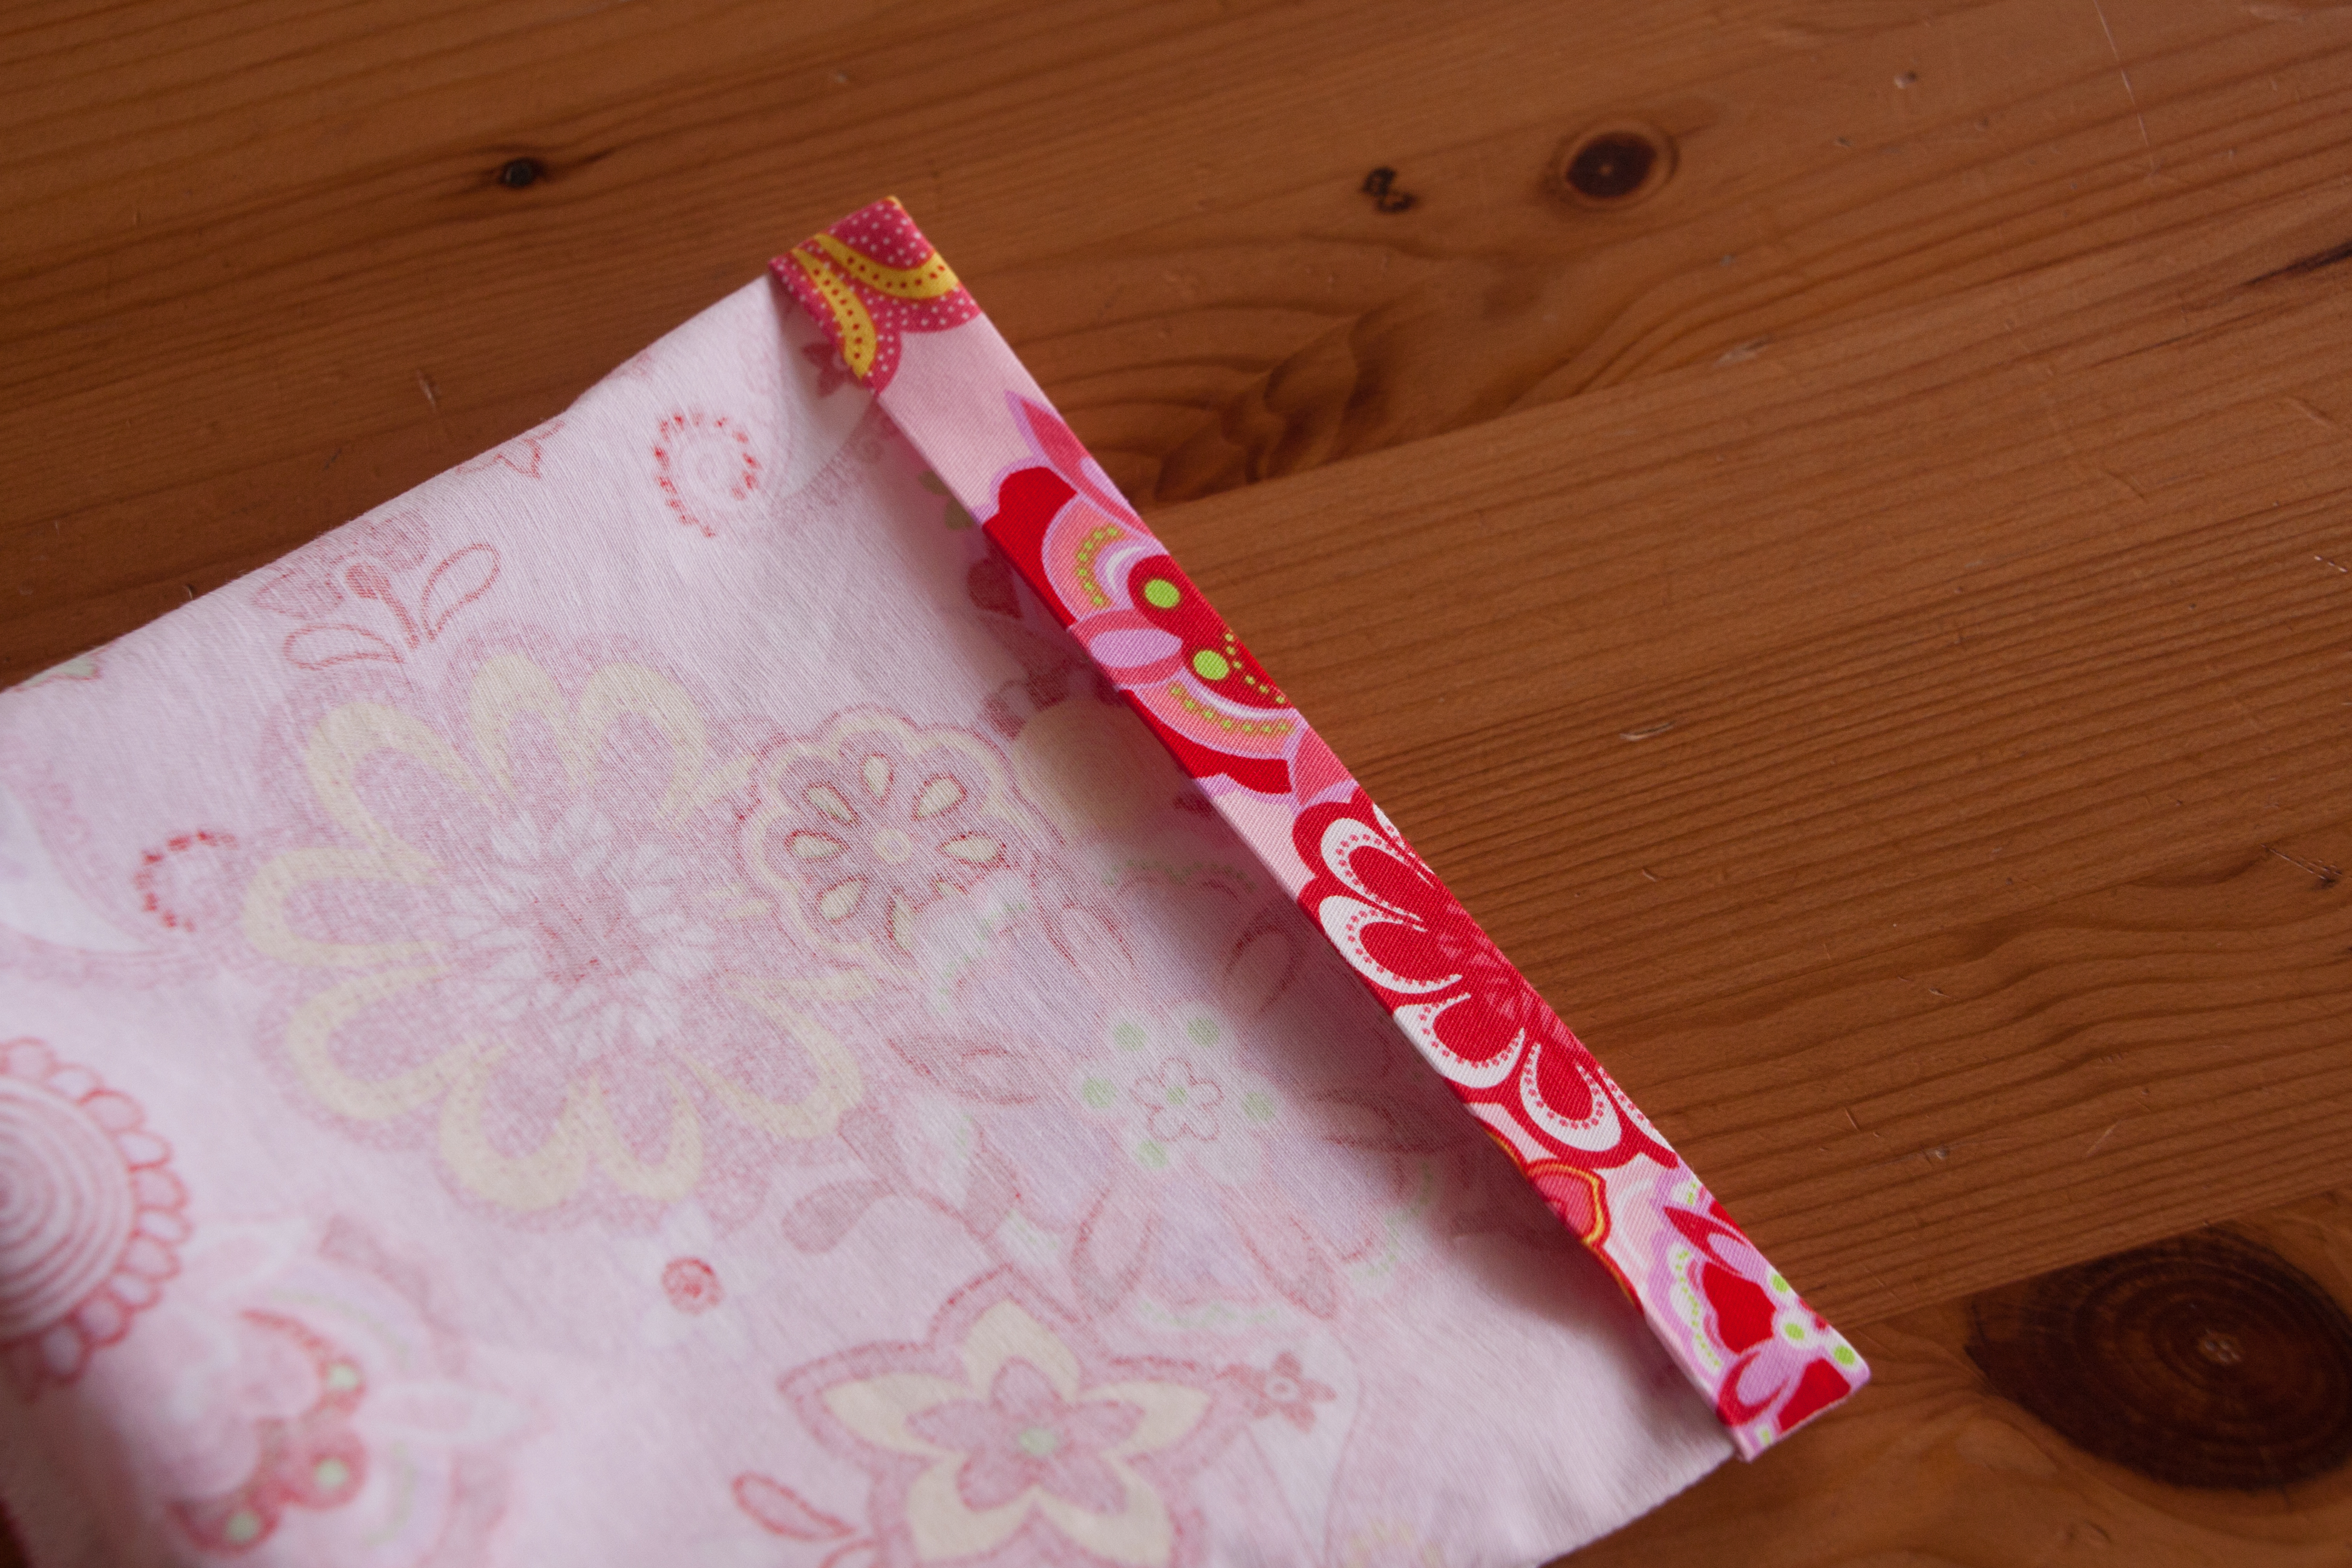
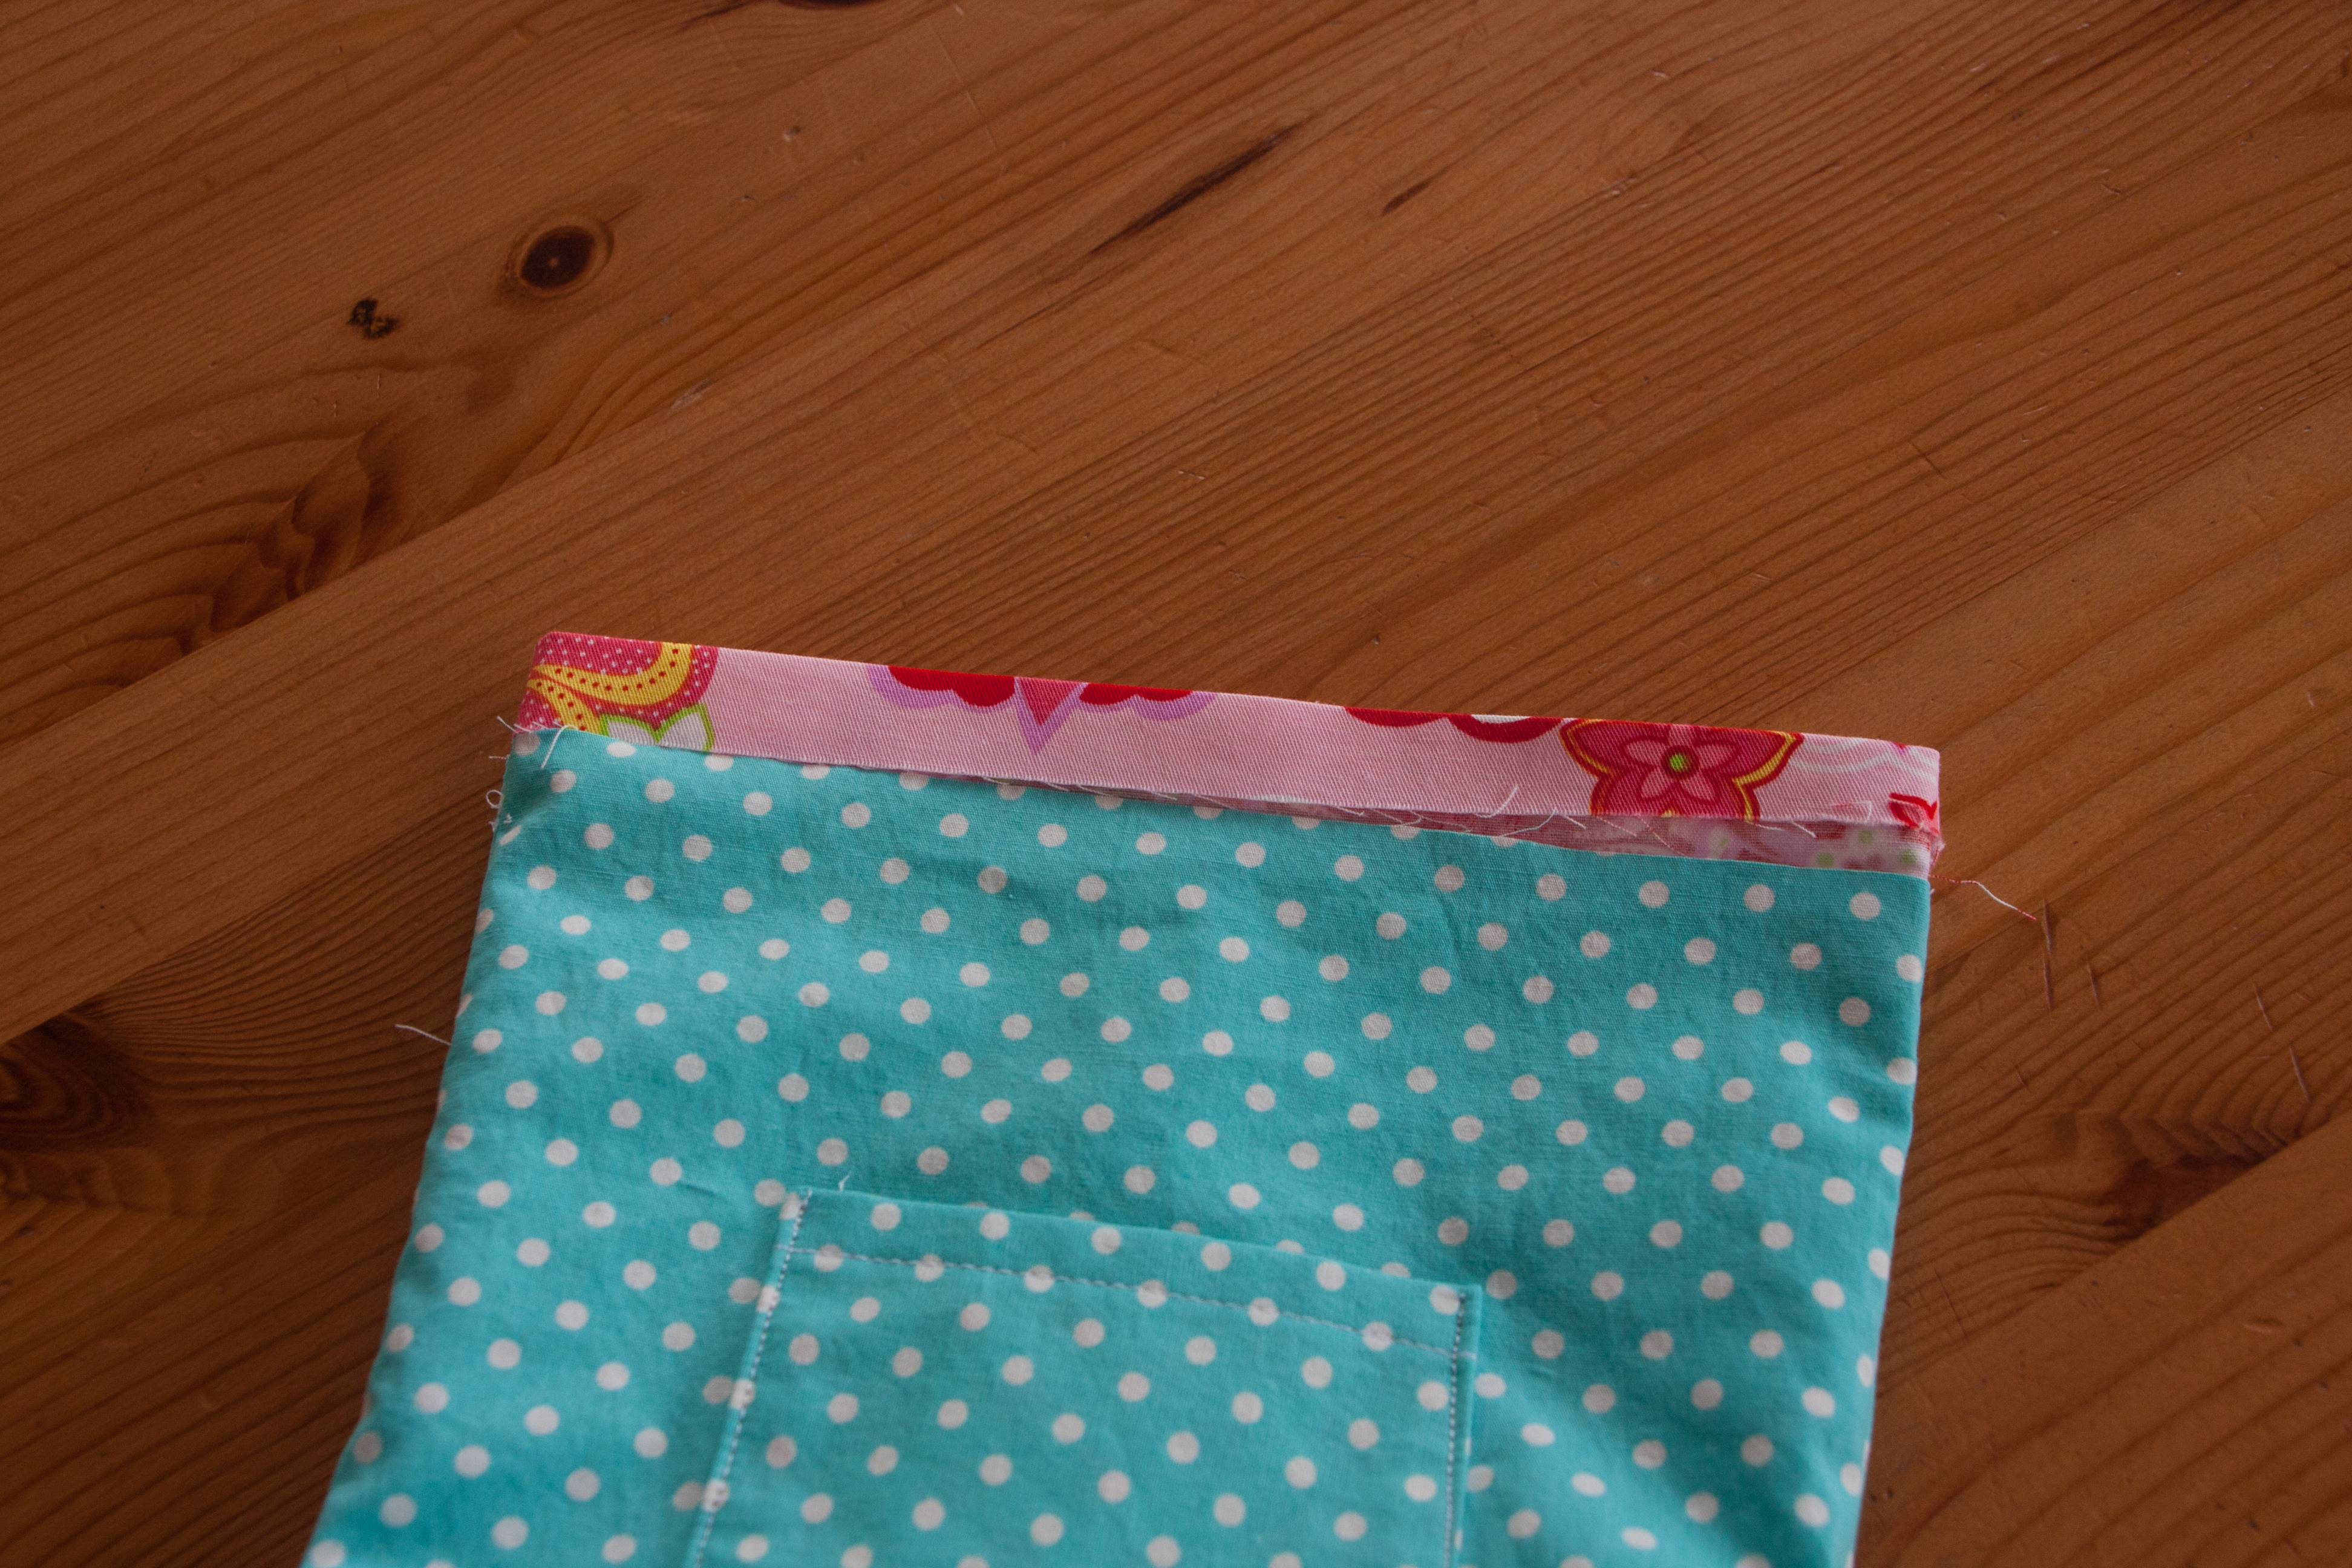
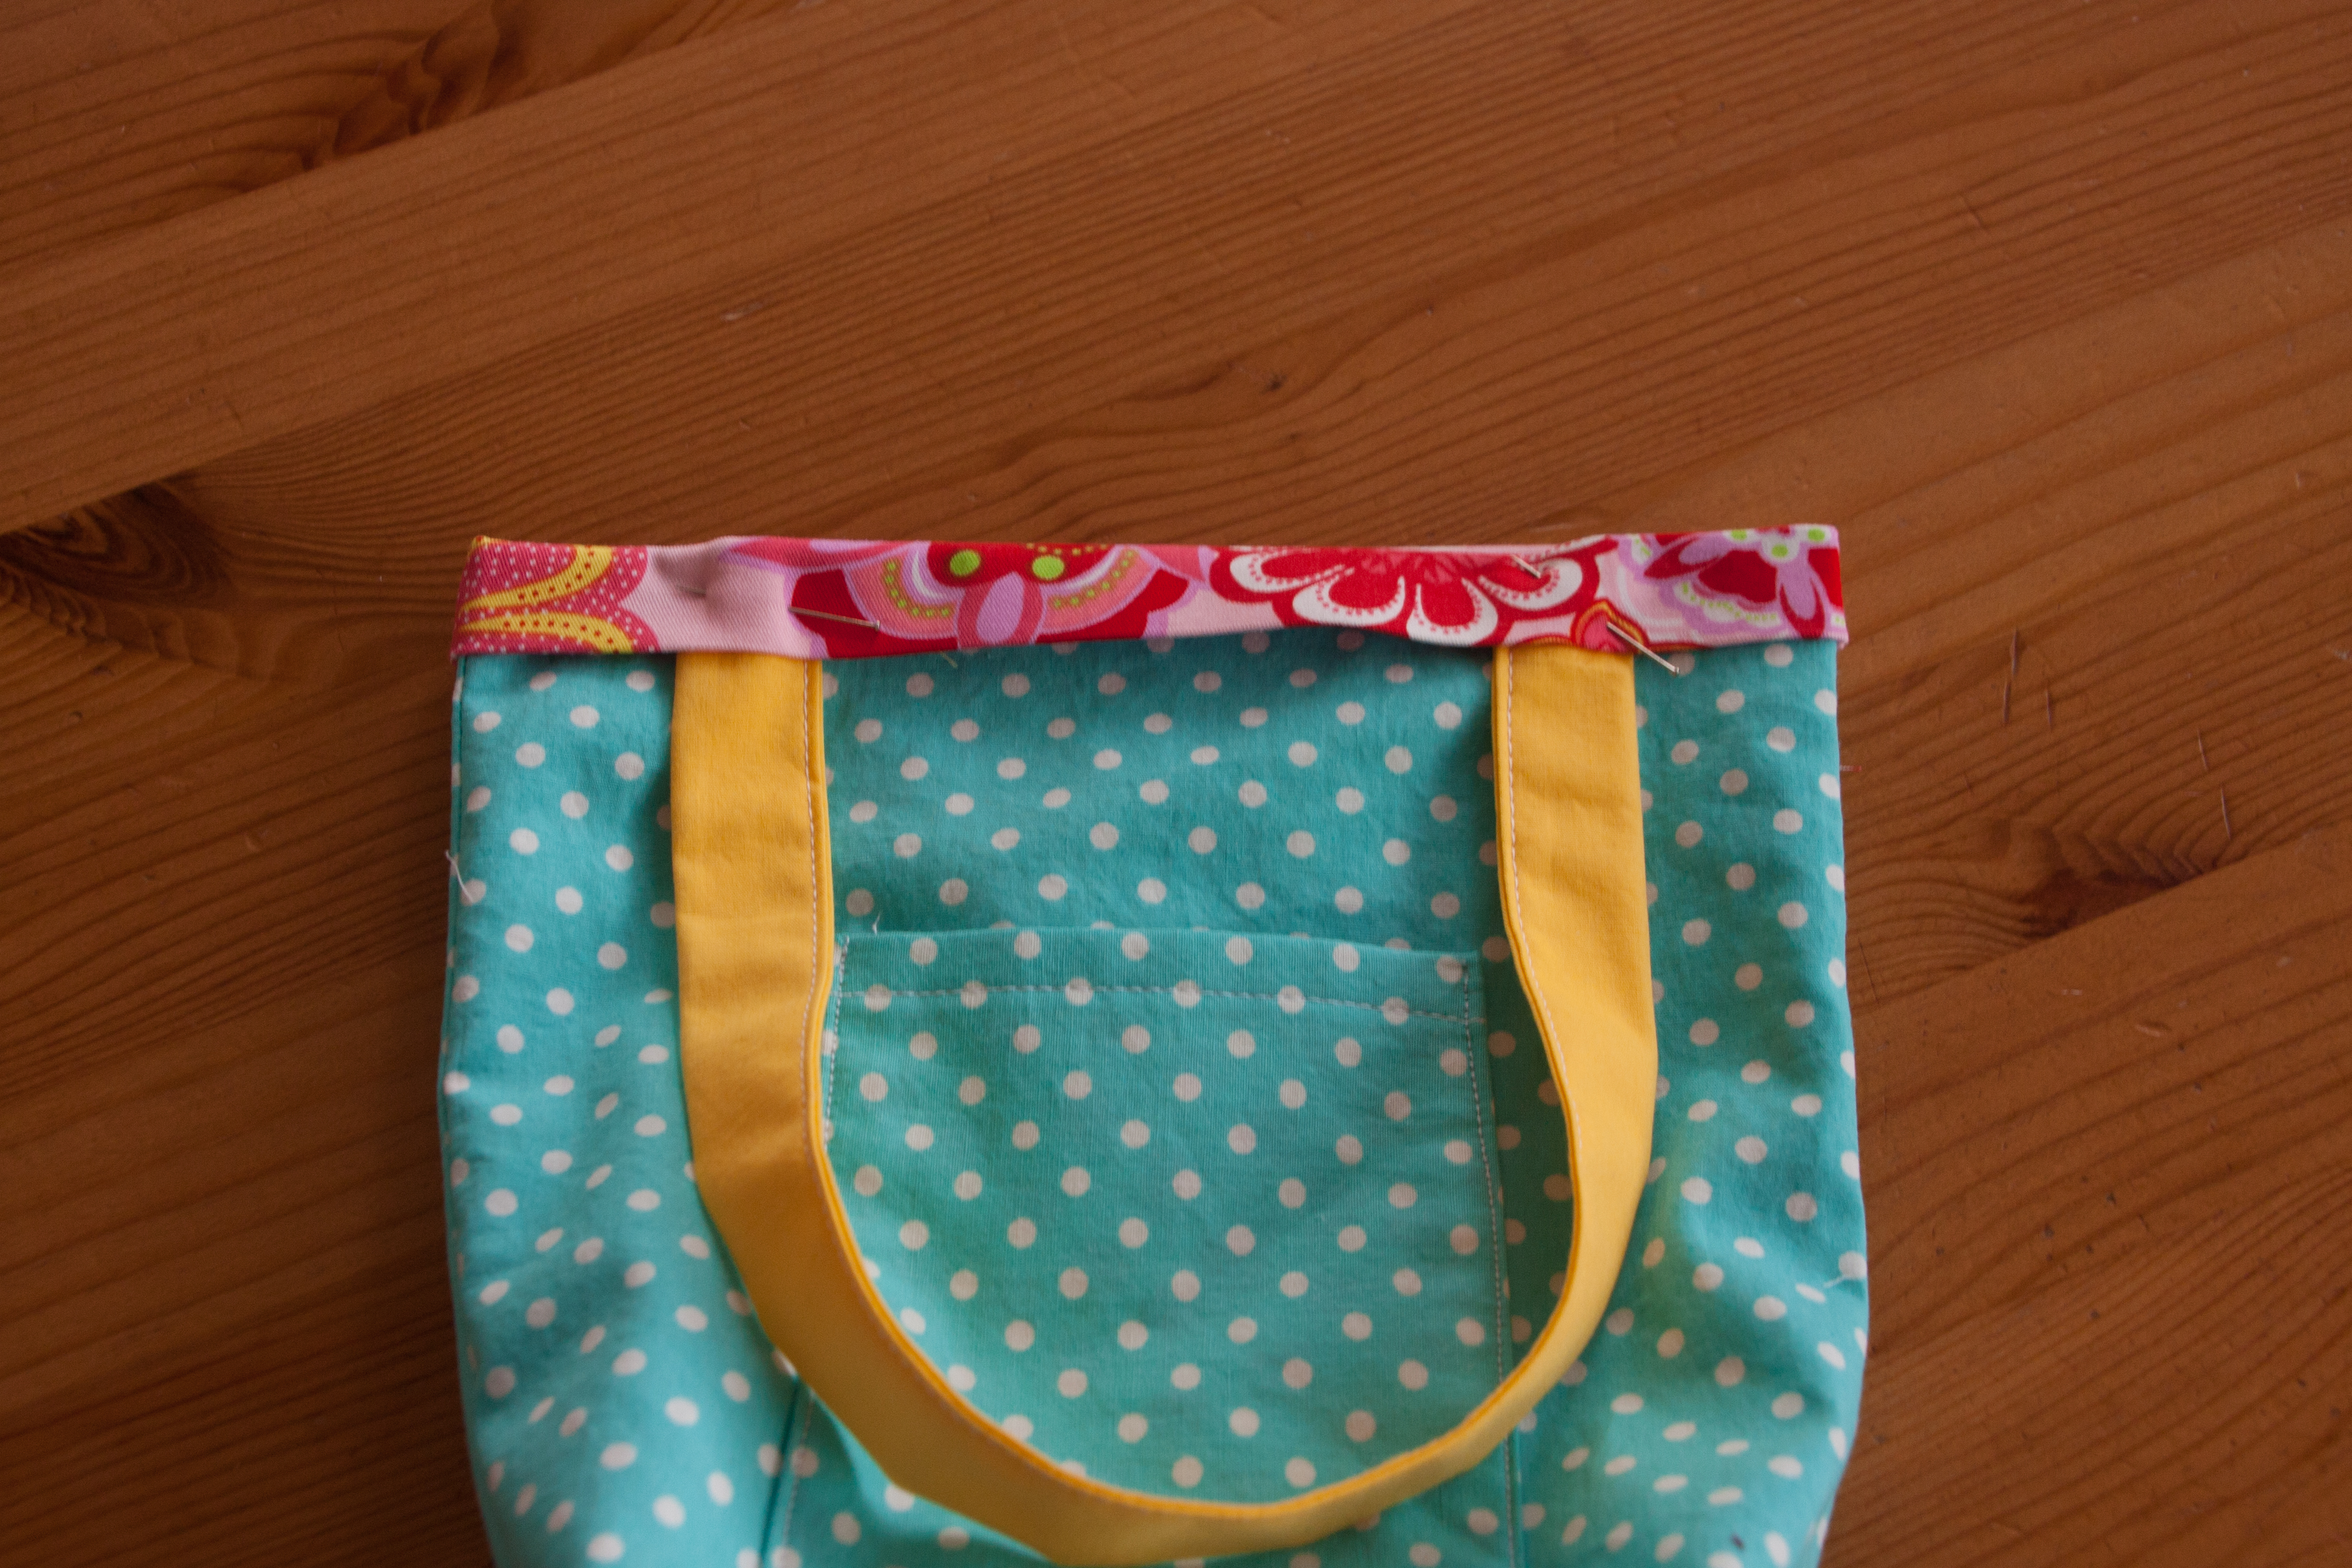
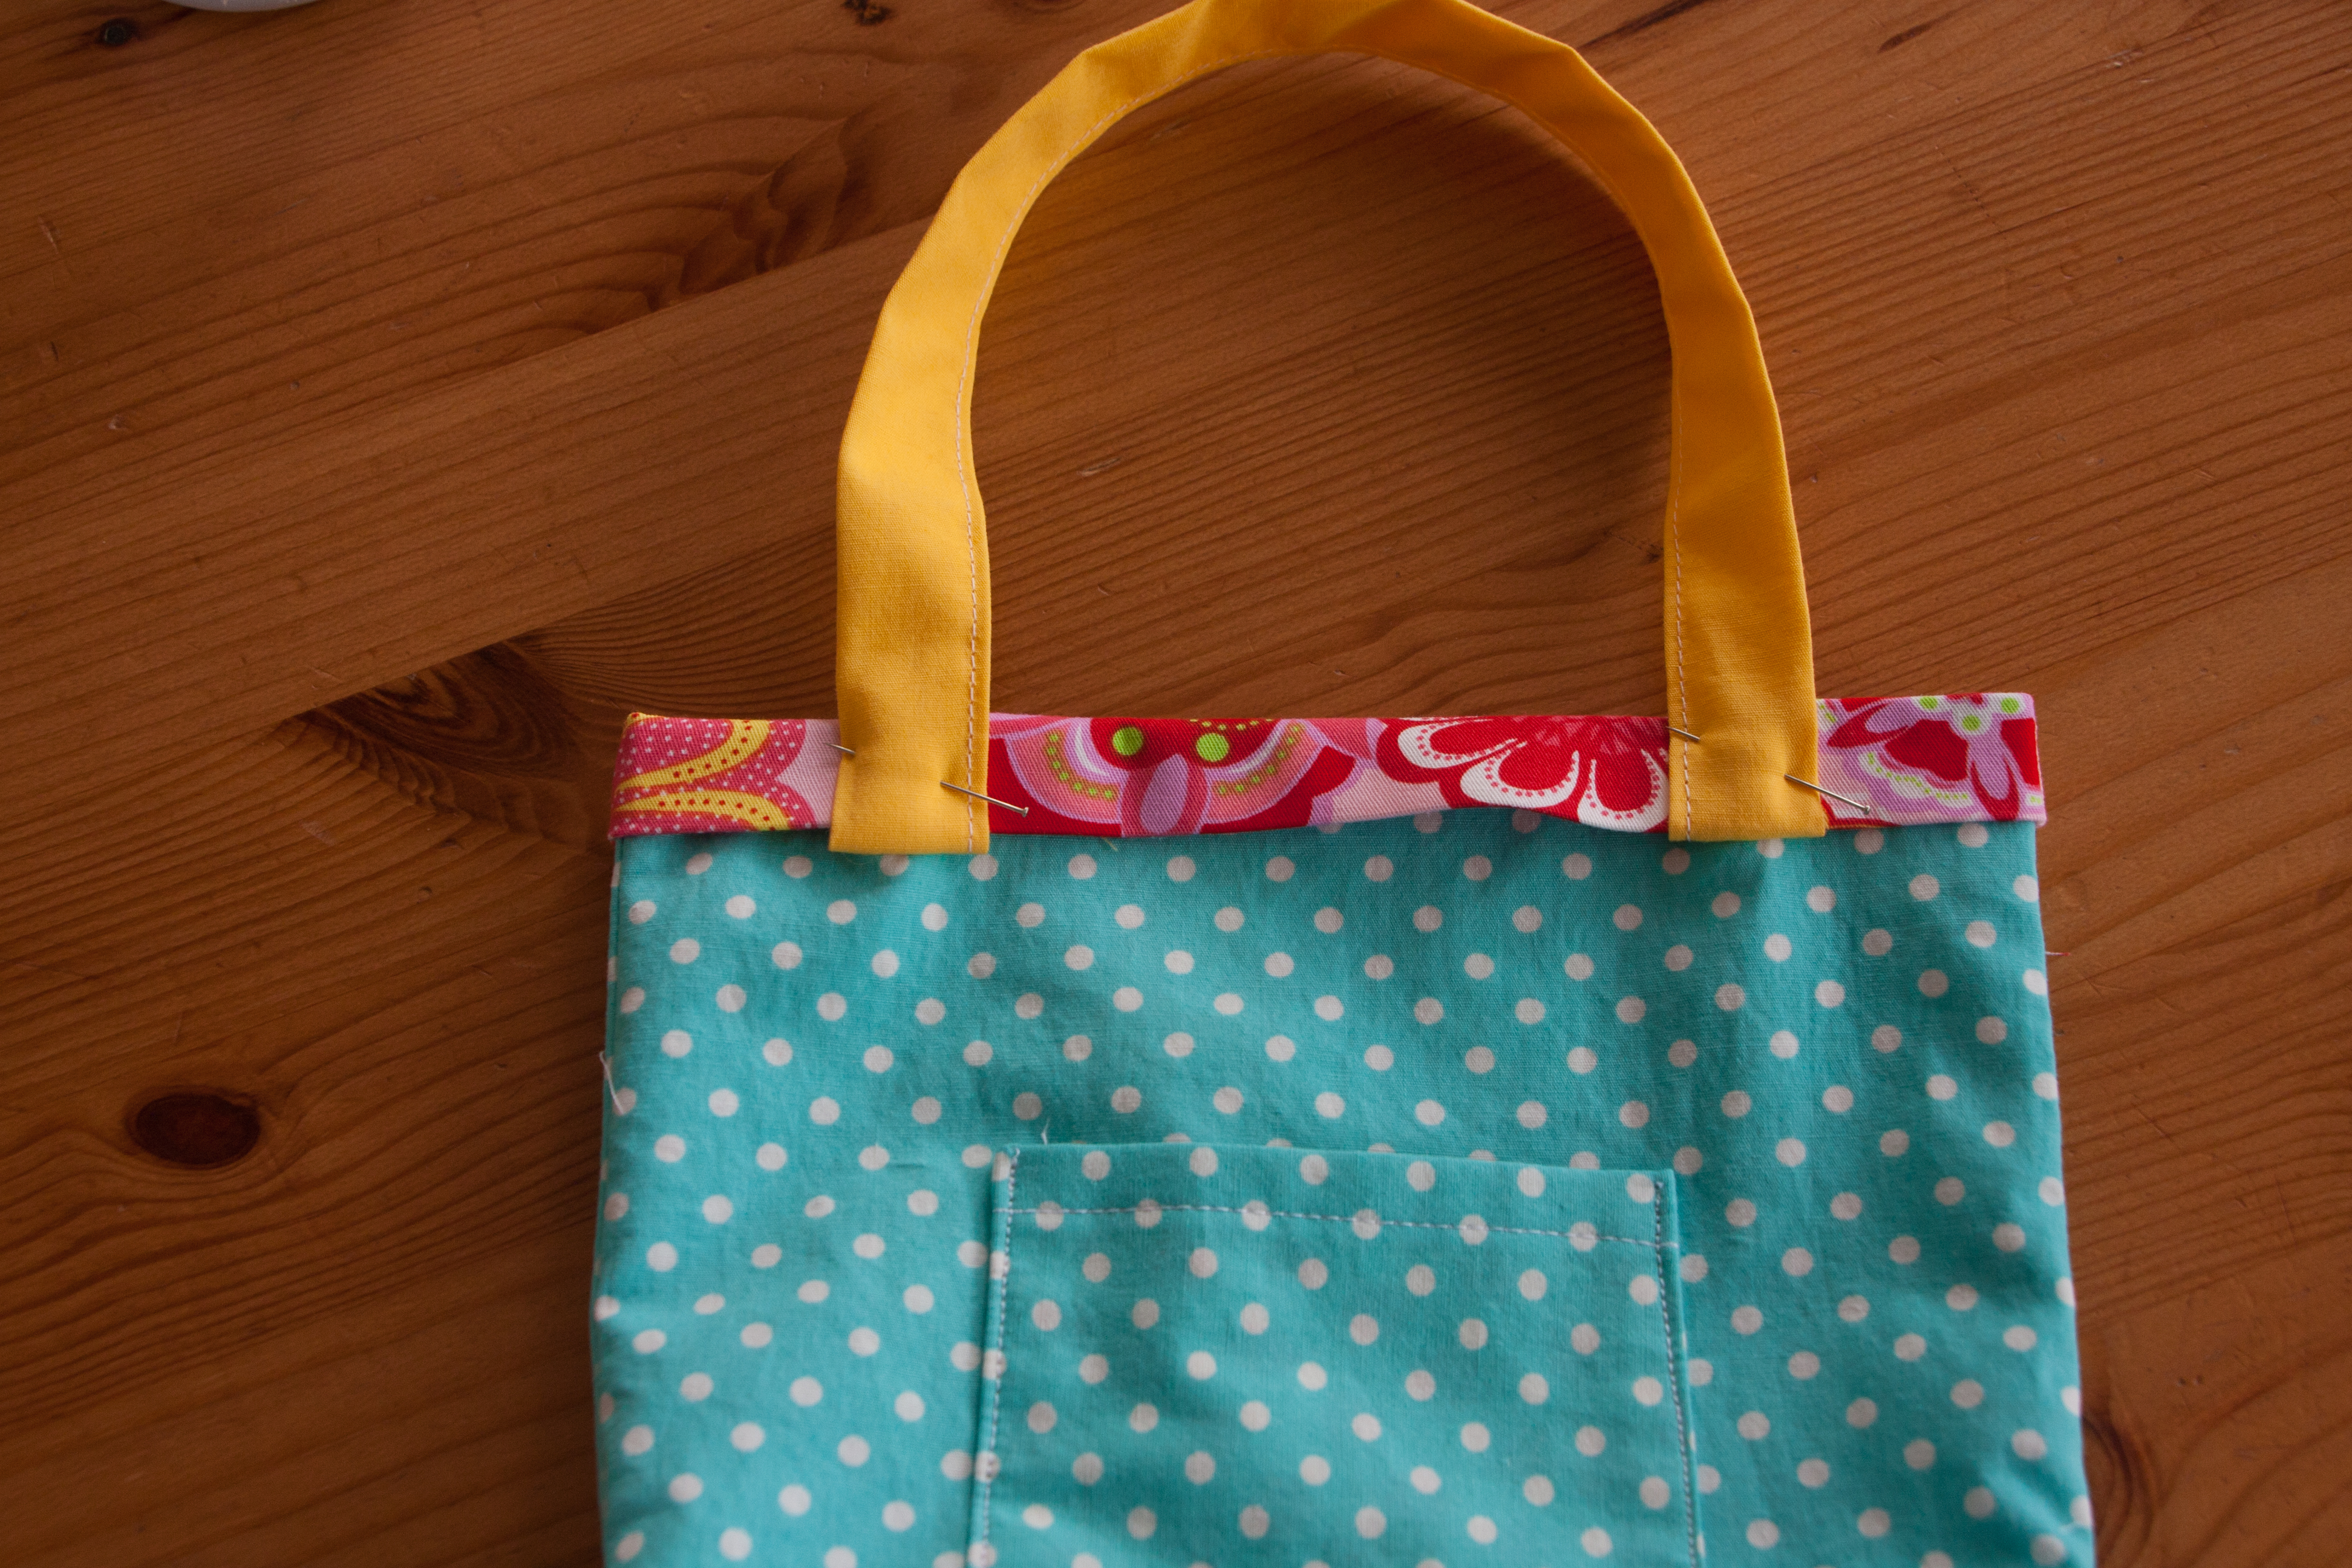
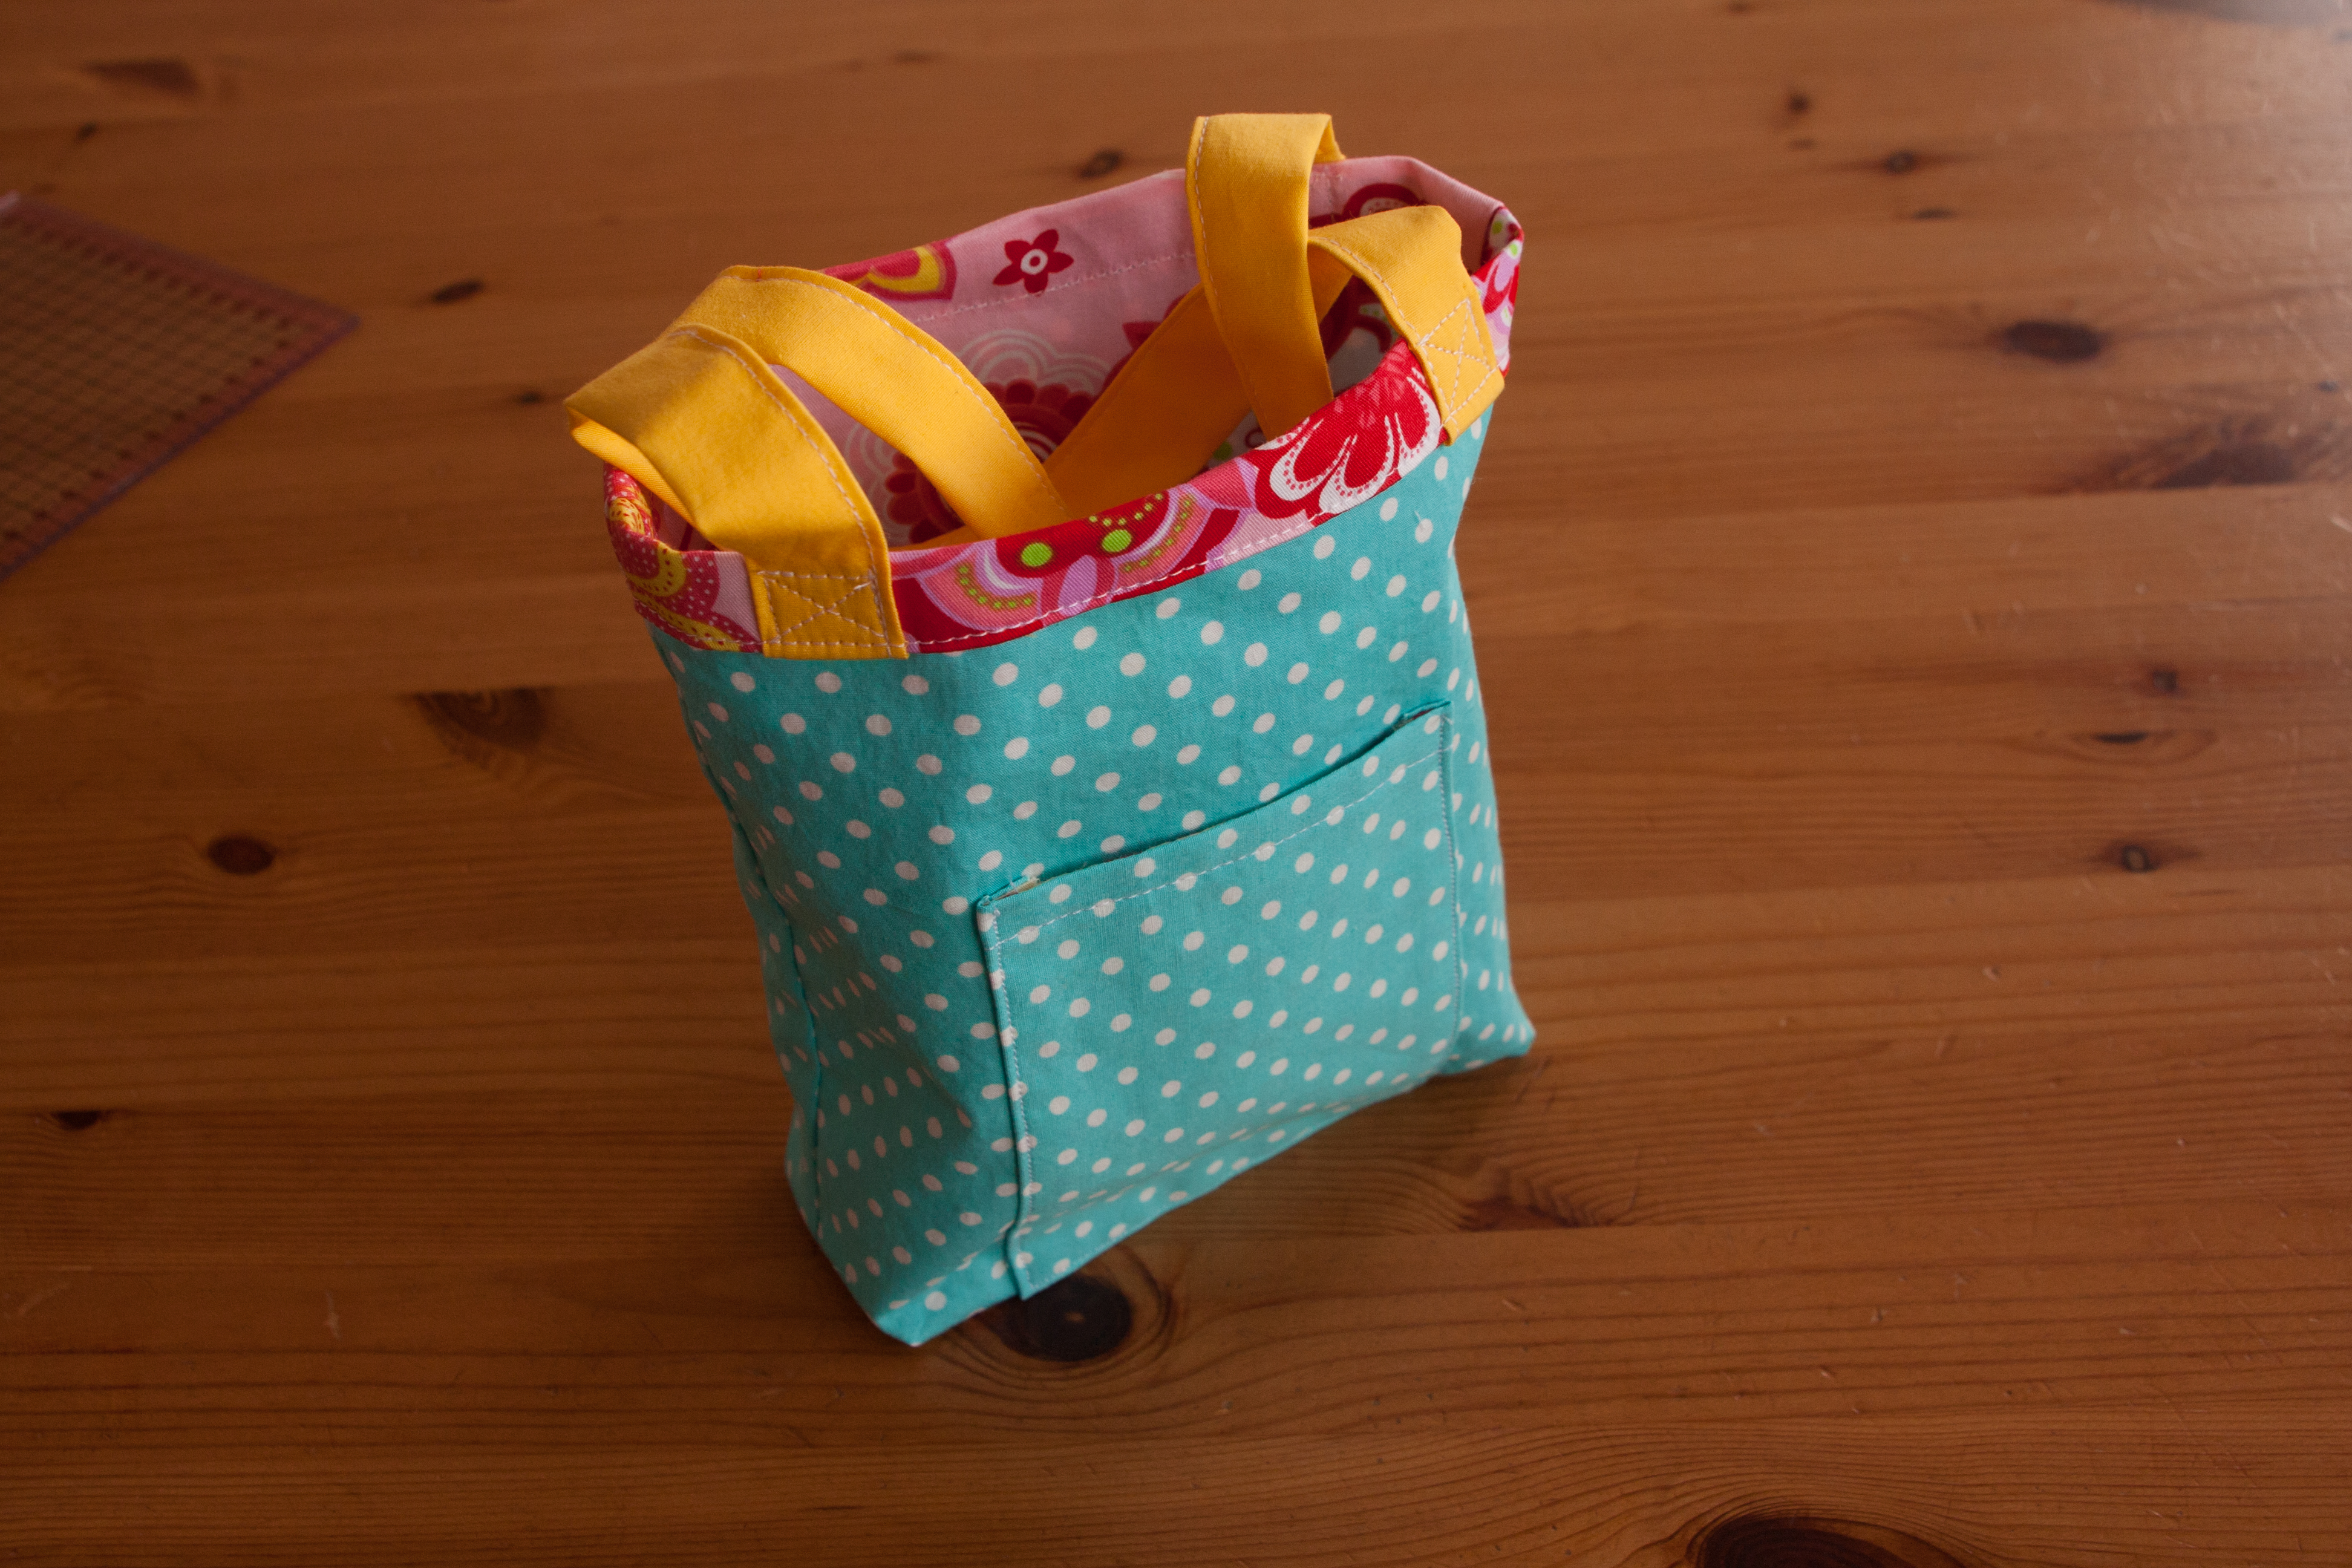
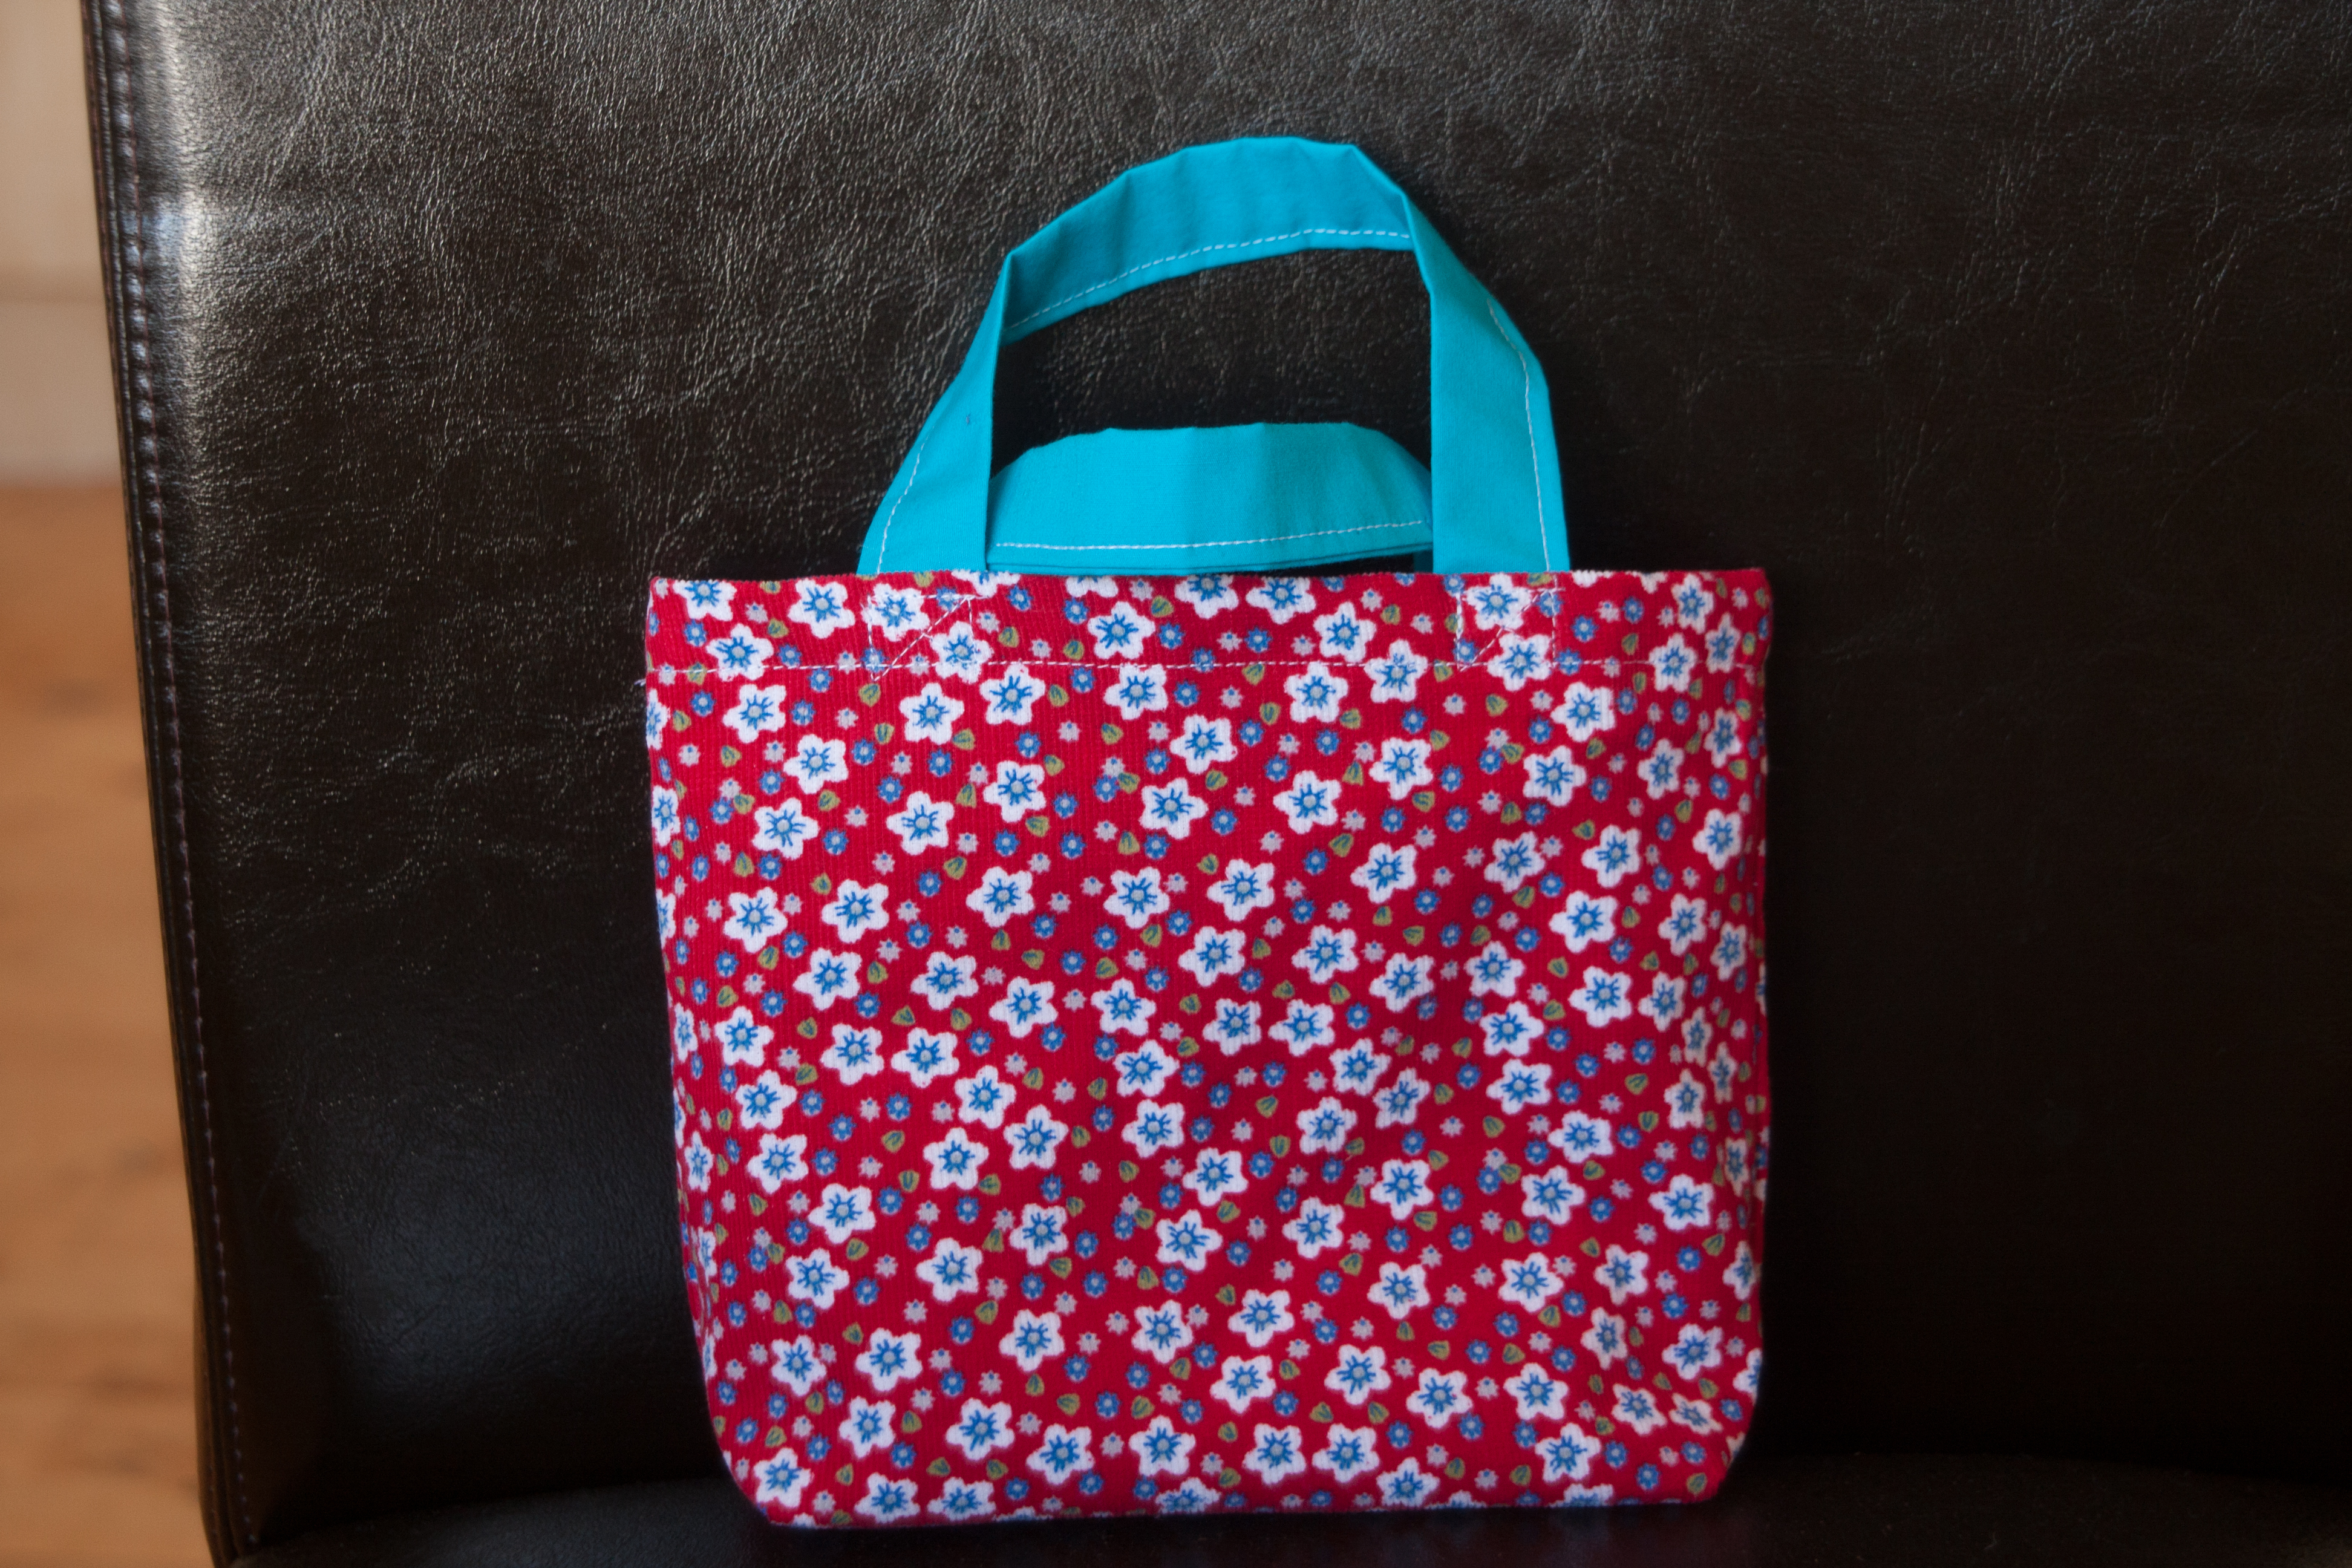
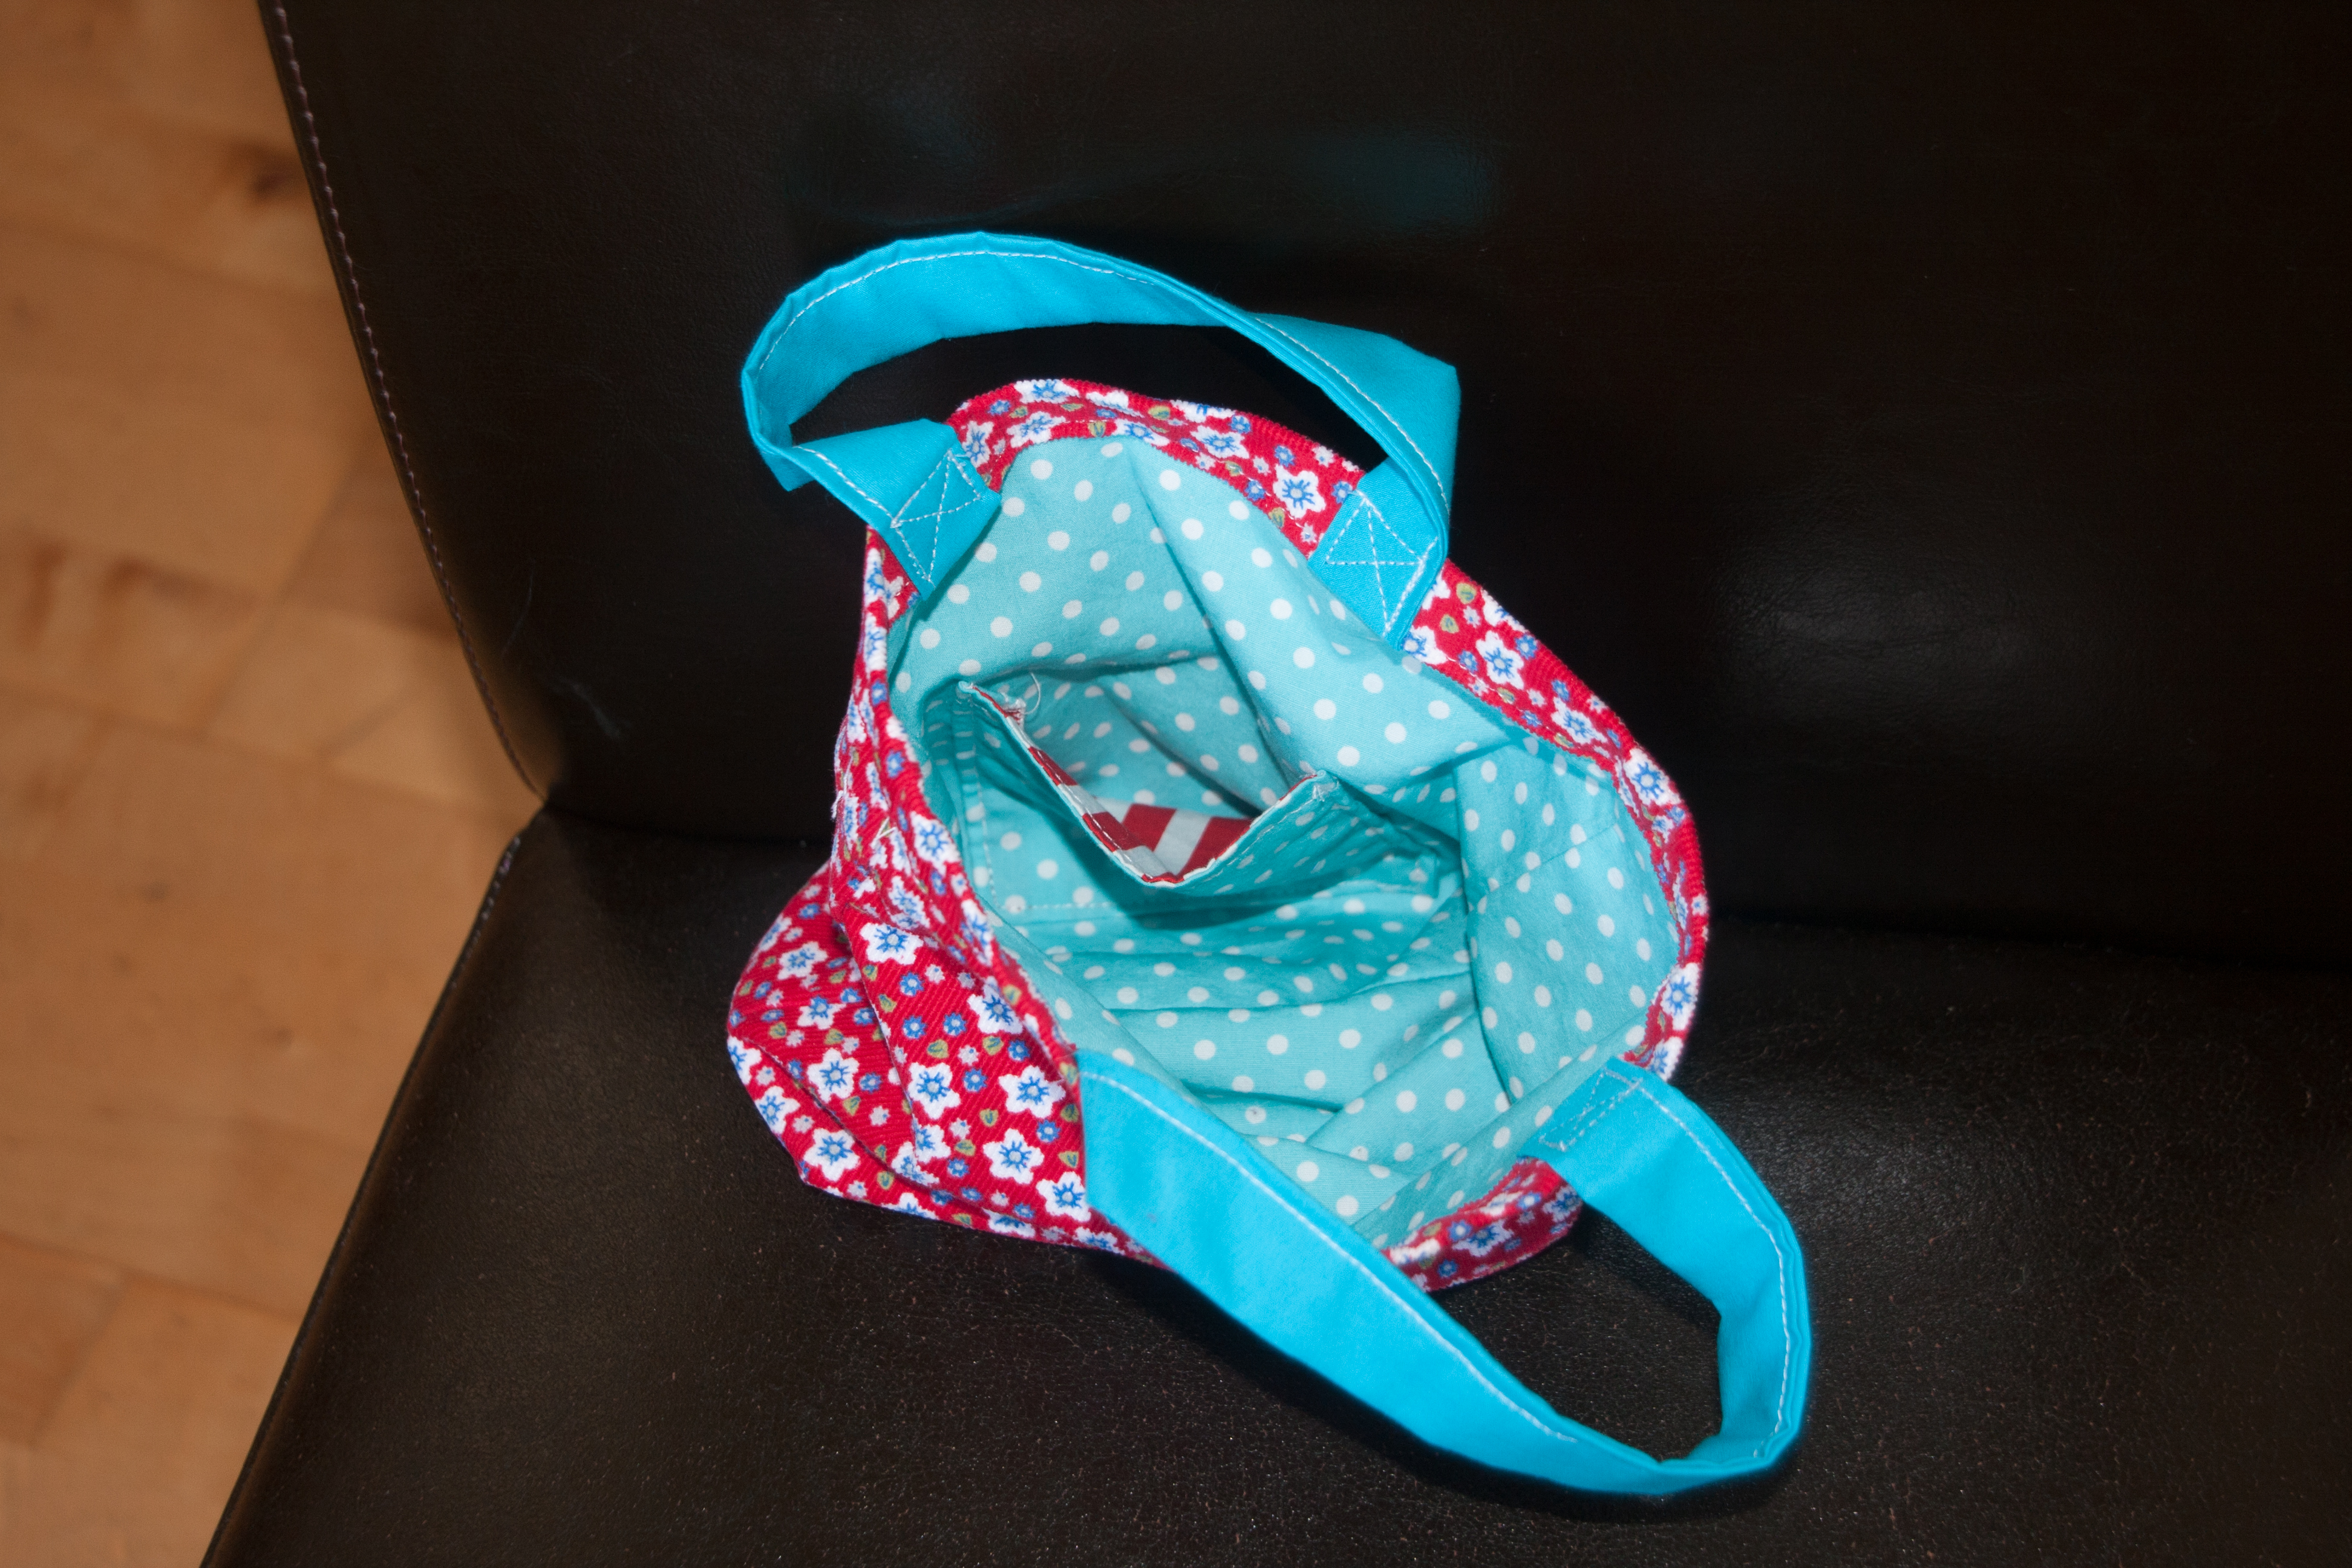
Oh, and before all of that I had also made two more bags as birthday presents. One for the lovely mother of the little girl I had made the very first one. As she kept using her daughters bag, I thought it was about time to make her her own.

IMG_3966 IMG_3959 IMG_3961 IMG_3963

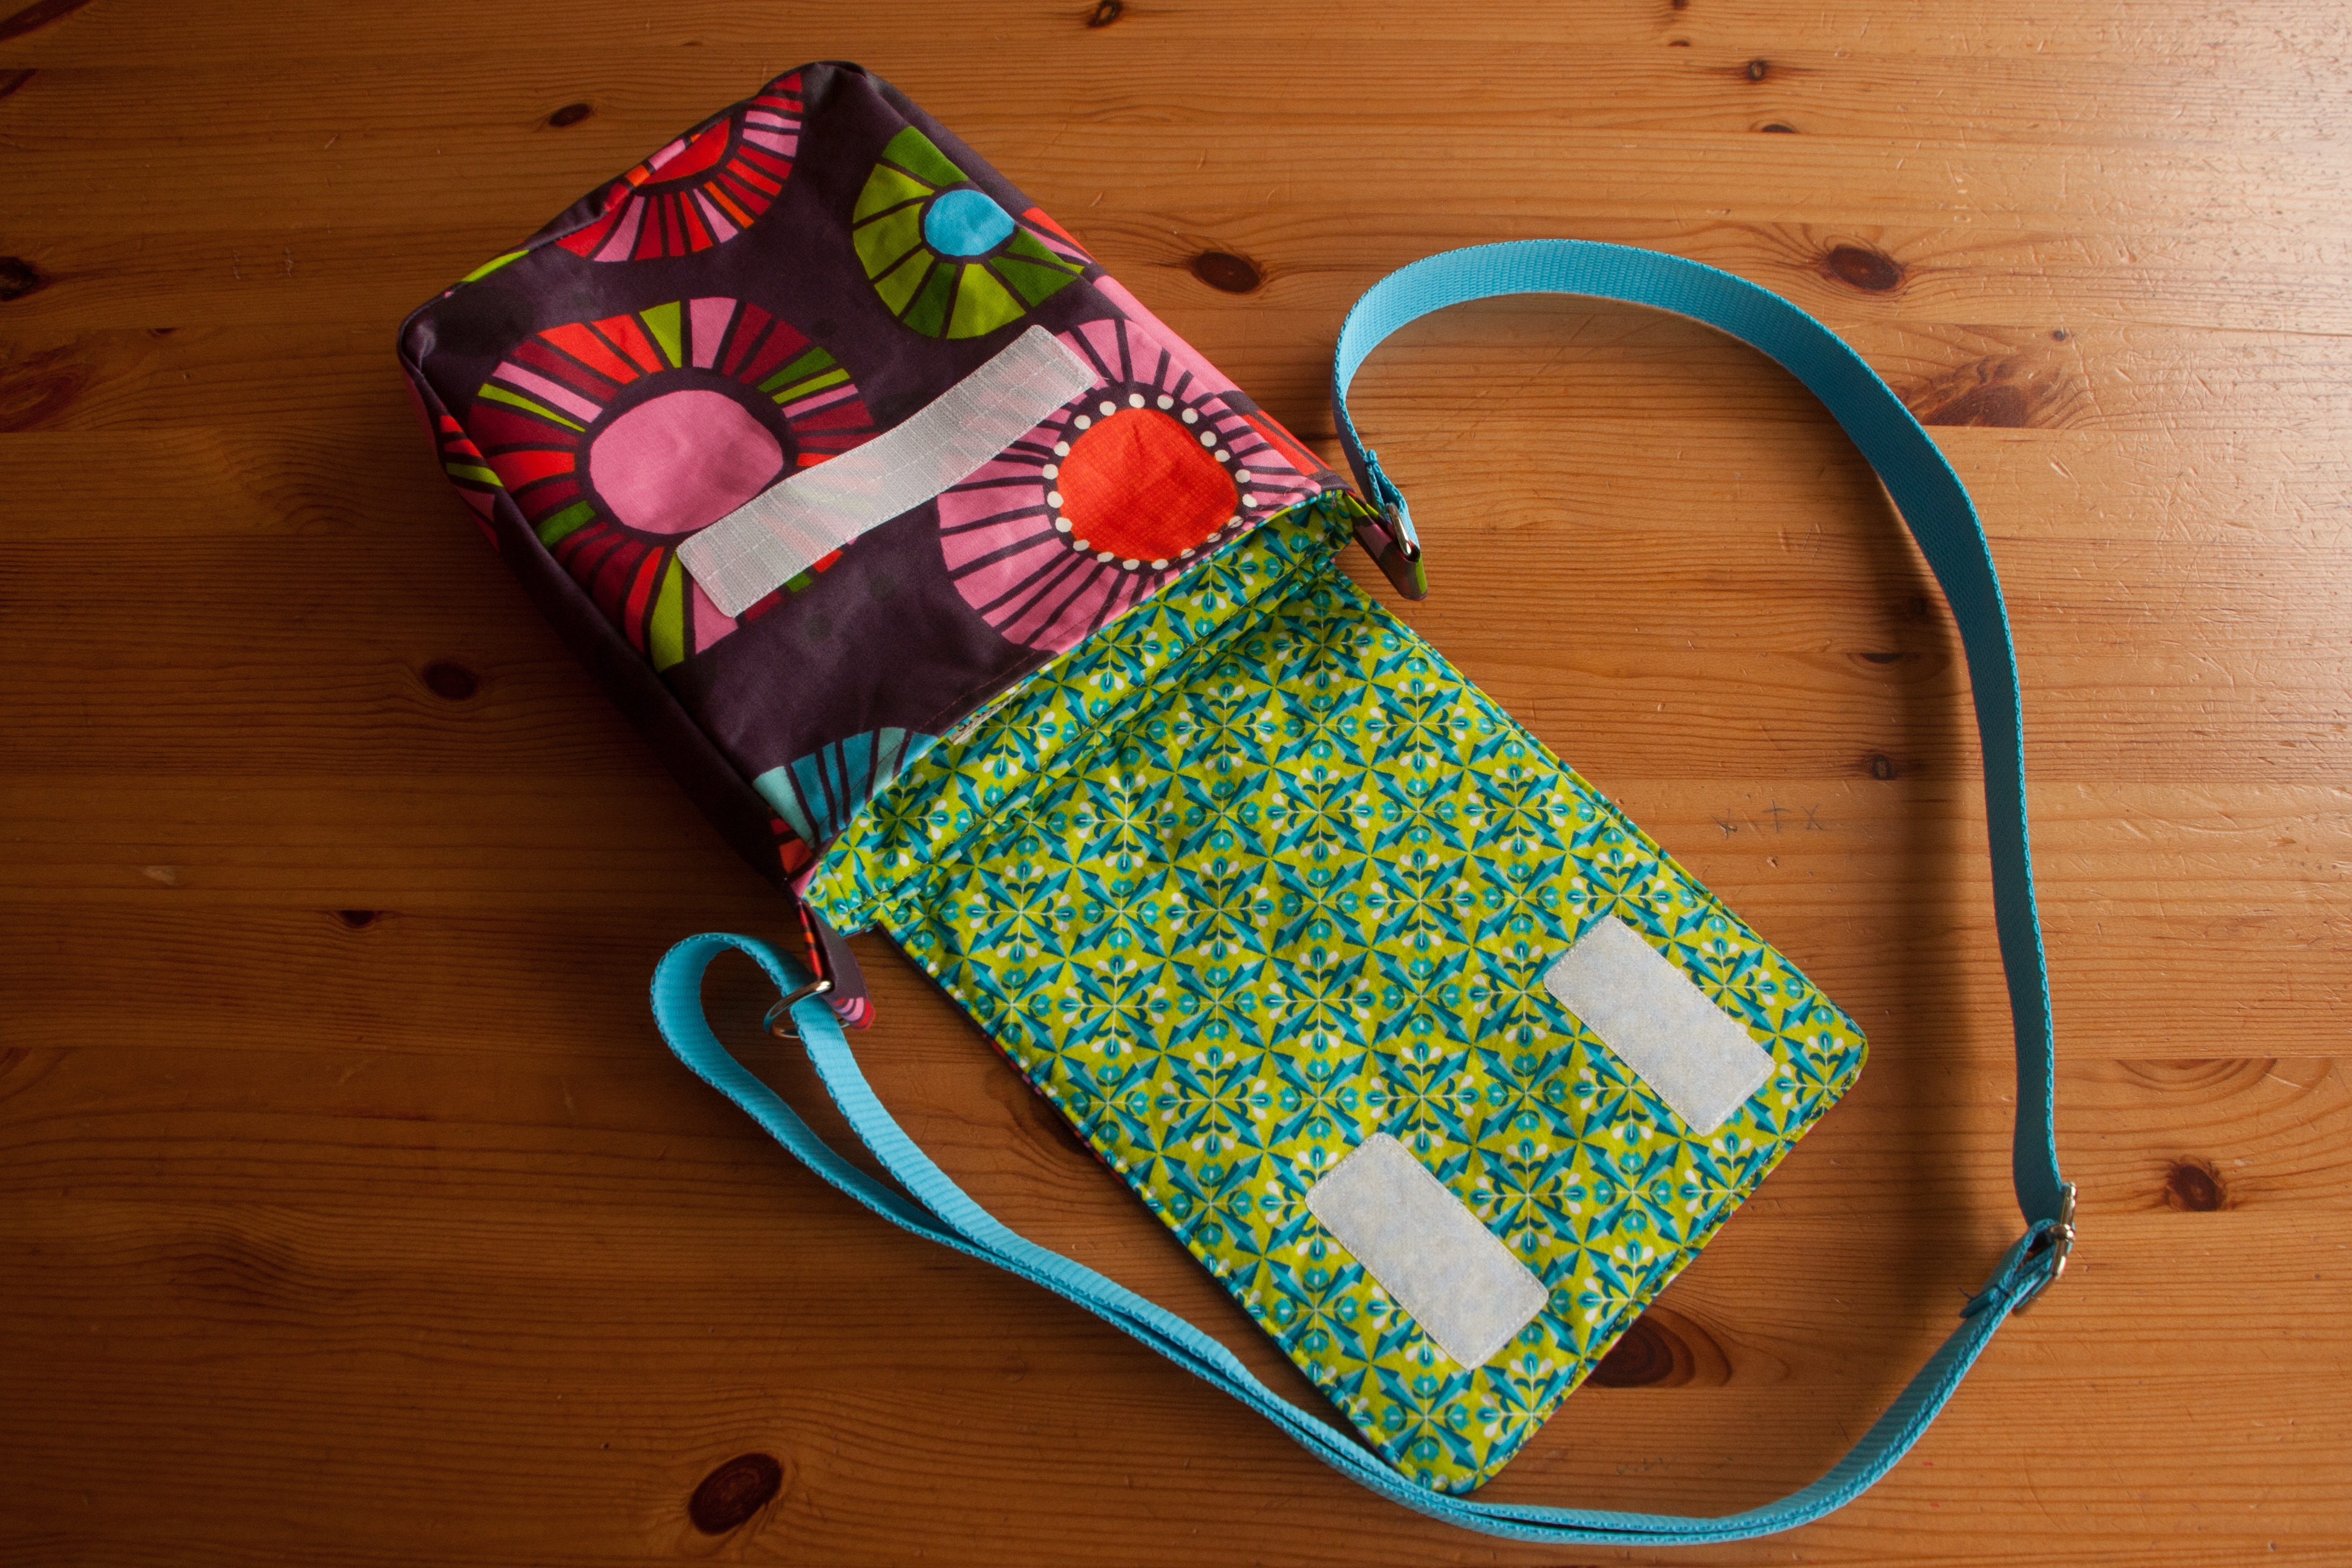
and one for my daughter’s birthday. She has basically asked for it since May, when I had made the very first one of the series. It only took me about 6 months. Not bad. And I think I have now more or less ticked all the things of my to do list I had posted a couple of weeks or months ago.IMG_3964

IMG_3965

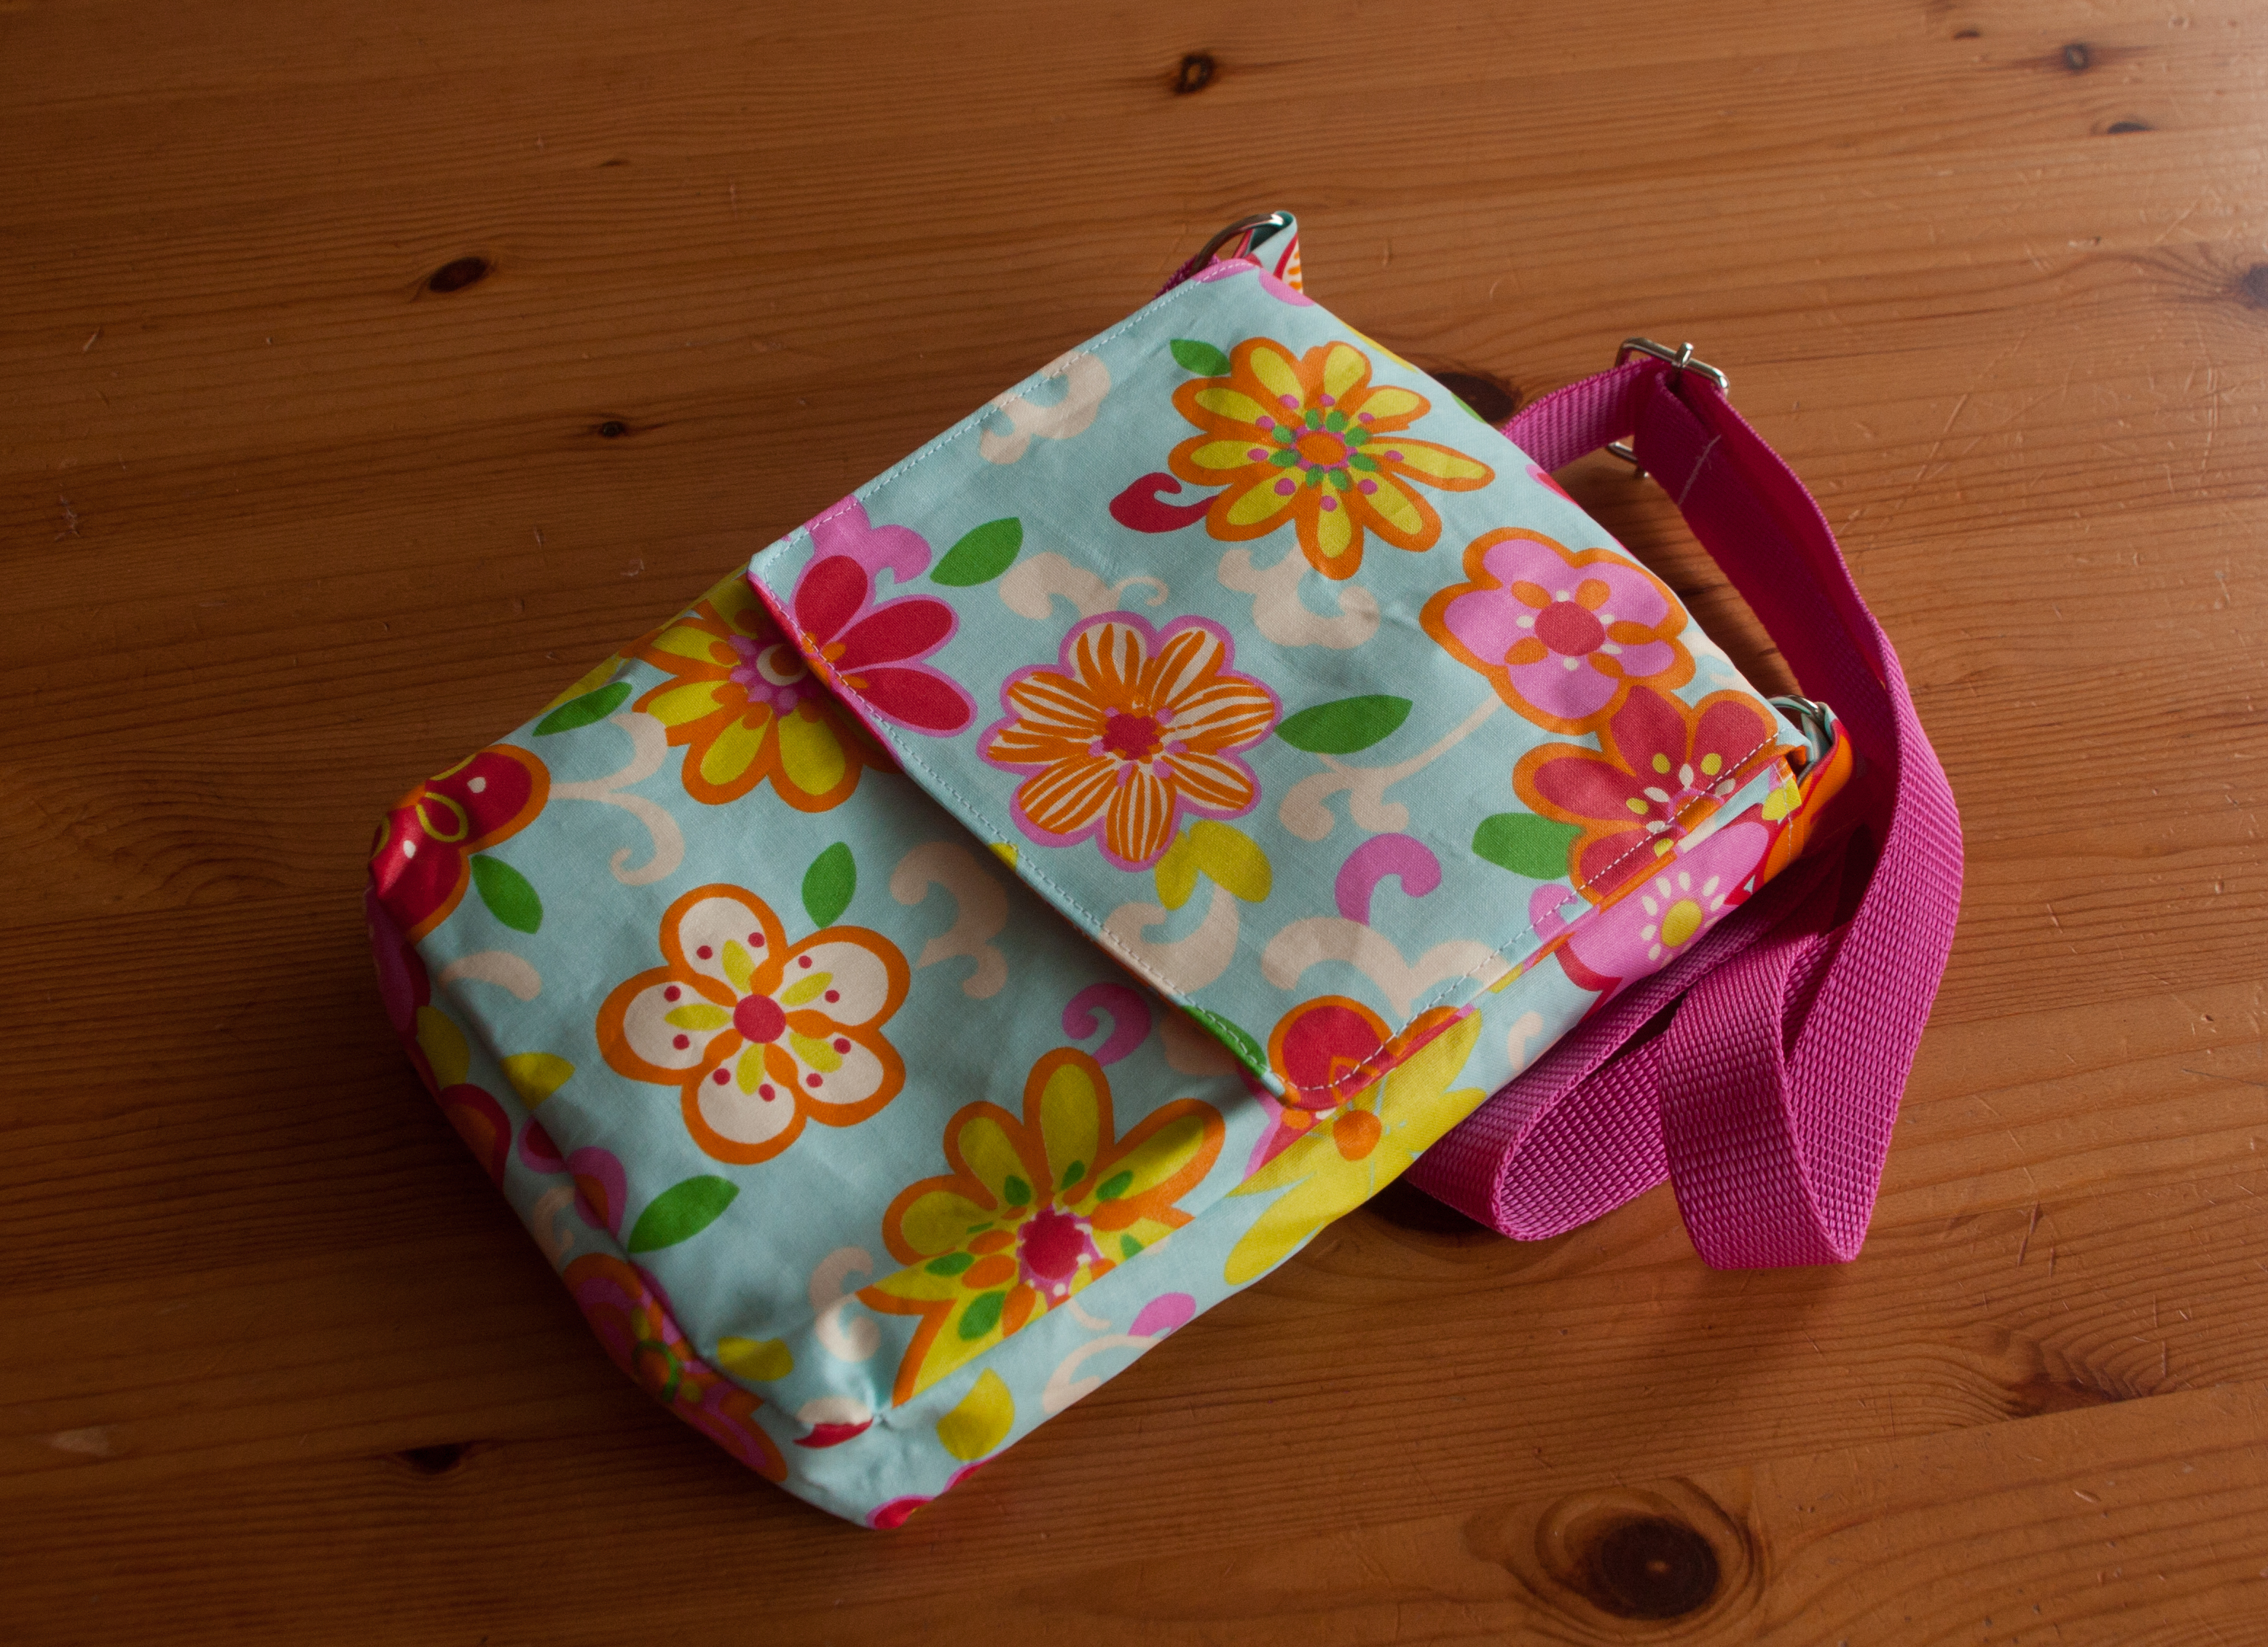
As you can see, going 10 days past due date made me finish quite a few things. When everything was done, all I could do, was going to my knitting class, listening to a few horror induction stories, which seemed to scare the young man so much that a couple of hours later I had to rush (and I mean to rush) to hospital to quickly (and I mean quickly) give birth to a beautiful baby. 10 days after his due date and 2 days after the appearance of my equally beautiful new nephew who – much better behaved – was only a couple of days late.

And obviously it is now time for a new to do list, especially as I am unable to remember anything at all.


Downsizing: Klimperklein jacket modified

We are a bit short of baby clothes because I lent them to someone a few years ago and never got them back. So I decided to use up the lovely Viking jersey initially purchased for my nephew’s birthday jacket to make a baby version of the same Klimperklein pattern.

Klimperklein is the brand of an amazing woman with 5 lovely children who still manages to create lovely patterns for baby and children clothes. Her blog is in German and I think the e-books are also only available in German but they are brilliantly written and with so many pictures that even those professional looking jackets were fairly easy to make. So I guess, what I am saying is “Learn German” ๐Ÿ™‚

So far, I have made these for my children…

and this one for my nephew…

IMG_3912

I love the colour combination of this one, I made the cuffs and the hem (I really have no clue how you call the red piece of the main body: hem, waistsomething? Help, anybody, please) slightly wider as I had one of the pattern pieces accidentally folded on the wrong line and the main body would have gotten too short. Oops.

But back to the modified baby version. As you can see the original klimperklein jacket has a zip and in my case a hood but there is a collar version too (and many more options to choose from).

But I thought for a baby, none of these things are very suitable, all I wanted was a simple jacket with snaps, normal neckline and simple hem and cuffs. Something like this:

IMG_3946

At first glance it is what I wanted but actually I have mixed feelings about it so lets have a closer look.

The most important modification from zip to buttons or snaps is obviously that the front pieces have to overlap rather than just meet in the centre. So I added 2cm to the original front pattern and the initial zip facing to make sure that I would have a wide enough button border.

IMG_3947

First jersey snaps of my life, 10mm from Prym, I think I want to find slightly smaller ones for those children clothes. Also, I need to get stronger, they are slightly on the loose side I think.

Instead of using a ribbing for waist and arms, I just added 2cm seam allowance, neatened the edges with the serger, whilst at the same time closed the seam between the button facing and the hem

IMG_3943

Usually I am using the twin needle to give the hem a professional finish…IMG_2277a

but as I have recently noticed that these seams seem to fall apart easily (not sure what I am doing wrong) I wanted to do something different and went for another stitch.

So, I ironed the hem to the back, estimating 2cm instead of using a ruler. But then suddenly I took it very seriously and actually tacked on the serged edge to give me a line to follow when sewing on the right side, making sure that I am really sewing on the serged edge… Which was a good plan but I never actually compared the ends of my tacked line and also got a bit caught up when finally topstitching it with my fancy stitch. So….. good idea but really bad execution led to this:

IMG_3950

Whilst I am really unhappy with the result (especially as this was a very obvious danger and something I knew about), I think that it has been a necessary mistake to be made once. And hopefully I will forever remember and for once really learn from it ๐Ÿ™‚

The other section that needed alteration was the neckline. My initial idea was to use the pattern for the hooded jacket and cut the neckline without seam allowance and to finish with some bias binding.ย  But when I stitched the facing to the front openings, I thought it would be clever to just continue the seam where the facing goes into the neckline to make the whole bias binding attaching more straight forward. Which was a big mistake. Obviously, if you are stitching facing to jacket right side to right side and then turn it,ย  you will loose the width of your seam. So there will be a gapย  or maybe rather jump between the part of the neckline with facing and the part without facing. IMG_3941

It wasn’t a big deal, it just meant that my whole neckline became slightly wider (which does matter in the case of a tiny newborn jacket), but at the same time I realised that actually I would prefer a normal neckline with facing all around. So I copied the neckline from the pattern to make a back neckline and elongated it to hide the ends on the already existing neckline.IMG_3948

As the initial facing gets really narrow the result looks a bit silly. But again, the learning curve here is really steep. If I ever make a baby version of this jacket, I will make a proper facing, widening the neckline part of the button band facing and make it longer, to make sure it would go around the whole neck. This might result in a waist of fabric but I guess, once the pattern is perfect you could split it into three sections and safe some material.

Now that I have shared all my mistakes with you – maybe one last thing I would like to add: I made the smallest size 56 which corresponds to something like 1 month or 1-3, I forgot, but to me it looks really really huge. I don’t think it will fit for the next couple of months but I will find out I guess…. considering that I still need to get the future owner out, I am actually hoping it will only fit in a couple of months ๐Ÿ™‚

Back to the start of my sentence: Now that I have shared all my mistakes with you, I would like to point out that I am still pleased with the result. I kind of want to make another one just to see that correcting the mistakes will lead to a perfect baby jacket but then we won’t need two of these. Maybe someone else could step in and use my mistakes to make their own perfect baby jacket, please?


Scrap Sunday: The doll carrier

I am currently writing this post whilst waiting for a couple of babies joining the family. I am scheduling it (the post, not one of the babies) for Sunday, so when you are reading it, we might not be waiting anymore ๐Ÿ™‚

Anyway, I made a doll carrier for the soon-to-be big sister of my future nephew and I am quite pleased with it. And I am not the only one, in fact I have already gotten complaints why ours is not so pretty. For the record, 4 years ago, I was running through all the fabric shops in Shepherds Bush to find the requested “airplane” fabric for the doll carrier of a certain young lady. Which then really wasn’t cheap. But I guess, taste can change, particularly if you are not 2 anymore but 6. And I have to agree, we chose really nice fabrics (you might recognise them from other projects) for this one.

I think this carrier is suitable for slightly younger children, so the straps look a bit out of proportion on the following picture because of the model being a bit taller. Or should the strap be fixed slightly deeper? Maybe.

IMG_3873

The carrier can be worn in front or at the back.IMG_3874

I made the straps a bit longer, same for the waist strap as it was already a bit tight on my children, depending on what they are wearing and they actually tend to be on the slimmer side.

I found the ebook initially on Etsy (at the time not even knowing what Etsy was) and whilst I am happy that I found it there, I would do a few things differently next time. Which I would like to point out (to myself) as I am sure that 4 years ago I had already thought the same but didn’t remember it this time round.

When you print out the pattern, the line is actually a couple of mm thick so it is hard to know where to cut to make sure that the straps will match their positions on the main body. Also, I couldn’t read what seam allowance is included, I do think it is meant to be 1/4 in.

IMG_3871

The pocket fabric is folded, which is a bit too stiff if you are using a thicker cotton as I did in this case but perfectly fine when using a thinner material.

I struggled quite a bit with the waist. First of all the little curve between waistband and main body but also where the waist thingy joins the strap. In the pattern the waist thingy doesn’t end in a straight line but in a slightly sloped line so I have now an edge in between the main waist thingy and the strap which doesn’t make much sense. So next time, I will have to make sure that I even this out when placing the strap:

IMG_3872The waist strap is closed with a proper side release buckle, but the shoulder ones only by sliding the strap through a bar slide buckle which I find a bit too loose. In the case of the pictured carrier it is actually ok as the material is a bit thicker and I made the straps on purpose a tiny bit wider but the first one was made of a rather thin cotton and the straps just didn’t stay in place. So maybe a proper buckle like for the waist might be better. But then it means that the carrying child needs a lot more help to get it on an off. So the loose version might be the better option anyway.

The e-book itself is done very thoroughly, lots of pictures and explanations, I was actually a bit overwhelmed and maybe for me personally, a little less would have been better. I guess this is due to me struggling a bit with many unfamiliar terms on one hand but maybe spreading the whole thing out on more pages would have been good… Which makes me realise that I tend to squeeze things when writing patterns to save paper. So this is another lesson learnt, I hope.

I didn’t mean to criticize the e-book as it helped me make already three wonderful doll carriers but for me personally there are a few things that I would do differently and hopefully these comments will help me or anybody else when using the pattern next time.


Tutorial: Cute little girl’s handbag

A while ago, I was asked to make one of my accidental reversible bags, so it would be suitable both for mother and daughter. In the end, I made one reversible bag in grown up fabrics and a small, slightly simpler version for the little girl.

Restetasche24

To make sure that they are a kind of matching pair, I have used the same fabric for both the lining of the small bag and the small pocket of the big bag.

IMG_3834 Restetasche23

But now, lets go back to the beginning: I have put together a little tutorial to show you how easy it is to make a cute little bag for a little lady. It is definitely also a great way of using up scrap fabrics. As I have already misplaced theย  measurements of the pictured bag, I will explain how to calculate your measurements plus give you those of the second bag I made, which was a bit more square than this one. In the end these numbers are only a rough guide anyway, I actually cut out how I felt before measuring the pieces)

You will need:

+ two pieces of cotton for the outer bag (width of bag + 2cmย  x height of bag + 6cm = 24 x 24cm)

+ two pieces of cotton for the lining (2-3cm shorter than outer fabric, alternatively you can cut them all out in one go and shorten the lining later = 24 x 22cm)

+ 2 pieces of fabric for a small pocket, one or both of them in the lining fabric (width of pocket + 2cm x height of pocket + 3cm = 12 x 12cm)

+ 2 pieces of fabric for straps (4 x width of finished strapsย  x desired length + 8cm = 8 x 30cm for a 2cm wide strap)

+ the usual things like sewing machine, thread, scissors,…

Restetasche01

Preparation of the straps:

Fold the fabric lengthwise and iron, fold both edges to this middle line and iron again, fold together and iron. Top stitch close to the edge.

Restetasche02

Preparation of the pocket:

Sew the two pieces of fabric at the top together, Iron seam flat and turn so the right sides are outside, iron again to get a neat edge and top-stitch about 1 cm from the edge. Zigzag the three open sides of the pocket together.

Restetasche03

Fold and iron the edges to the backsideย  (1 cm)

Restetasche04

Cut off corners to avoid bulky pocket corners later.

Restetasche06

Place and pin the pocket to one of the lining fabrics where you want it to be (at least 4 or 5 cm away from the bottom) and top stitch close to the edges…. ideally leaving the top open….

Restetasche08

… alternatively you can go creative ๐Ÿ™‚

IMG_3907

Put the two lining fabrics right side together and stitch around sides and bottom with 1cm seam allowance and zigzag around it.

Restetasche09

To create a fuller shape for the bag, pull the two sides apart at one corner, making sure that the side and bottom seam lie on top of each other. Draw a straight line (in a right angle to the seam), I find 2-3cm away from the corner creating a 5-6cm long line quite good for this size). Stitch on that line.

Restetasche10

Cut the excess fabric off, zigzag and do the same on the other side of your bag.

Restetasche11

Repeat all steps (apart from the pocket) with your outer fabric. Restetasche12

If you haven’t done it yet, it is now time to shorten the lining bag. Just cut of 2-3cm from the top (depending how wide you want your edge)

Restetasche13

Take the outer bag and fold the open top about 1.5 – 2cm to the wrong side. Iron.

Restetasche14

Fold it a second time 2cm to the wrong side. Iron.

Restetasche15

Turn the whole lining bag inside out (so the outside is now showing) and put the outer bag wrong side to wrong side into the lining bag. The edge of the lining bag should reach the once folded down edge of your outer bag.

Restetasche16

Fold now the outer bag down the second time (like you have ironed it before), the lining should now be fully covered.

Restetasche17

Now it is time to place the straps. Slide the open ends in between the two bag fabrics, making sure the ends reach the very top of the bag. For my bag I placed them about 4.5cm from the side seams. For now the straps look downwards.

Restetasche18

Now you can carefully fold them up again (without pulling them out of the slot) and pin them in place. Do the same with the second handle on the other side, making sure that they are in the matching position.

Restetasche19

Top stitch close to the edge all around your bag, securing all 4 ends of the strap at the same time.

Restetasche20

Then secure all 4 ends with a little X. I seam to have forgotten to take a picture of this step. But here is a picture of an other bag and at the bottom of my tutorial for a very similar cotton bag you will actually find a more accurate description the sewing directions.

Stofftasche 20

And we are done ๐Ÿ™‚

Restetasche22

Restetasche23

And another version, where I used a lovely corduroy for the outside:

IMG_3909


IMG_3911