the girl with the golden top

I have to admit, the girl with the glitter dragonfly dress is not alone. I, too, own since fairly recently something sparkly.

I kept admiring the giant flowers by Susalabim (my new favourite designer in case you haven’t noticed) featuring dark grey and yellow flowers on a grey background. When I saw it on a shopping trip, I took a bit and only realised at home that the yellow was actually gold. I guess, I deserve a little bit of gold, so never mind.

The fabric is a super soft modal and together with the giant flowers it would be ideal for a dress. But for someone who never wears dresses I do have too many already so I made a Usedom by Schnittreif. The loose fit and the bat wings make it just perfect to accommodate my wobbly tummy without looking pregnant.

IMG_6068 (3)

pattern: Usedom by schnittreif, fabric: modal Riesenblumen by Susalabim, lillestoff

IMG_6081

IMG_6087

IMG_6077IMG_6085

IMG_6070

I love it, it ticks a lot of boxes, quick to sew, supersoft material, comfortable to wear, unusual print, somehow neutral colours (in comparison with the rest of my wardrobe) and most importantly, apple puree seems to be blending in.

And in case you are wondering about the quality of the pictures – they are meant to look like this. This is called artistic. Honestly. It wasn’t easy to make them look like this.

Over to RUMS now, to see if other are better photographers.


Just right for any occasion: the girl with the dragonfly dress

As you might know by now (if not, go back and read the last 5 posts a bit more carefully), we have been attending a wedding and I know that some of you can’t wait to finally see THE dress.

Well, we have established that much to some people’s disappointment the bride was only wearing a normal wedding dress (she did look really beautiful in it, but still just a normal wedding dress). Obviously for those of us who are born in England, the expectations are a bit higher when it comes to wedding dresses, you want to see something more royal, somewhere in between Lady Di and the Duchess of Cambridge.

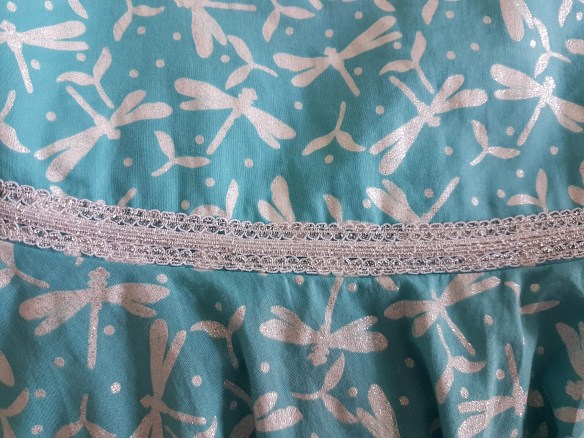
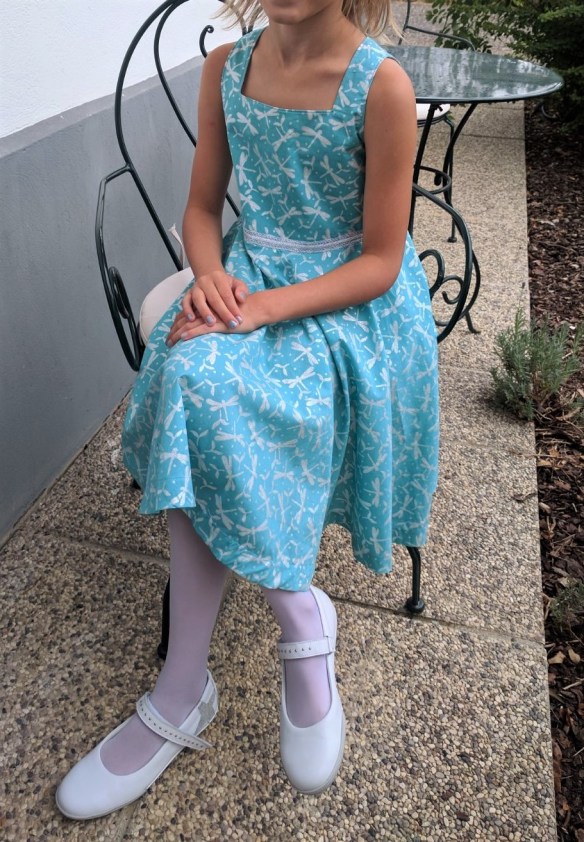
But back to our outfit. Before looking for a suitable dress, we agreed that the bride should be the one with the most eye-catching dress so when choosing the number of layers of tuelle one should keep that in mind. I wasn’t planning on making a tulle-y dream of a dress for a one time occasion so we went shopping on the high street. But there was nothing. Really nothing. So we went fabric shopping instead. I was thinking of using a simple pattern and just doing two layers, tulle on top. The nearest fabric shop that had tulle on their website was biostoffe, my favourite fabric shop anyway. Unfortunately the organic version of tulle was not what we expected but they had some gorgeous voile by C.Pauli. We could easily agree on the turquoise version with white and glittery dragonflies.

20170905_192247

It was really perfect, sparkly enough for the little princess and yet still really nice and tasteful (I almost bought some of the aubergine version for myself)

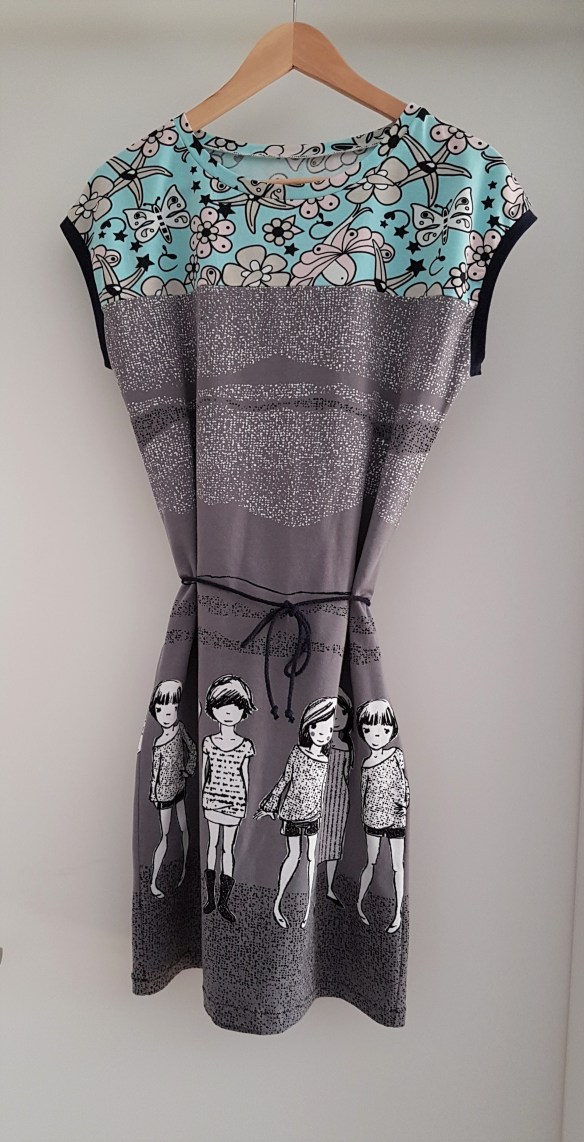
Patternwise, we kept it simple, Leni by pattydoo a lovely summer dress for woven fabrics. IMG-20170904-WA0025 (3)

pattern: Leni by pattydoo, fabric: Libellensommer by C. Pauli

You might find the bodice a bit too wide. I usually cut her dresses in size 122 with a length of 134 (two sizes difference). If I would follow the measurements, I would have to go for another 3 sizes smaller but that seems just wrong. And in the end, even a princess needs to be able to run, jump and move around freely. Especially on the dancefloor.

To make sure that this simple dress would be slightly more suitable for a wedding, I added a silver ribbon around the waist

20170904_141344

and some Diamant buttons (considering how much they cost, I assume they are not real)

20170904_14142020170904_141514

The dress with its circle skirt was not only incredibly powerful on the dance floor (sorry no pics) but would also work for an afternoon tea party.

IMG-20170904-WA0018 (3)

I am really happy with the dress. It was quick to make (possibly quicker than finally finding something in the shops), it satisfied the desire for a nice and “elegant” dress without making grown ups feeling sick or blind.

And since the whole outfit, including white thights and shoes and sparkly nail polish, was good enough for a wedding, Madame decided to wear it on her first day back to school, too. So my worries of investing time and money for something that might only get worn once were completely unfounded.

I still owe you pictures of the amazing accessories we were all wearing but apart from that we could actually go back to every day’s life and work.


Day and Night

Sorry for missing another Scrap Sunday but we only came back from the famous wedding weekend yesterday. And whilst, as a family we had been wearing lots of Scrap Sunday projects, unfortunately I did not manage to take decent pictures. Same problem for the even famouser (I do realise that this is not a real word, thank you) wedding outfit. By the way, much to her disappointment, the bride had only been wearing a normal wedding dress (luckily the kind bride had prepared us by sending us a picture beforehand – I guess she had a feeling the expectations of a certain young lady might be a little bit higher than she could provide with her “normal” wedding dress. Apart from that, the wedding has been great, lovely couple, lovely family members, lovely guests, great food, even greater music. We really had a good time and a lovely short break. As usual I am getting side-tracked, I am clearly not attending big events often enough.

Anyway, today I had the pleasure to hand over a present to a 12-year-old girl who had a big day today. I find her style really cool, very grown-up. Definitely more grown-up than my style. But then, that doesn’t mean anything considering how I usually dress.

Anyway, I tried hard to match her taste, I am not sure if I managed.

The fabric is a design by Susalabim, called Mannequin. It is the first time I have used a fabric which comes in pattern repeats (so you have to buy any multiple of 80cm if you see what I mean). As one repeat would have been a bit short, I used  a pattern with a yoke which allowed me to use a different fabric on top. It is called Pia and is a pattern for a top by pattydoo. So I elongated the main part of the shirt to the 80cm of one repeat to get the maximum out of it.

Unfortunately, I am unable to show you pictures of the dress being worn. Whilst I did manage to squeeze in to find the right hight for the belt, it would not be suitable to show of the features of a loose fit dress.  A clothes hanger will have to do.


20170904_094409

pattern: Pia by pattydoo, fabric: jersey by Lillestoff, design Susalabim

20170904_094524

20170904_100310

Personally I am rather pleased with the result, almost what I had in mind. I just don’t like the armhole/sleeve cuffs. But surprise-surprise. I had cut out the fabric before thinking things through. Next time I would add two cm to make a normal hem.

In any case, I hope the new owner likes it, I will never find out, the whole family is far to polite to tell me if I have just ridiculed myself.

Scrap Sunday: Things the world has been waiting for. Or not.

Ages ago I came across a tutorial for a travel wallet and thought that it might be a good alternative to our usual routine of putting 5 passports and tickets in my husband’s jeans pocket. Obviously I never actually took the time to make one. But a while ago, it came back to my mind as a suitable present for my mother-in-law who travels a lot.

So, I looked for the tutorial again, only to realise that those diy versions are apparently for people with proper flight tickets. Who does still get proper tickets? Don’t we all have large print outs instead now? And it seems to be always for 2 people with space for two passports and two tickets….

In my mind I started to develop a collection of different sized travel wallets to accommodate different sized travel groups/families. Clearly another brilliant business idea. Although I also quickly realised that you do not want to take your five passports out of five different slots.

Anyway, my first attempt turned out to have far too tight pockets, mainly because I experimented with super strong interfacing decovil. So model no 1 now gets used as a powerful – almost magic – computer similar to the one Inspector Gadget’s niece uses. I am currently writing this post on it. Really.

Model No 2 turned out fit for purpose, but I finally had to admit that 3 layers of decovil are not easy to handle and not necessary.

I tried to keep it simple and grown up this time.

IMG_6051

See, using only one fabric for inside is stupid as it makes it impossible to actually see the different pockets.

IMG_6050

So, there is the big slot for a folded A4 paper, information, tickets,….

a medium one for one passport and a row of smaller ones at the bottom, with one compartment for credit cards or similar things and two for pens.

Most wallets I had seen online have a lot of space for credit cards. I don’t know why. Don’t you have them in your normal wallet anyway? Do you need special travel ones? Maximum a frequent flyer card or whatever, no?

But I thought a pen could be useful.To write down email addresses and phone numbers of your newly met friends.

And last but not least I went for a zip pocket. It would be large enough for something like a mobile phone or some money. Mainly it is there because otherwise that side would look to empty.

And just in case you were wondering: I did use a different fabric for that one at least. Otherwise it would have been ridiculous, really. IMG_6054

I am still working on different sized models, prototypes before I start my successful business of necessary things the world has been waiting for. I’ll show you another one on another day but for now I need to get back to the wedding outfit. I managed to lose the essential shiny silver ribbon. Without it the diamant buttons will look a bit lost.