Scrap Sunday: Neck Sock

Yes, a neck sock. Well, a neck warmer I guess, but when looking for ideas online, I discovered that the Germans call it apparently a “neck sock”.

Anyway, I wanted to make something for my lovely midwife and as she is a cyclist, I thought she might need something to keep her neck warm. Obviously I don’t do a simple neck sock made of a lovely fabric. So, I chose some fabrics that should remind her of all those lovely people around her. All these fabrics are left overs from clothes that I made for my children, her son, the sons of a very dear friend and you might also recognise my maternity shirt ๐Ÿ™‚

IMG_4174

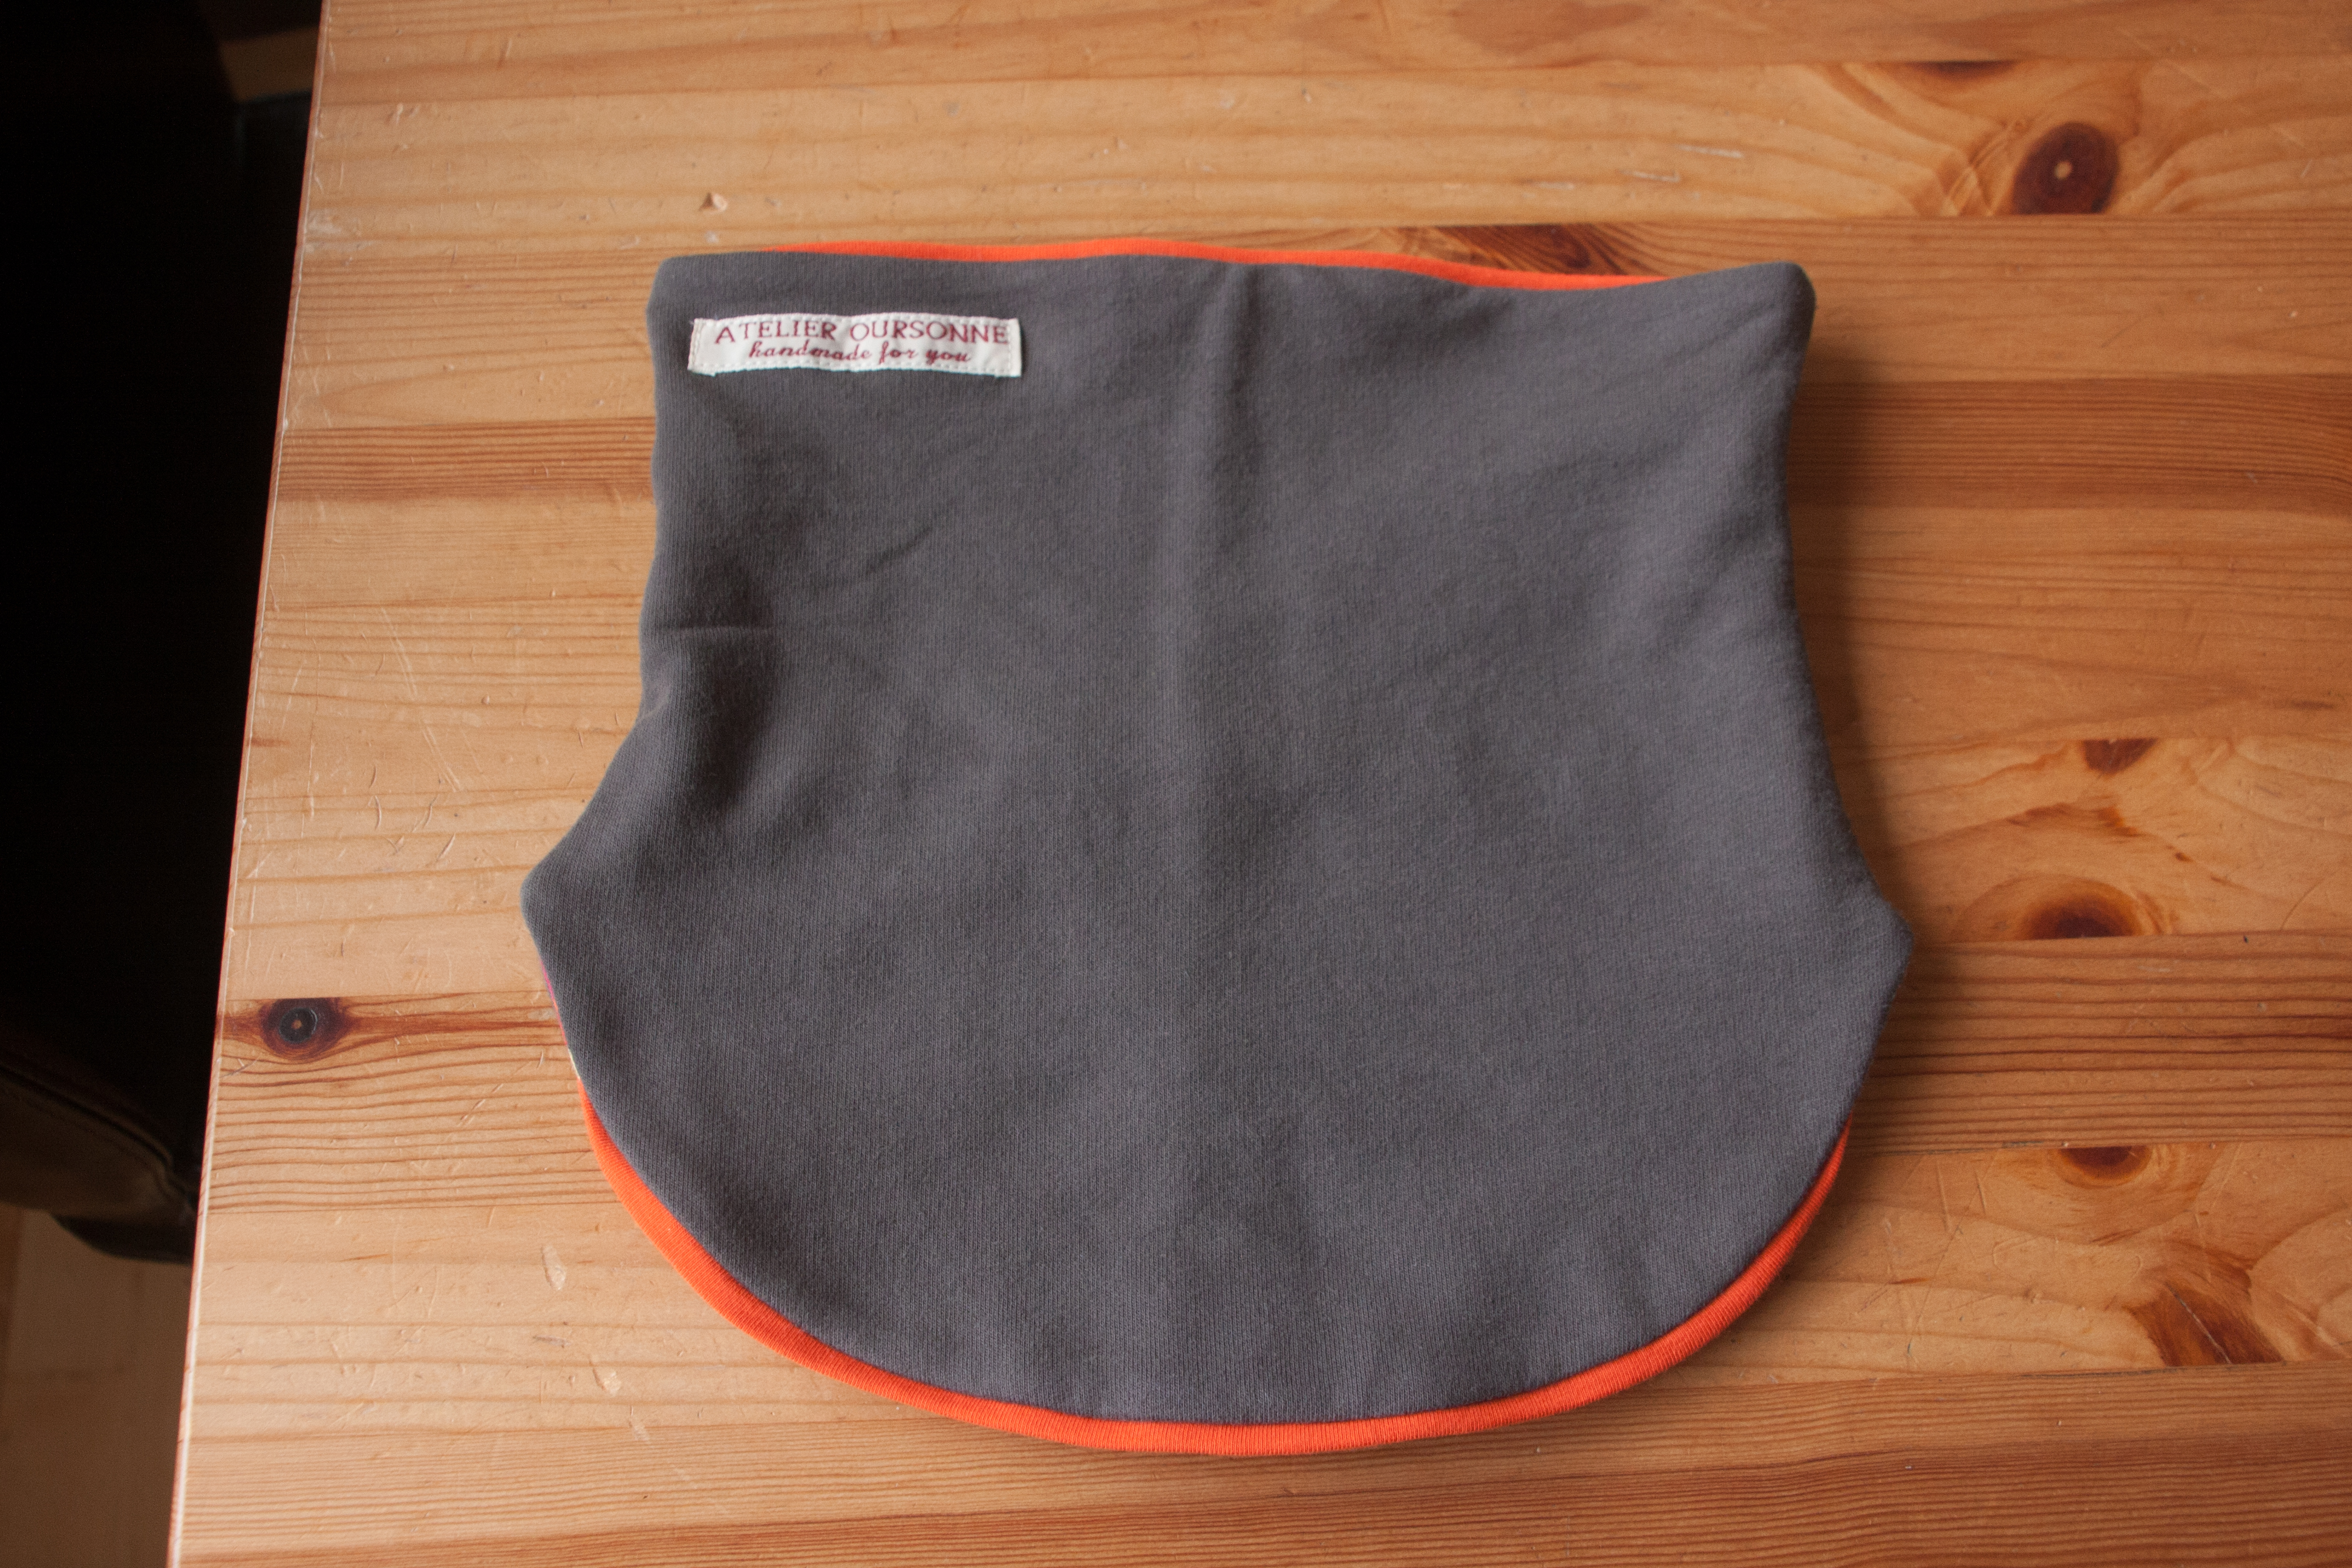
Even I realised that this combination would not be wearable in some people’s eyes so I combined it with some grey sweat.ย  I joined the squares in two sets of four and cut out four pieces following a pattern of olilu (I made it a few cm higher)

IMG_4183

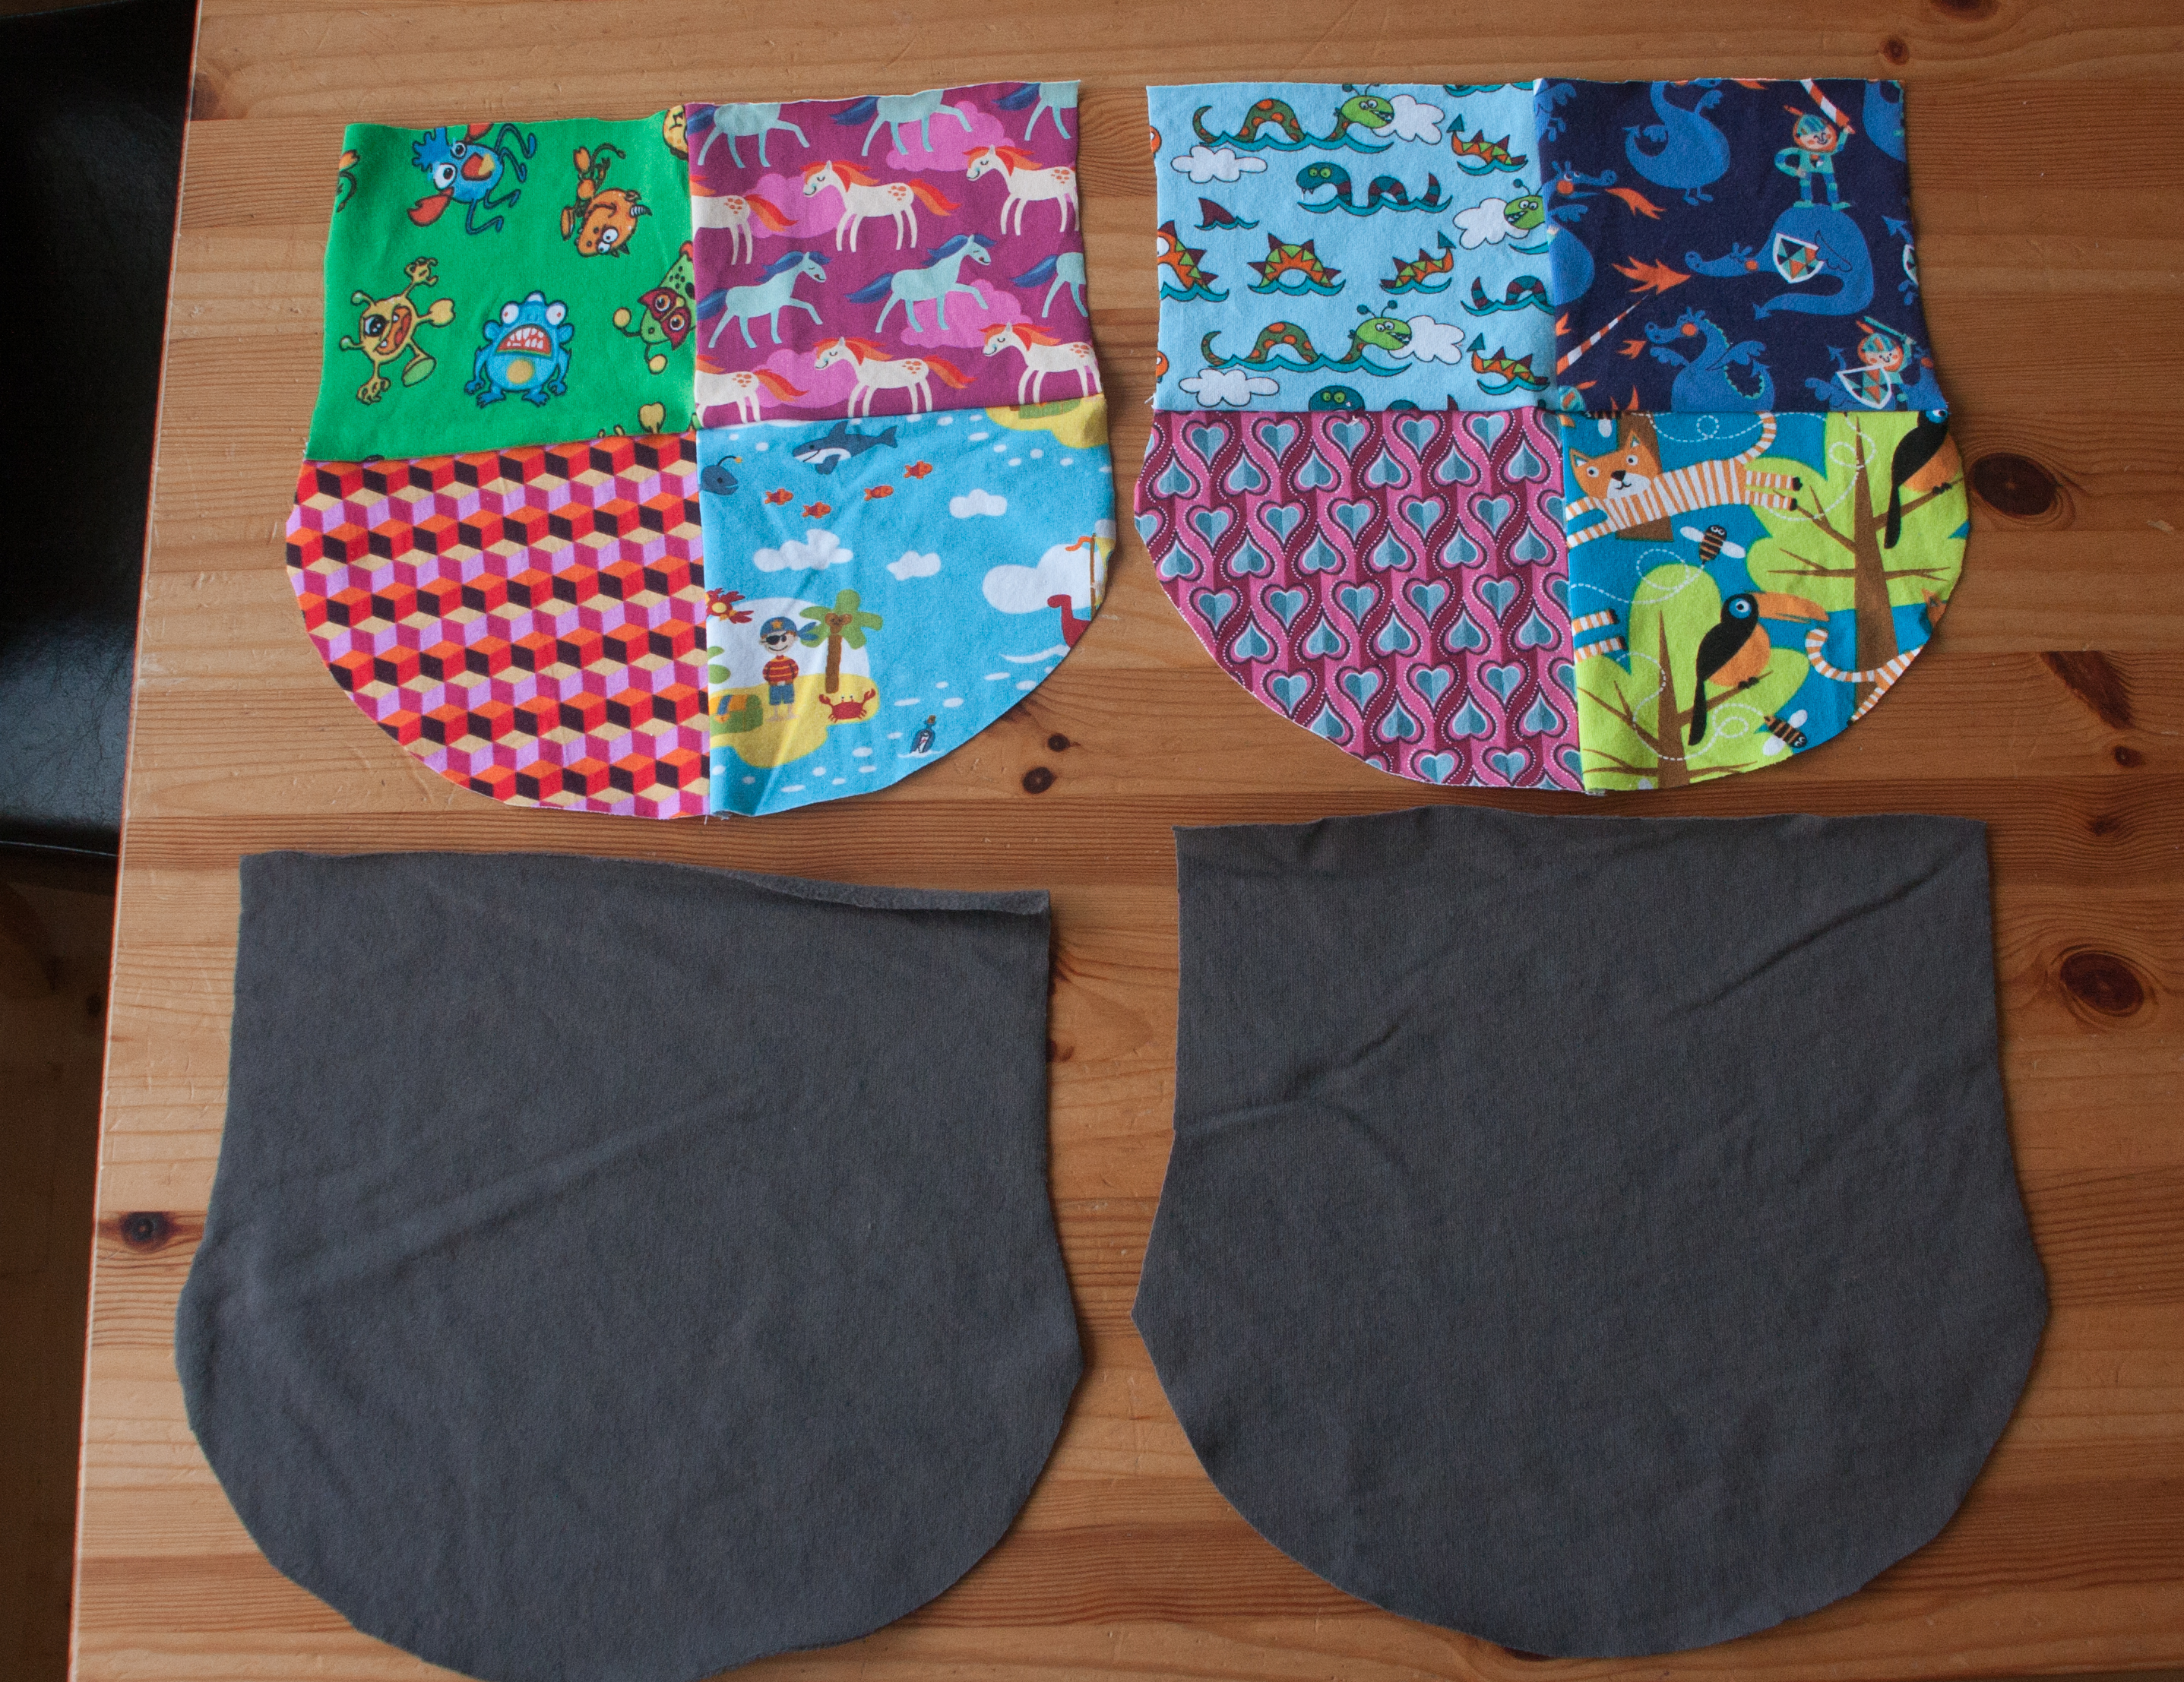
To make it slightly more complicated and the grey side a bit more exciting, I added an orange edge, a bit like piping but without a cord. A little trick: to make sure that I could sew the sides together easily, I only started the piping 2cm from the edge.

IMG_4185

And voila: a smart grey neck warmer with a fancy orange edge….

IMG_4189

… and a crazy lining with lots of memories … IMG_4188

IMG_4187

And obviously you could wear the whole thing inside out as it is reversible.

I made two simpler ones for my children too. They obviously wear the colourful side outside and the boring sweat inside.

IMG_4224 IMG_4223

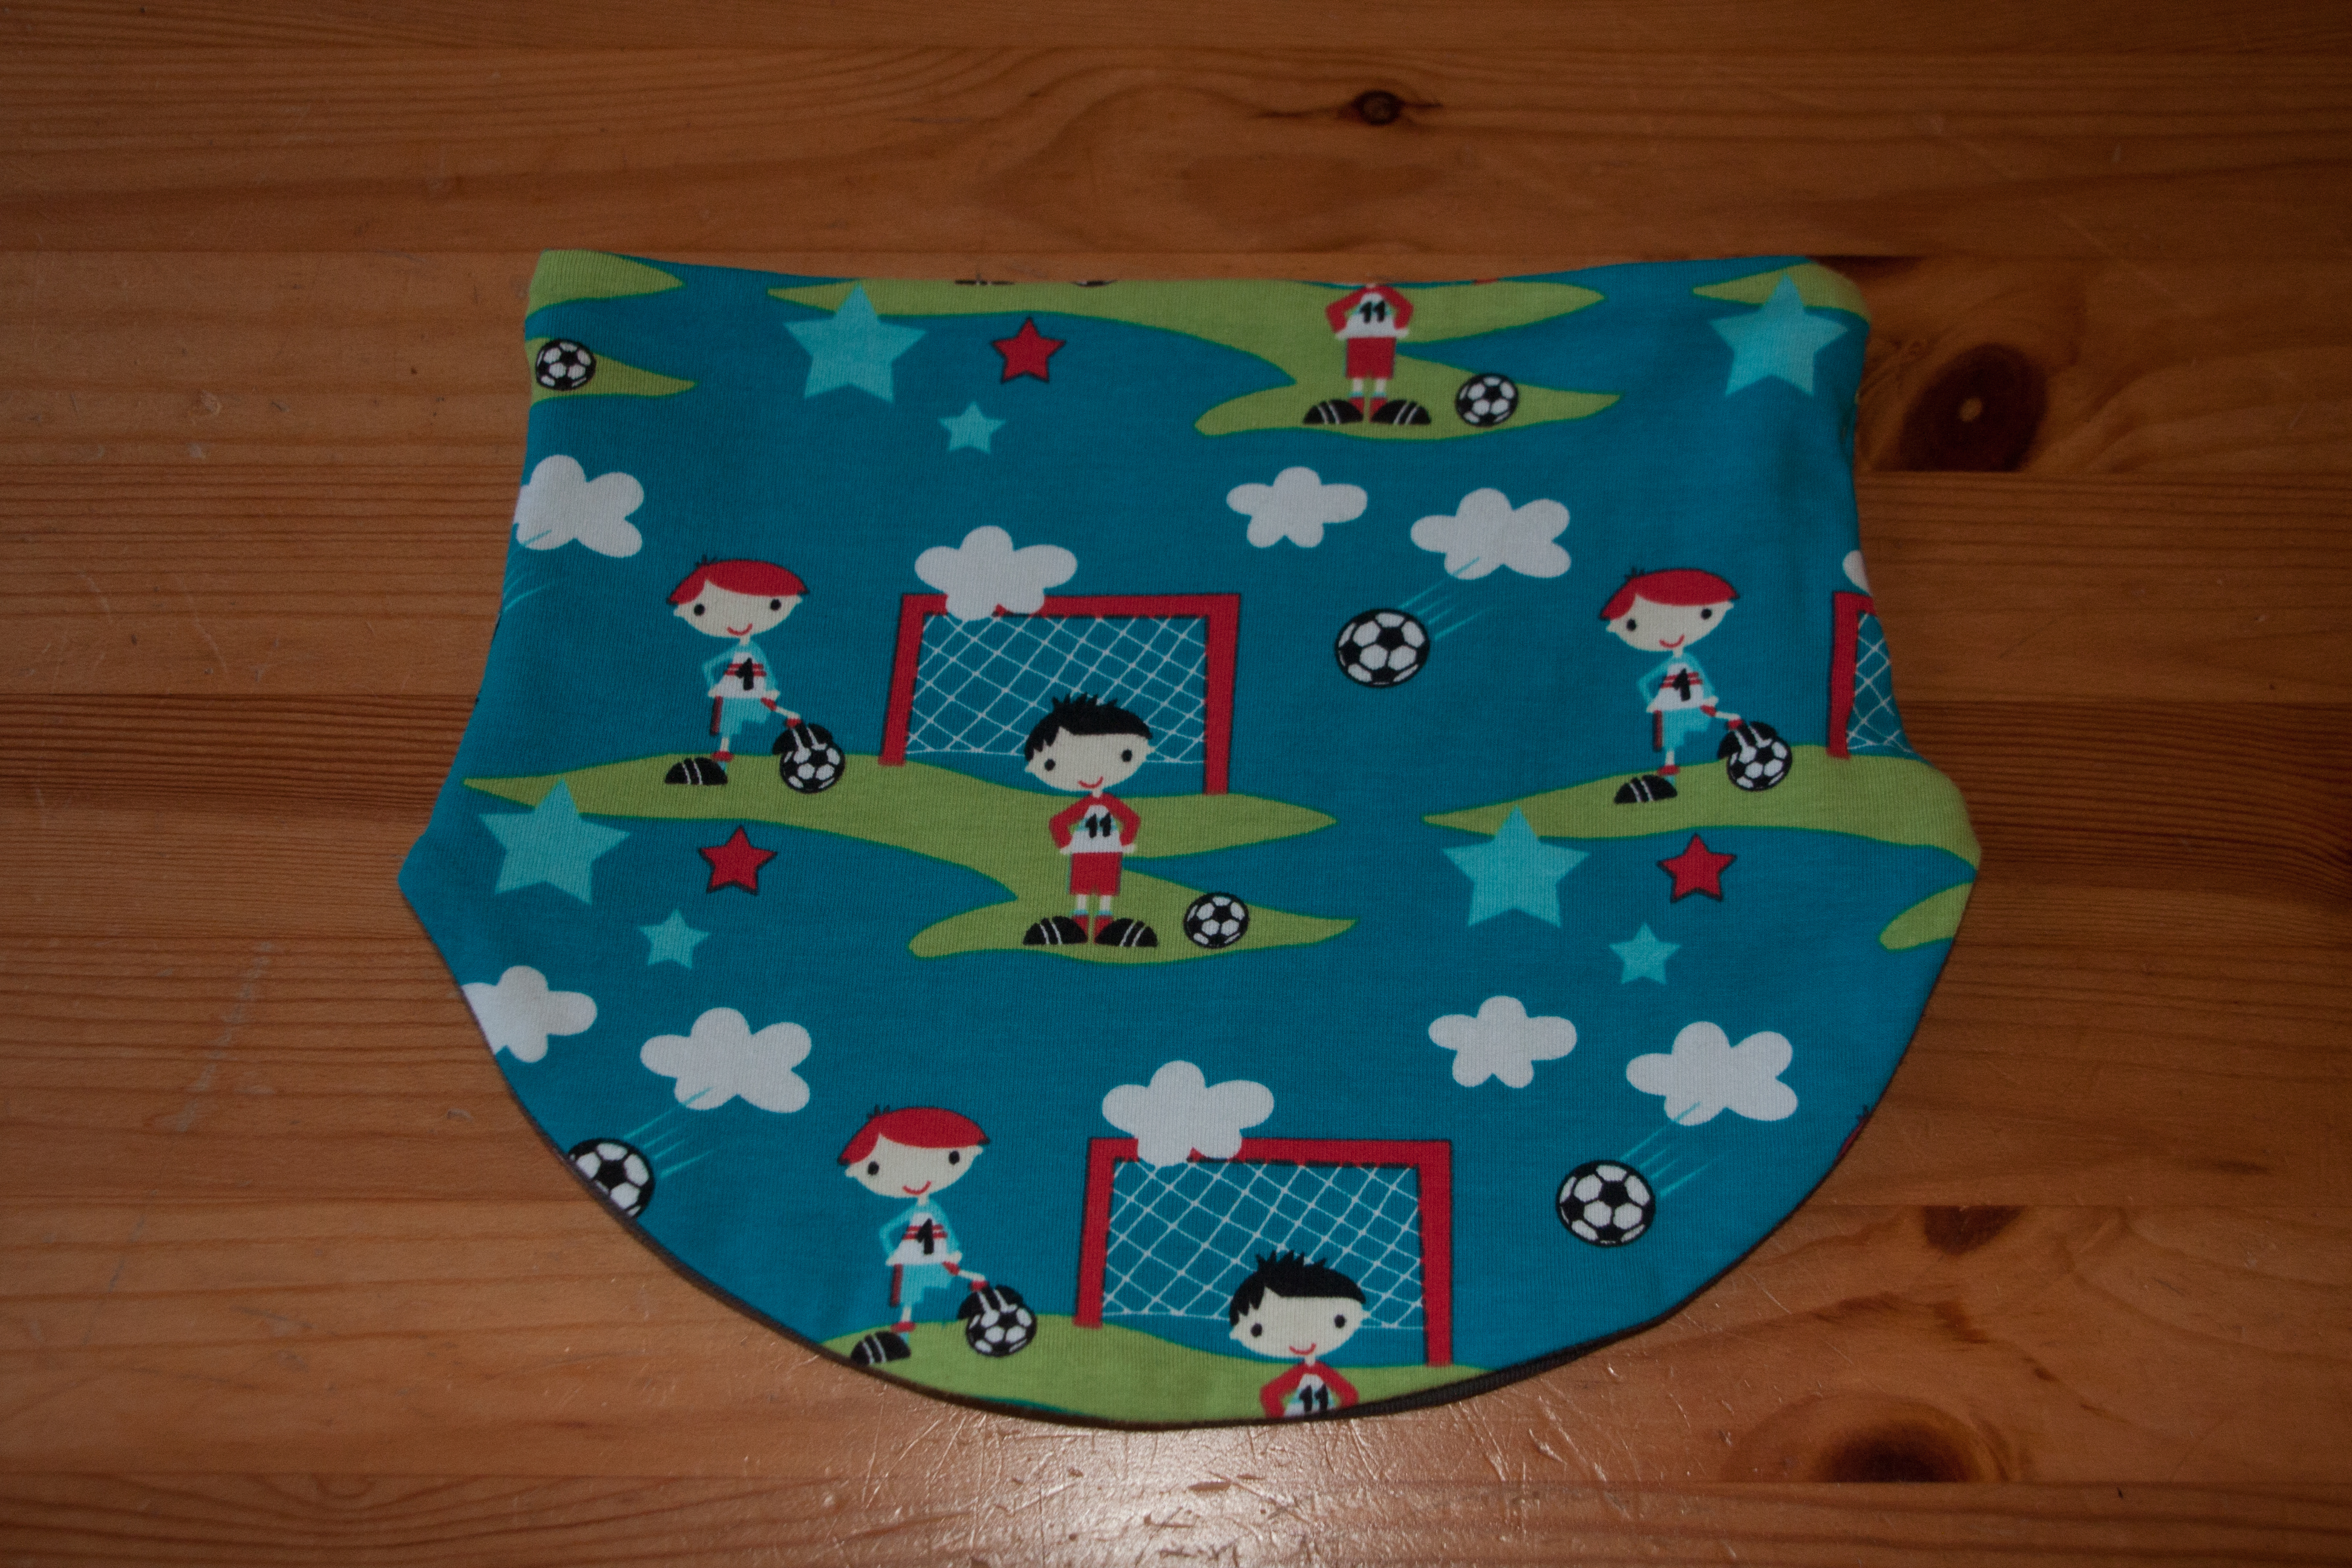
They are really practical. Actually, they are great when you have a baby in the sling. It keeps your neck warm without anything too bulky hanging over the baby nose. I always borrow my husband’s one which I had made him for Christmas:

IMG_4430I do wear it grey side out though. I don’t want to be seen with such a boyish fabric fabric ๐Ÿ˜‰

And just for the record, I made him a hat, too. With the fabric that he had requested when he had seen the hat for my nephew

IMG_4428perfect match, I know ๐Ÿ™‚


Scrap Sunday: Yarn doll

When I created that big mess with my unwound skein of wool over Christmas, I suddenly remembered the yarn dolls we used to make in school.

As I then had hours of fun (well, not exactly hours and not exactly fun, but hours of fun sounds better) making some with my children and nephew and nieces (well, my daughter and my niece only, but a big crowd sounds better) using a model I had found online, I decided the world (well, not exactly the world, but you know by now how this works) is in need for not only a simple blog post on Scrap Sunday but also a tutorial (I am considering to post this again on Tuesday for Tutorial Tuesday) how to make a yarn doll.

To be honest, I don’t quite remember how we did this, I think not like the ones that I found online, so this is about my version plus what I have seen online and how a dear friend of mine used to make them (just the inspiration, I am far to lazy to even go and get the yarn out, let alone the camera)

All you need is scraps of yarn, scissors and something to wind up your yarn depending on the size of your doll (a book, a postcard or simply your hands).

WollpuppeA01

Then, you wind the yarn around a book for a slightly bigger doll or a postcard or even just your fingers. The latter will result in a tiny strand of yarn (especially if you were using a child’s fingers), this would be good for the arms of the second type of dolls.

WollpuppeA02

Carefully remove the book, making sure the yarn doesn’t collapse to a big mess. Tie a knot around the top to keep everything together and a round head.

WollpuppeA03

Cut the whole bunch through opposite the knot to get open ends. You could do this at a later stage but I find it a bit easier.

WollpuppeA04

Tie a knot around the whole bunch close to the top to form the head. You want a nice round and fairly firm shape. Not like in the next picture, that wasn’t mineย  ๐Ÿ™‚

WollpuppeA05

Separate the ends into 4 portions to form arms and legs.

WollpuppeA06

Tie knots around those 4 portions, leaving the legs longer than the arms.

WollpuppeA07

Cut the ends to get neat feet and hands. Done.

WollpuppeA08I am not sure if this is how we did it, I have this vague memory of a pompom in connection with the doll. Maybe we used a pompom as a head. Oh, the possibilities are endless!

The versions I found online, use a separate strand to make the hands. So you will need a shorter one than for the body. You could do this by wrapping it around your fingers.

IMG_4448

Bind off both ends for the arms and put the whole thing aside for a moment.

IMG_4449

Make another doll body as before and bind off the head. For this model, I did not tie a knot at the top to keep the bunch together. As you can see, this results in a slightly floppy head.

IMG_4456

Slide the arms through the body, just under the head.

IMG_4457

Bind the body strand off, just under the arms to form the torso.

IMG_4458

Form two legs and bind them off at the end.

IMG_4463

Cut all the ends open to get neat arms and hands.

IMG_4468

You could as well make a “skirt” version instead of the legs by not separating the strand. Another variety would be to pleat the strands. You can play with colours, having mixed strands or keeping them in one colour, using contrasting yarn to bind off the body parts. Oh the possibilities are endless. As I said. Hours of fun on these cold cold days.

My friend told me they made octopuses. One big head with 8 pleated legs. (Or arms?) The queen of yarn dolls. I might make one one day. But not today.


Yarn bombing – We can do it

Since a long time I am dreaming of leaving a footprint in London by yarn bombing something . But I didn’t know what, where, when or how. It is slightly overwhelming, I guess. Initially I thought of our nursery, kind of on the last day before we left for good. But they closed it so that would not be that impressive, would it.

If you don’t know what yarn bombing is, just look at Lorna and Jill’s website. They are two yarn bombing sisters and my super heros and do amazing stuff.

But then, a couple of months ago a friend of mine asked me if I was interested to be part of a yarn bombing community project. Of course I was.

Corner 9, a local charity which offers arts and crafts projects, has set up a workshop over 4 Saturdays where a lovely and pretty but slightly tired and forgetful tutor will help those who need it to knit up some rectangles which will then be sewn together by said tutor and hopefully some lovely helpers to wrap a warm and colourful coat, scarf or however you want to call it around a sad little dead tree:

20151014_110421

After 4 weeks of hard work there will be a little celebration in the garden where we can all admire the result of our collective work. I am really looking forward to it and I am hoping to see many people there (not only because I realised how little knitting time I have these days ๐Ÿ™‚ )

So if you live in the area and want to be part of it, bring your family and your needles and get knitting! On two of the four sessions there will even be a creche provided, you will find all information on the Corner 9 website.

If you live far away, no need to book a flight to admire our work, I promise I will post a picture of the result ๐Ÿ™‚


Welcome 2016

I did it. My new year’s resolution really is winding new skeins into neat balls before starting to knit, see:

Before :

20151231_155005

After:

20151231_161303

In between :

20151231_160029

Actually even better: my new year’s resolution is to get my yarn wound neatly rather than to wind it up neatly โ˜บ

Projects for the new year?

Finishing the fingerless gloves.

Knitting another pair of fingerless gloves using that beautiful pictured silk from DyeForYarn .

Sewing a bunch of baby hats as gifts.

The Big Bib Project

Yarn bombing a tree – a community project where I will be in charge of the knitting workshop. I will write a proper post when I am back in London

Finally sewing that coat – I bought the fabric almost exactly a year ago.

I guess that doesn’t sound much but considering my working pace lately that seems about right โ˜บ

And obviously there are lots of ideas like winding up balls, using up scraps, not buying any new material unless it is really necessary ย (๐Ÿ˜‰), eating healthy, ย doing lots of exercising, ย being nice, always tidying up, writing witty posts, getting some sleep…

We will see how all those go.

For now I am wishing you all a very happy and healthy new year.